
Features of decoupage as a handicraft technique. What materials are needed for creativity. Working techniques of masters, the best ideas for decoupage wooden boxes in vintage, provence, shabby chic style.
Decoupage of a box is a special decoration technique in which a drawing is transferred to the base and then covered with several layers of varnish. A homemade piece of furniture will complement the style of the room in the best way. The decor of the box will not change the functionality of the item, but will give it originality.
Features and styles of decoupage boxes

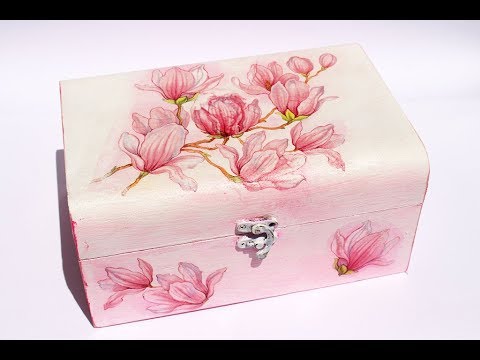
Pictured is a box using decoupage technique
For the first time, references to the drawings transferred to furniture can be found in historical treatises on the life of China and Japan in the 15th century. The fashion for decorating came to Europe a little later - in the 17th century, when oriental themes became popular. Masters from Venice achieved special mastery in this art of transferring images. Drawn pictures were glued to furniture and then covered with several layers of varnish.
Decoupage of wooden boxes has become an excellent alternative to wood carving and other types of material processing. Such crafts did not require significant expenditures of materials and time, but looked no less impressive. Today, the works of Venetian masters are considered exclusive, and collectors hunt for every historical piece.
Separately, mention should be made of the popularity of decoupage in our country. The decorative technique came to us from Europe at the end of the 17th century and was actively used in icon painting, called wood applique. It was the religious theme of the products that inspired the craftsmen to develop and improve individual technologies for aging and fixing materials.
Interest in decorating household items does not subside to this day, and modern technologies greatly simplify the work of craftsmen. So, if in the old days, to make a decoupage of a box, you had to cut out pictures with filigree, now napkins, textiles (for example, lace) and even specially printed blanks are actively used for decoration.
In decoupage, various painting techniques are distinguished - direct, inverse, artistic, 3D and decopatch. 3D and artistic decoration require basic drawing skills from the master, as well as an expanded range of paints. When decorating, instead of a solid pattern, separate parts of it are applied to the surface. This puzzle covers the entire workpiece. And the inverse (reverse) technique is applicable to transparent bases, in which the drawing is not glued to the top, but to the transparent bottom of the craft. For obvious reasons, decoupage of a wooden box using the reverse technique is not carried out.
If you are just getting acquainted with decoupage as a type of needlework, then choose the direct technique, in which the drawing is applied directly to the front of the workpiece and fixed over with transparent varnish.
Separately, it should be said about the different style of decoration, according to which the classification of handicrafts is also carried out. The selected pattern focuses on trendy interior styles, but should also reflect your taste and preferences.
The following decoupage styles are popular today:
- Provence … The style is characterized by lightness and airiness, the base, as a rule, is painted in white or pastel colors, and the pattern with floral or animal motifs is made translucent. Decoupage boxes with lace also look good in Provence style.
- Vintage … Crafts using this technique are artificially aged, the base colors and drawings at the initial stage can be saturated, but then they are specially made "faded", so that the craft looks used, with a touch of time.
- Shabby chic … Combines all the qualities of Provence and vintage. Pastel colors and floral motifs on a wooden base are artificially aged, but a complex indirect shape (possibly with legs) is chosen for the craft.
For each of the described interior styles, the caskets on the shelves are an integral part. However, it will be considered the highest decoration skill if not only the shape of the craft, but also its drawing meets the entire interior, which can only be achieved by independently decorating home trinkets.
Note! If you decide to make a decoupage as a gift, choose the style of decoration based on the tastes of the person being gifted.
Materials for decoupage boxes

The availability of materials and master classes for decoupage boxes influenced the growth of interest in this type of needlework. A useful thing can be created together with the child, developing the creative abilities of the child, but also acquainting with the various properties of materials. However, if you decide to involve children in decoupage boxes with your own hands, you should carefully study the list of necessary materials and work with each of them, strictly observing safety precautions. The child can perform individual stages of decoration independently, while others should be carried out under the supervision of adults.
To create a box using decoupage technique you will need:
- wooden blank boxes - such bases are easiest to purchase in specialized stores, but old wooden boxes that are boring to you can also be used;
- napkins or textiles with a pattern in the chosen theme - decoupage boxes for beginners are easiest to perform with the help of special decorative napkins, but with a certain amount of patience you will be able to work with other materials;
- fine-grit sandpaper for smoothing surfaces and giving them a scuffed effect;
- degreaser, primer, paints and acrylic varnish;
- decoupage glue with a brush for application;
- soft sponge for shading paint;
- screwdriver.
Also in the work can be used needles, threads, lace, scraps of fabric - any materials at hand for decoration.
To thoroughly prepare for creating a craft, think over the design and prepare everything you need before starting work. With detailed planning, it will be possible to implement creative ideas for decoupage boxes of any complexity.
Step-by-step instructions for decoupage boxes

As already noted, the direct decorating technique is best suited for caskets. In this case, the pattern is applied directly to the front surface and covered with a protective layer. This is the technique used by the Venetian masters in their work.
Decoupage of the box is performed step by step as follows:
- Using a screwdriver, the box cover is unscrewed from the box. This will greatly simplify access to all surfaces.
- All treated surfaces are rubbed with sandpaper. This procedure should be carried out not only for already used boxes, but also for purchased blanks.
- The surface of the craft is covered with a primer to level the base.
- The base is painted in the required color.
- A decoupage drawing is glued to the blank. Be careful not to wrinkle the surface of the paper. Leave the glue to dry completely, and only then cover this area with varnish.
- When all the elements are dry, connect the lid and the box together.
Work with acrylic paints in a well-ventilated area, and it is better to cover the table surface with a protective film or an unnecessary sheet. After each painting step, let the craft dry thoroughly naturally.
Metal parts, if possible, are best removed before painting. If such elements cannot be removed, try not to get paint on them or quickly erase stains.
At the request of the author, the decoupage of the box blank is supplemented with lace or other decorative elements.
The best ideas for decoupage boxes
For the first craft using the decoupage technique, it is not at all necessary to choose simple rectangular bases, a round box and a box with ornate legs or additional elements will do. The blank for the decoupage box chosen by you should correspond to its shape to the conceived style. For vintage crafts, boxes with simple geometric shapes, but ornate lock handles, are suitable. The same simple shapes are suitable for Provence-style caskets, but in this case the locks and latches are hidden or simple shapes are chosen. Well, decoupage boxes with napkins in the shabby chic style is a real extravaganza of shapes and colors. In this case, you can choose a blank in the form of a chest or attach carved legs to a classic rectangular box.
Decoupage jewelry boxes in vintage style

Such crafts carry their own history, you want to consider them and hold them in your hands. Decoupage of a vintage style box is perfect for a needlewoman's home, since this product in the interior will harmoniously combine with other homemade items (knitted blankets, napkins, sewn crafts). To artificially age the workpiece, the craquelure technique is used.
Necessary materials:
- blank box;
- primer;
- sandpaper;
- acrylic paints - brown and white;
- napkin with a selected pattern;
- coating varnish;
- glue;
- brushes.
We make decoupage boxes in vintage style:
- We clean the workpiece with sandpaper and prime the base.
- We paint the workpiece brown, and the lid white, let the paint dry well.
- We glue the cut pattern on the cover of the blank and lightly paint over the joints.
- We cover the workpiece with craquelure varnish and leave for 40 minutes until it still sticks to the hands, but no longer spreads over the surface.
- We apply a second layer of paint over the craquelure varnish, and on the lid we make another one. When all the toners have hardened, cracks will appear on the surface, from under which the lower layer of ink is visible.
If you don't have craquelure varnish, use a wax candle. Before applying the second layer of paint, rub individual areas with wax, and after it dries, remove the excess layer with sandpaper.
The worn corners of the craft will also add a vintage effect. To color them unobtrusively in this way, use a sponge.
Note! Not only the outer, but also the inner part of the box should be cleaned and primed, so the craft will look neater.
Decoupage boxes in Provence style

The delicate style of Provence involves the use of pastel color palettes and decor with floral motifs. Such stylistic elements can be not only decoupage napkins, but also openwork hemstitching, hand painting. For decoupage caskets using the Provence technique, the aging effect is also suitable, but unlike vintage craquelure, such crafts are often overwritten, imitating the effect of frequent touches, and do not crack.
Necessary materials:
- piece of wood;
- sandpaper;
- primer;
- pastel colors;
- decoupage napkins;
- varnish;
- lace;
- decoupage glue.
We make decoupage boxes in Provence style:
- We prepare the base: we disassemble the box, we clean each element with sandpaper and cover with a primer.
- We paint the base in a blend pink color, choose white or milky with the second layer.
- We glue the selected floral pattern to the lid, cover the sides of the craft completely with floral motifs. Let the glue dry well.
- We tint the workpiece and cover it with varnish.
- We glue openwork lace along the edge of the box.
Decoupage boxes with flowers can be supplemented with your own drawings made with acrylic paints and a thin brush. And for an additional aging effect, lightly wipe the top layer of varnish with sandpaper.
Decoupage boxes in the style of shabby chic

The shabby chic style in terms of creation technology does not differ from those described above. To decoupage a wooden box, choose patterns with a tea rose and delicate pastel shades of the base. In order for such a craft to look harmonious in the interior, it must be combined with other design elements, so it will not be superfluous to develop a whole series of boxes and boxes in the shabby chic style.
Necessary materials:
- piece of wood;
- a napkin with a "tea roses" pattern that covers the lid and sides of the blank in size;
- sandpaper;
- primer;
- paints;
- glue;
- varnish.
We make decoupage boxes in the shabby chic style:
- We process the wooden base with sandpaper and level it with a primer.
- When the primer is dry, cover the base with the first coat of paint, varnish, and then the second coat of paint.
- We glue a floral pattern on the lid so that not only the lid, but also the sides are covered. This transition looks very original.
- We tint the dried base and varnish it again.
- When the craft is completely dry, we go over it with sandpaper to give the craft an aging effect.
- Metal legs and an original lock can be attached to the finished product.
How to make decoupage boxes - watch the video:
Decoupage a box is a technically simple exercise that produces incredible results. With a little patience and imagination, you get a unique interior item. The craft can be a great gift for a loved one or a place to store your materials for creativity, notes with ideas and, of course, jewelry.


