
The scrapbooking technique allows you to make a beautiful postcard with your own hands, make a photo album and hang it on the wall, like a panel. Thanks to the many step-by-step photographs presented in the master classes, even children can master this art. The content of the article:
- Photo frame
- How to make a photo album
- Designer notebook
- Scrapbooking paper
- Panels for photos
- DIY postcards
Scrapbooking is a type of handicraft that helps in the production and design of personal and family photo albums, postcards, notebooks. Literally translated from English as "a book of clippings". There are several varieties of this art. The lightest scrapbooking options will be presented below.
How to frame a photo frame with flowers

This is how beautiful it will turn out for you as a result.
As you can see, the photo frame is decorated with flowers. See how to make such a decoration element. To make it, you will need the following items:
- special paper for scrapbooking or other thick paper;
- scissors;
- a template for flowers or a curly hole punch;
- glue;
- distress ink.
Often, a curly hole punch is required for scrapbooking, which you can buy at a craft store.
If you do not have a curly hole punch, then cut out a template for flowers from cardboard or use special knives to cut out such elements.
The next photo shows which flowers with six petals need to be made. Here they are made using a figured hole punch.

For one such flower, you will need to make 3 identical blanks, but then they need to be decorated in different ways. Make an incision on the first workpiece between the petals. For the second workpiece, cut 2, for the third - one petal. Do not throw away these small elements, they will still be useful to us.

Cover the edges of the petals with distress ink. To ensure that the finished flower has the correct shape and is not too bulky, fold it as shown in the photo and cut off the tip.

Now put some glue on the petal left from the cut, put the right one on it. Decorate all three flowers in this way.

Here's what you should get.

Now we need to give the colors a more realistic look. To do this, twist the edges of the petals with a wooden stick or, for example, a pencil.

These are the elements of the postcard made using the scrapbooking technique.

Now put the middle element on the blank of the large flower, and on it the smaller one. We fasten all layers with glue.

It's time to make the core of the flower. To do this, take the two petals that you cut off at the beginning of the work. Twist the ends back with a wooden stick, and then shape the bag, cut the corner off.

Do not tighten this shape too much, as in its center you will need to glue a one-leaf element, decorated in the same way.

As a result, you will get such a lovely flower, which scrapbooking helped to accomplish. With your own hands or with the involvement of junior assistants, you will need to make several more flowers of various sizes. Just like the first one, you will also glue them to the photo frame, and you will have a beautiful, touching design thing.

How to make a photo album with your own hands

The scrapbooking technique will also help to make it.
This folding photo album takes up little space. It can be themed, dedicated to an interesting trip. If you want, paste photos of dear people and friends here.
When you need to look at the photos, you simply open the folded album and plunge into pleasant memories.

To indulge in them, start making a do-it-yourself photo album right now. This handicraft will require the following materials from you:
- scrap paper;
- glue;
- scissors;
- blue ink;
- teflon sheet.
From the scrap paper, cut 2 strips of 10 x 30.5 cm in size. Fold each in four accordions. Glue the two stripes together to make the photo album longer.

Now we need to work with the background. To do this, spray the ink onto the Teflon sheet. For those who do not know what it is, an explanation is given.
Teflon sheet is glass fiber coated with Teflon. This layer prevents sticking, therefore, after finishing the needlework, it is simply wiped off, and the sheet becomes clean again.

Sprinkle ink with a little water. To add a background, sweep the photo album over the Teflon sheet to get streaks. After they dry, you can paste photos into the album and decorate it with various labels, letters, labels.

Making a design notebook - a master class

You can turn a notebook, a thick notebook on a spring into a designer thing, which the scrapbooking technique will also help to create.
First, you must carefully remove the thick bottom and top cover. It is not necessary to unbend the spring, it is enough to twist it and remove these parts.
Cut 2 rectangles out of thick paper to fit the cover. Mark which one belongs to which cover.

Apply glue to the old covers, spread it evenly over the surface with a stiff brush.
Put the cut out sheet on the table, on it - the blank coated with glue. Press down, trim the edges at a 45 degree angle, backing 1, 5 mm.
Apply glue to the margins of the paper, fold them over the cardboard cover, iron with your finger to achieve the closest fit.

Use a sharp knife to cut the holes for the spring, glue this part of the paper too, insert new covers into the notebook.

Place patterned paper on the back of the covers. You can decorate the initial page of the album with thread, letters, ribbons.
DIY scrapbooking paper

As mentioned above, they buy it at a craft store or use thick paper. For decorating sheets, you can make yourself.
For this interesting needlework, you will need:
- table napkins of various colors;
- decorative paper;
- 2 rectangles of a mosquito net;
- PVA glue;
- blender;
- deep tray;
- towels;
- sponge;
- large board;
- pot.
Tear paper and napkins finely, add water, mix with a blender until smooth. Add PVA glue and mix again.

Place the mosquito net on the tray, pour the mass on top.
To make it easier to remove excess water later, use a slotted spoon for laying out. But, in addition to the paper pulp, there should be water on the tray.
Put pieces of paper, flowers, dry leaves, finely chopped threads on this mass. Cover the top with a second mosquito net.

Now, with movements from the center to the edges, collect excess water from the surface of the mesh with a sponge. Try to drain the mass as best you can.
Then place a towel and a large board on top of the mosquito net. Gently turn the tray over so that the still damp paper is on the towel. Remove the first mosquito net, cover the mass with the second half of terry cloth.

Iron it with an iron to dry the paper, turn the blank over, placing it on this half of the towel, carefully remove the mosquito net. Iron scrapbooking paper through the fabric to dry.
In conclusion, it is imperative to put a press on the paper and still dry it for 1-4 days. During this process, check your creation occasionally to ensure it doesn't dry out and become brittle.
Now you can use this paper to decorate albums.
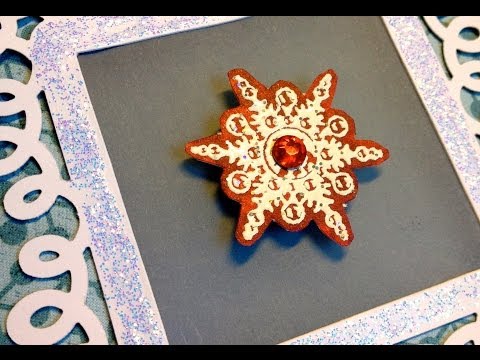
Panels for photos

It is also quite easy to make using the scrapbooking technique. There will be a place for several photographs and decorative elements at once. Here's what you need for this scrapbooking:
- shoe box;
- colored paper;
- scissors;
- glue;
- double sided tape;
- braid and other elements for decorating the photo frame.
Take the lid from the box, glue colored paper or a sheet with prints inside. Cover the sides with brown paper, and arrange the partitions in the same way. Using PVA, attach them to their place.

Cut out the petals from colored paper, twist them, fix this flower with glue. Decorate panels with decorative butterflies, lace and other elements.

Use the braid to make a loop for hanging the photo frame on the wall.
DIY postcards

The scrapbooking technique will help make them too. Such a birthday card will certainly please the birthday boy. If you want to present it during another joyful event, then you just need to make another inscription.
Here's what you need to get things done:
- a sheet of white cardboard intended for watercolors;
- on a sheet of colored and black cardboard used for pastels;
- white tape 30 cm long;
- lace braid 12-15 cm;
- glue;
- scissors;
- ruler;
- 3 buttons;
- 3 flowers;
- capillary or black gel pen.
To make the base of the card, cut a 16 x 20 cm rectangle out of white cardboard and fold it in half.
Now cut out two large and two small rectangles from black and colored cardboard, the dimensions of which are indicated in the photo.
Next, glue the colored cardboard onto the black one so that the dark one forms a frame.
Glue the lettering and the small rectangle onto the large one.
Let's start decorating the postcard. Glue the lace, and on top of it - a ribbon, tie it with a bow. Attach three flowers to a small rectangle, buttons in their center.
You can continue to make a postcard with your own hands, applying a drawing and bordering from dots on it. It remains to write warm wishes and hand a postcard to the birthday boy.
If you liked this type of needlework, you can improve your skills by studying the following videos:


This is how do-it-yourself scrapbooking is done, as a result of which charming postcards, touching photo albums, beautiful panels on the wall are created.


