Master class, 90 step-by-step photos will teach you how to create crafts from cans. It will be a rose, a car, New Year's and children's toys, lamps and beautiful vases and pots.
Almost everyone throws away such a container after it is empty. But some people create amazing crafts from cans that are not only beautiful, but also functional.
Crafts from tin cans - DIY flower pots
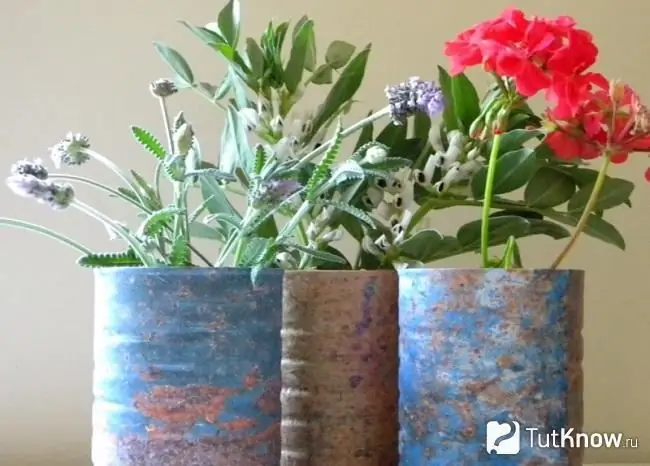
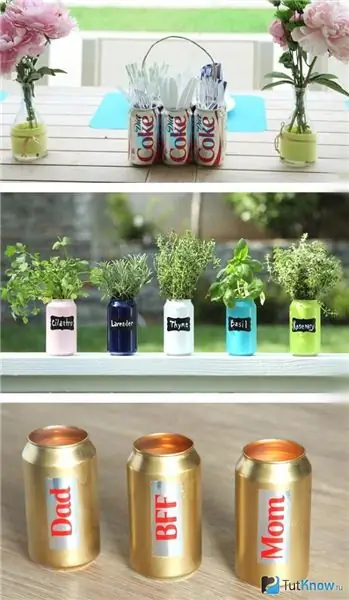
See how these containers are transformed into original flower pots. Take a jar, remove the label from it under warm tap water. Then dry it and degrease it. After that, you need to paint the outside with acrylic paint. You can use a spray bottle. If you want you to have such an original drawing on the surface of the container, then after the first layer of paint dries, take a sponge, moisten it in acrylic paint of a different color and apply similar glare here. You can also do this with a brush.
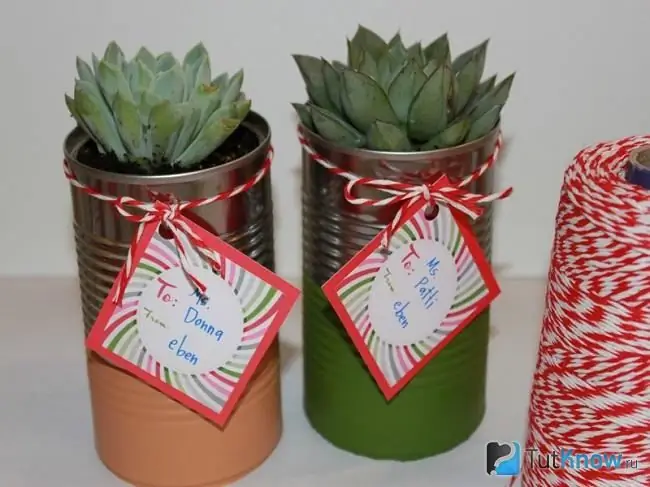
If you wish, then you can paint not the entire metal can, but only its lower part. Tie the jar with a pretty string and hang a sign with the name of the flower so you don't forget it. Or you can make such a gift, write warm words of congratulation and hand it to the addressee.
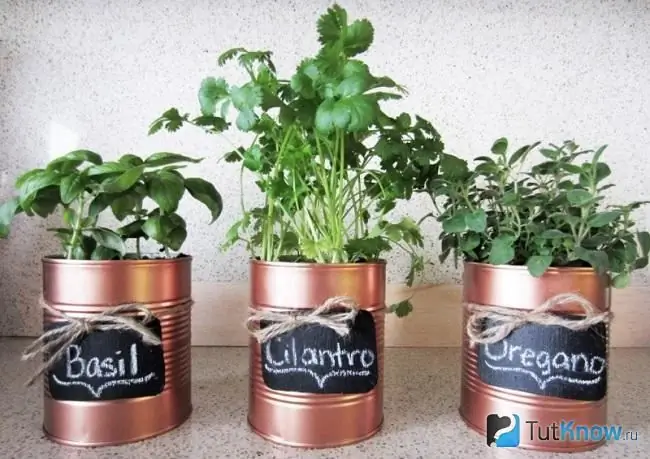
It would be nice to grow basil, parsley, oregano and other greens at home. In order not to forget where you sowed what, it is better to stick such plates to the jars, then write the name of each culture here.
For the following craft from tin cans, you will need:
- metal cans;
- cardboard;
- Double-sided tape;
- scissors;
- simple pencil;
- colored patches;
- chenille wire;
- glue gun;
- plastic toys.
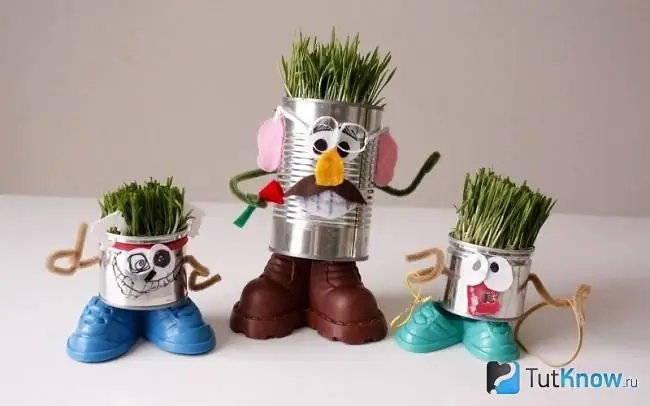
- First, prepare the jars in the same way. If they open so that the edges remain smooth, then you skip the next stage of work. And if the cans are opened with a wooden can opener with a metal tip, then you first need to make the sharp edges smooth.
- Now take white cardboard and cut out the eyes of these characters from it. Draw the missing details with a pencil. You can cut out the main features of the face from the pieces of fabric. Glue it all onto the jar.
- Roll the chenille wire in the form of handles. You can put on glasses for one character and also attach them.
- Take your toy shoes and glue them to the bottom of each jar. Now you can pour soil here and plant plants. But it is necessary to water sparingly so that the water does not stagnate here.
- If it is possible to put such a jar on a pallet, then use a nail and a hammer to make holes in it at the bottom. Then excess moisture will drain.
To make a planter from a tin can in a different way, you will need:
- metal can;
- birch bark;
- brown marker;
- scissors;
- twine;
- glue.
Cut the birch bark of the required size and glue it to a pre-prepared jar. Then, with a brown marker, draw a heart and the first letters of the names of the couple in love. Or you can simply rewind each jar with birch bark and twine. Now you can plant flowers in pots or use them as vases. Then pour water here and put flowering plants.
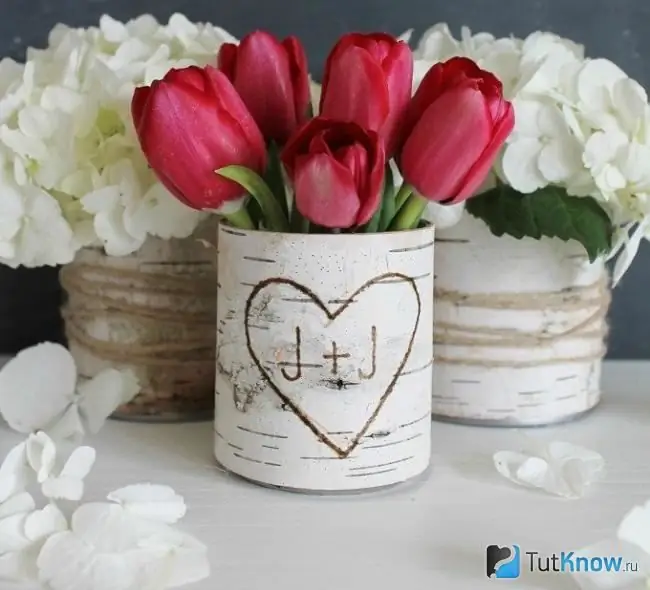
Short daisies will also look great here, and you can decorate your room in this way.
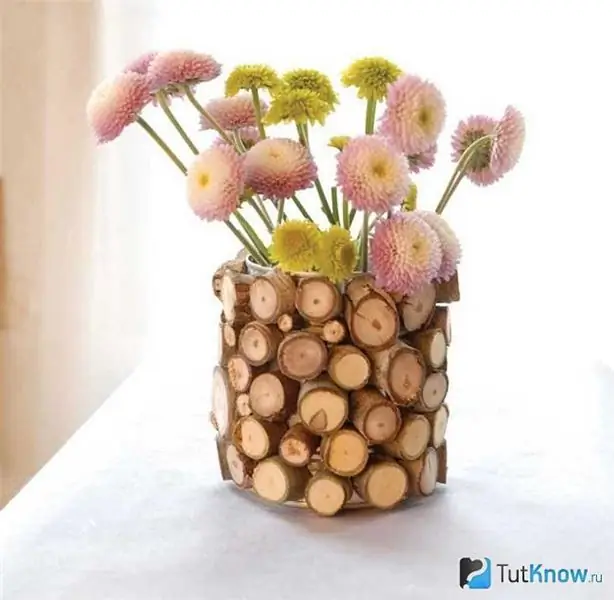
Saw the branch crosswise into several pieces. You will end up with blanks of different sizes, since the branch is thicker on one side than on the other. Then, using a glue gun, attach these elements to the outside of the can.
Glue the small ones between the large circles. In such a vase, you can put not only daisies, but also dandelions, small chrysanthemums or other flowers.
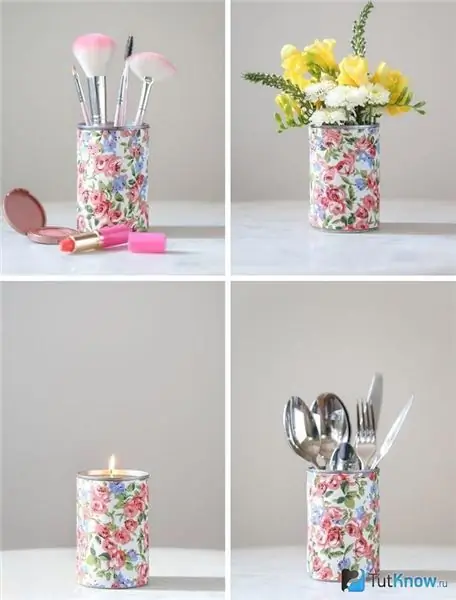
If you are familiar with the decoupage technique, use it to design the next container. Glue the top of the flower napkin onto the prepared metal can. When the glue is dry, secure this paper backing on top with two or three coats of water-based varnish. Such a jar can be used not only as a vase for flowers, pots, but also store makeup tools, cutlery, and light a candle in it.
Watch a master class with step-by-step photos that will help you make an original flower pot from tin cans with your own hands.
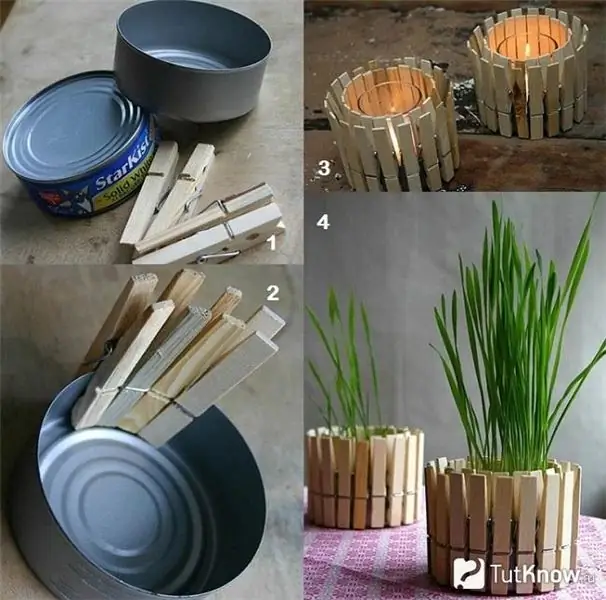
For this you need:
- low tin can;
- wooden clothespins;
- priming;
- greenery seeds or flowers.
Remove the label from the jar, make its edges smoother with emery. Then attach your clothespins here. It remains to fill in the soil and sow seeds of greenery or plant rooted plants. And you can use some jars to put scented candles here. Such compositions with plants and candles look wonderful.
You can place cans not only at home, but also in the country to decorate a simple wooden fence. Paint them and fix them here with self-tapping screws. Plant small flowers.
But such plants need to be watered quite often, since the earth heats up faster in metal cans, and the water evaporates.
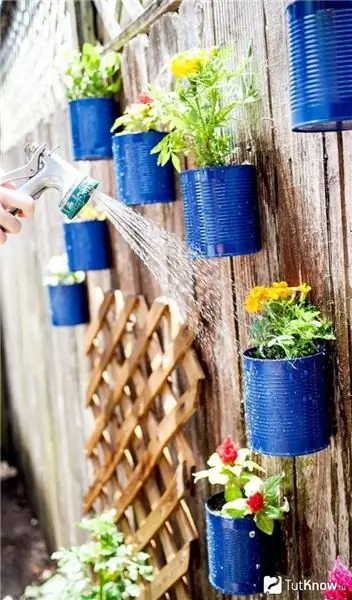
You can fix the banks not only with self-tapping screws, but also by taking a strong wire. Then you can fix such containers on almost any vertical support where there are suitable protrusions. This could be the outside of the balcony. Then you decorate it this way.
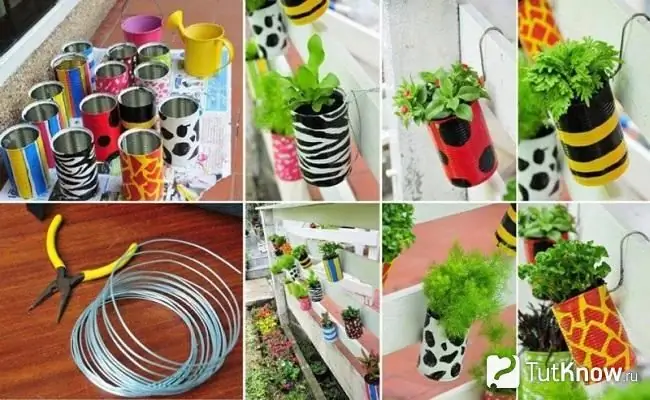
As you can see, banks can be painted in a variety of ways. And to create such patterns will help stencils or do it by hand.
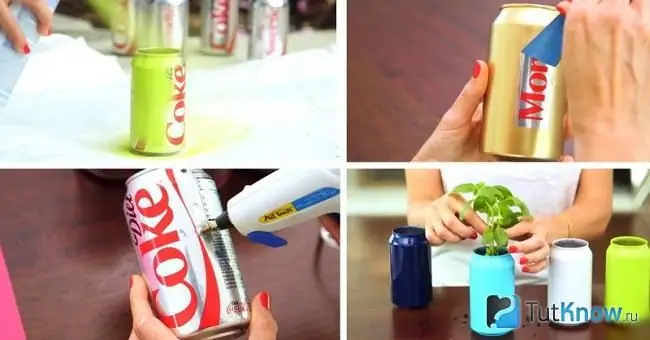
You can also take cans from Coca-Cola or other carbonated drinks. Paint such a container with acrylic paints in two or three coats. Once it's dry, you can place the selected plants here.
If you wish, write in Japanese or Chinese hieroglyphs some kind words, wishes to the household and place the flower in their sight. This can be done using a stencil after downloading it. Such a flower pot will be an unusual and bright accent in your home.
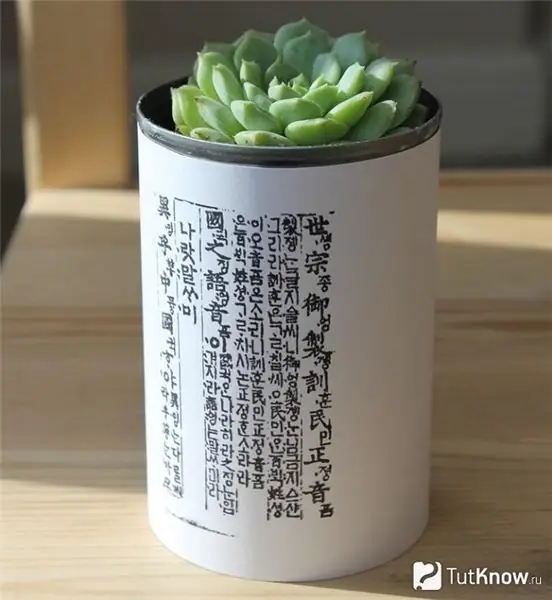
With the help of a stencil, it is easy to make inscriptions on cans. First you need to paint them in the selected color, when the paint dries, attach the stencil. Then cover this area with black paint. When it is dry, write by hand using a thin brush and white paint the names of the specific spice herb that is in each container.
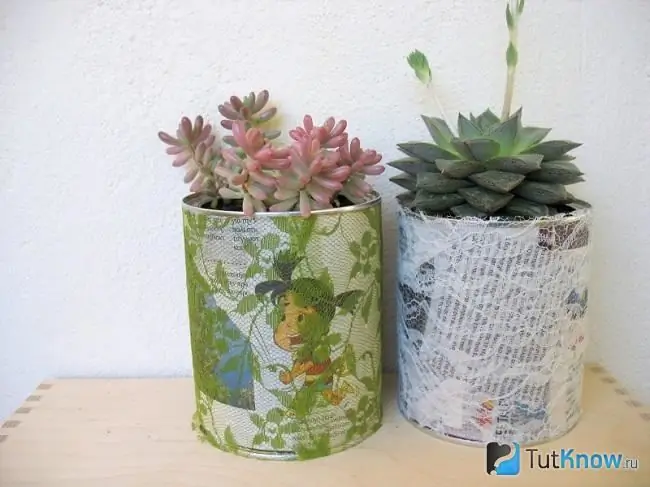
To make a planter from a tin can, you can first paste over it with scraps of magazines or pictures from unnecessary children's books. Then, on top, you glue pieces of tulle or fabric with a transparent tool. See how wonderful such containers look.
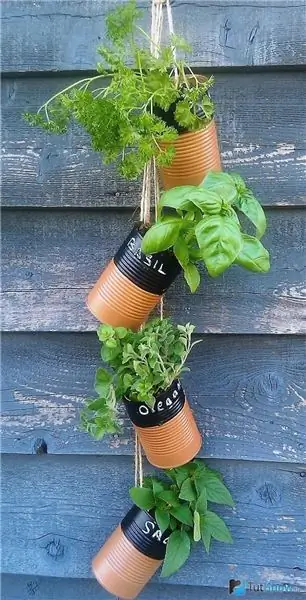
You can make hanging planters from tin cans. To do this, first prepare this container, then make a hole at the top of each. Then tie twine to these jars and place them on the wall of your choice. Plants will take up little space and will add originality to your home or exterior wall.
Mosaic decoration from tin cans - master class and photo
To get this kind of beauty out of a tin can take:
- metal cans for canned food;
- sheet polystyrene;
- acrylic paints;
- brush;
- foam glue;
- scissors;
- putty or sealant.
When you open a tin can, use a modern opener so that there are no chipping on the neck of this container.
Paint the outside of the jar with white acrylic paint. Let it dry for a while, it happens pretty quickly.
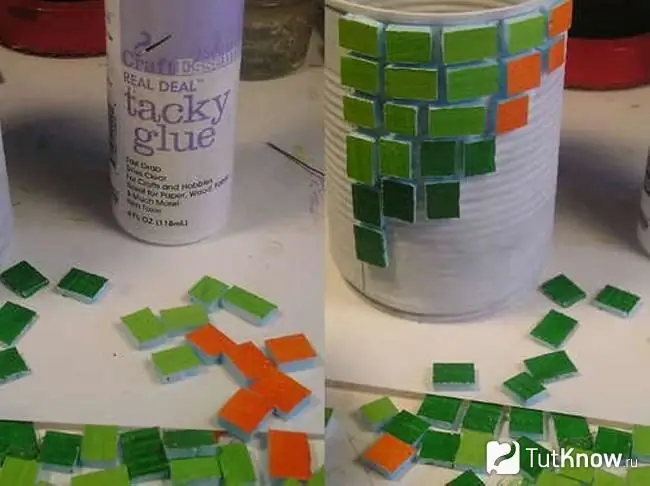
Use scissors to cut the styrofoam into whatever pieces you like. These can be rectangles, as well as various letters, in order to then form words from them. Paint these blanks and let them dry.
Now start gluing these elements to the outside of the jar. If you will make words from letters, then first glue them, and then cover the space with rectangles. Let your work dry, then take a sealant or putty and use a sponge to seal the seams in your work.
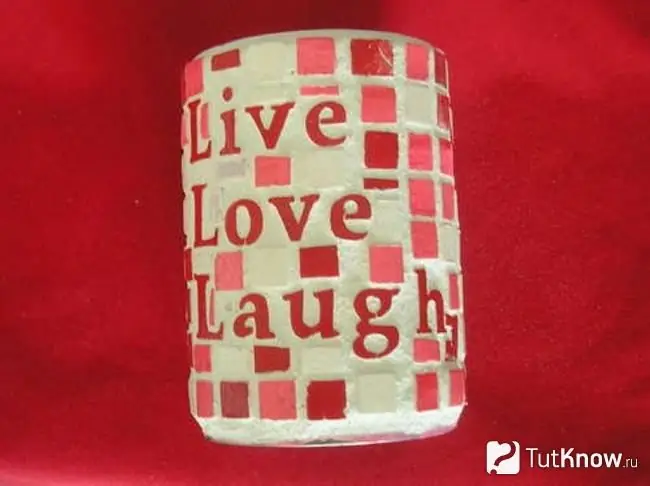
How to decorate a tin can with your own hands?
See what a charming object she can turn into.
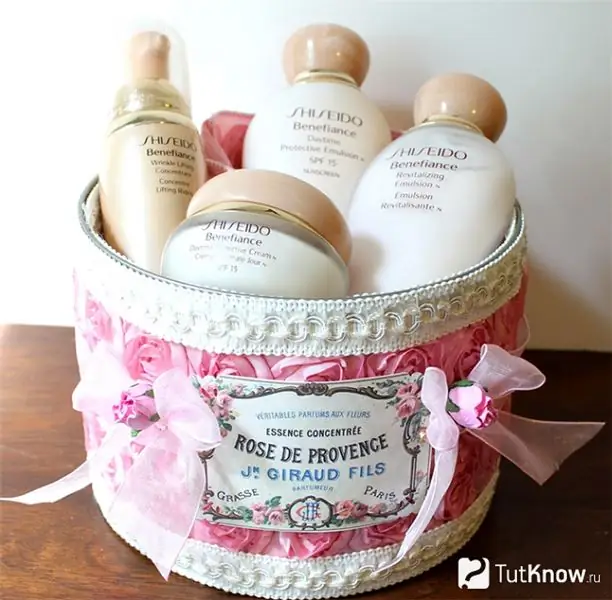
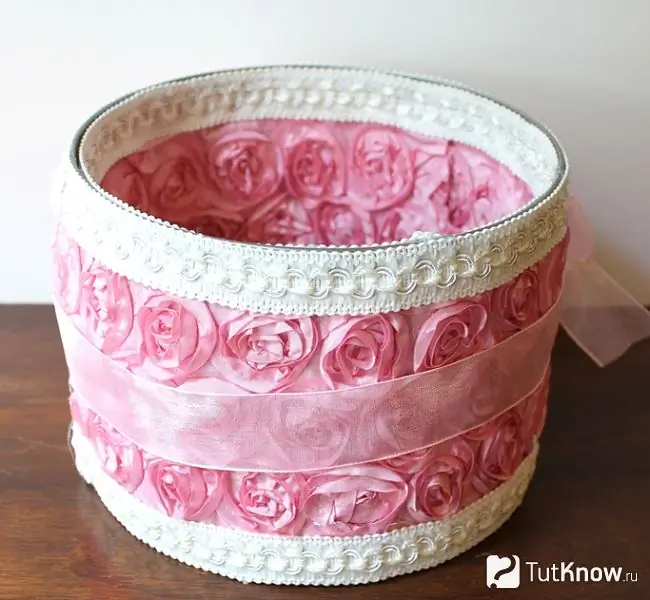
In such a box, every woman will be pleased to store her cosmetics. Get a can of the right size. Put a pink satin fabric on it after sewing the edges of this fabric.
Take pink satin ribbons and make roses out of them. To do this, you can simply twist these blanks in a spiral, then glue their ends. Glue the flowers onto the fabric base located on the jar. Take strips of tape and glue them on the top and bottom of the can. If you wish, decorate not only the outer part of this container, but also the inner one in the same way.
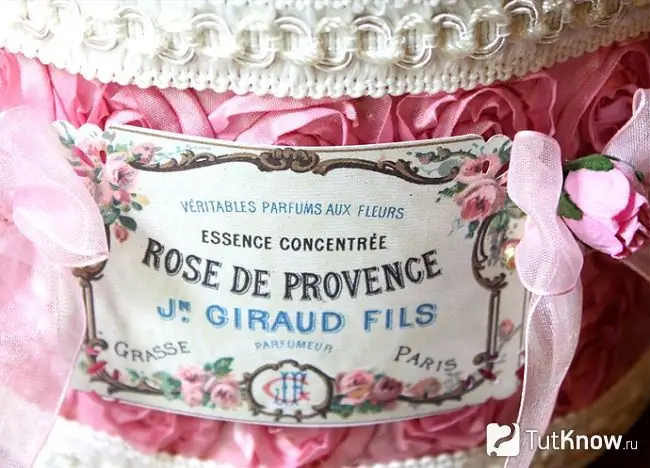
Take the pink ribbons and tie them into bows. Sew paper roses to them. Then print out a plate like this. Make holes so that you can then sew this workpiece here. You can just glue it, like the bows that you will place to the right and left of the plate.
If you need a container for storing sewing supplies, then a jar is also useful. Subsequently, you can write on each what exactly is in these containers.
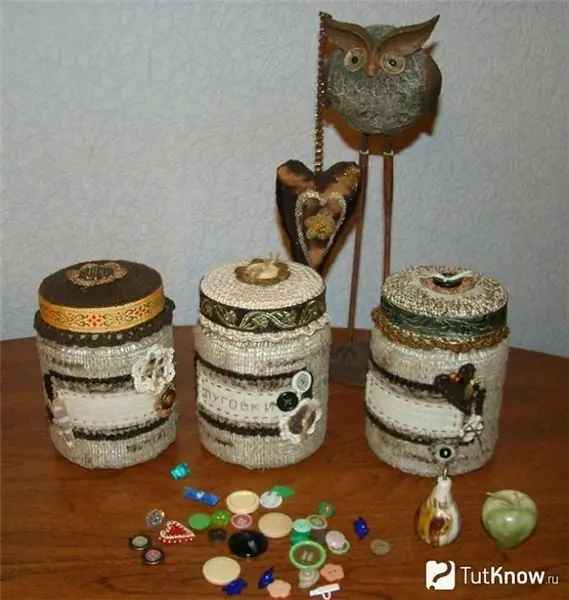
- Measure a clean jar and sew an outer cover for it to fit this size. It consists of a round bottom and a rectangular sidewall. The bottom diameter is equal to the length of this sidewall. First you need to sew the sidewall to the circle, then connect the ends and also stitch them. In the same way, you will make a cover not only for the outside, but also for the inside of the can.
- If you wish, you can tie it up or cover it with rare burlap on top. Take a suitable lid and arrange it the same way. In the center of the jar, sew a pointer on which you write or embroider the name of what is stored in this container. Finish decorating with your imagination.
- And so that the needlework jar also becomes a needle bed, take cotton wool or synthetic winterizer, sew any of these materials with a cloth. Glue this blank onto the lid of a tin can.
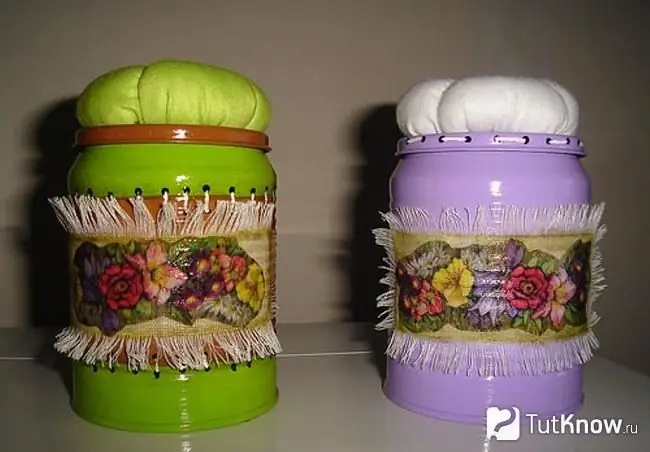
The container itself must first be painted. Decorate it like in the photo.
Here is another option for how you can decorate cans with your own hands. Here you will glue a photo of a person you love so that you can always admire the image.
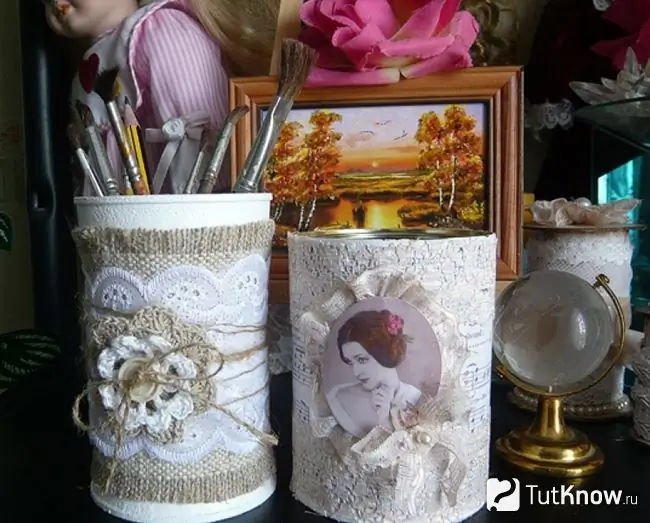
Take:
- bank;
- white acrylic paint;
- burlap;
- lace strips;
- twine;
- threads;
- hook;
- buttons;
- a printed photograph;
- notes;
- glue.
Two types of decorating cans will be presented to your attention. Take a coffee can for your first job. If it has a paper label on it, remove it.
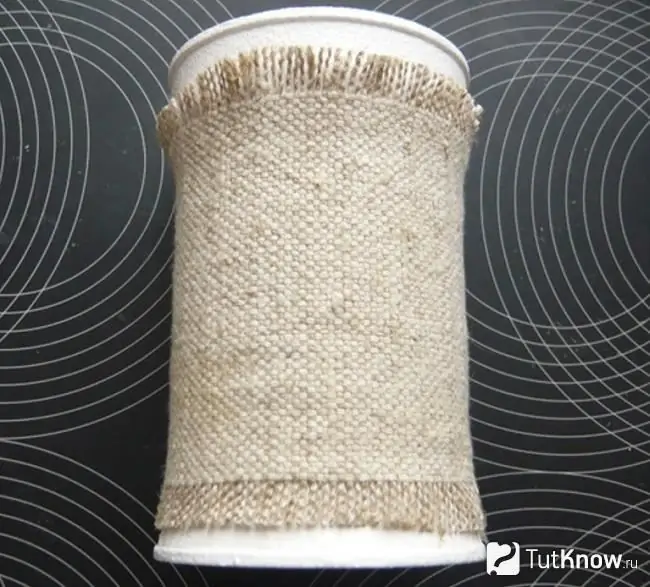
Now take a sponge and use it to paint the outside of the jar with white acrylic paint. Let it dry.
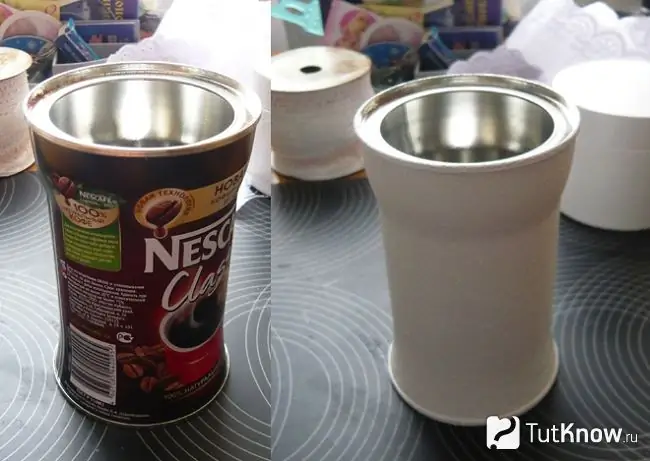
Cut a rectangle from the burlap to cover the jar. The upper and lower edges of the workpiece need to be made more fluffy. To do this, remove the horizontal threads with a needle. Join the sides of the burlap and sew here. The blank must first be put on the jar.
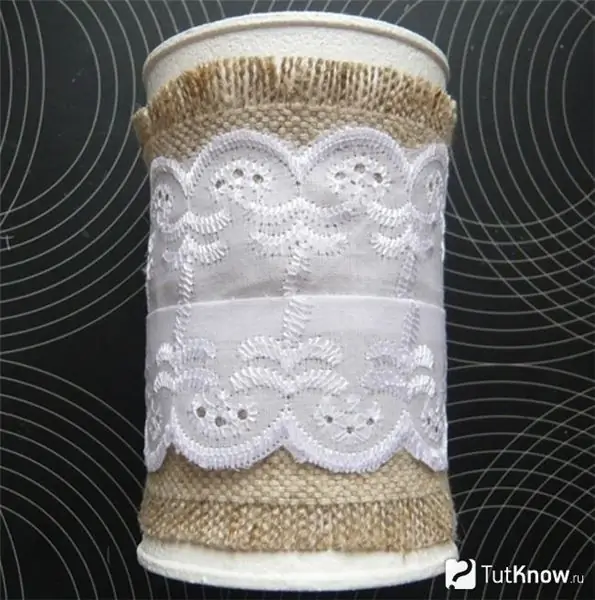
Now take the lace cotton tape, join the two strips and sew in the center. Wrap these blanks around the center of the can and also sew up the sides.
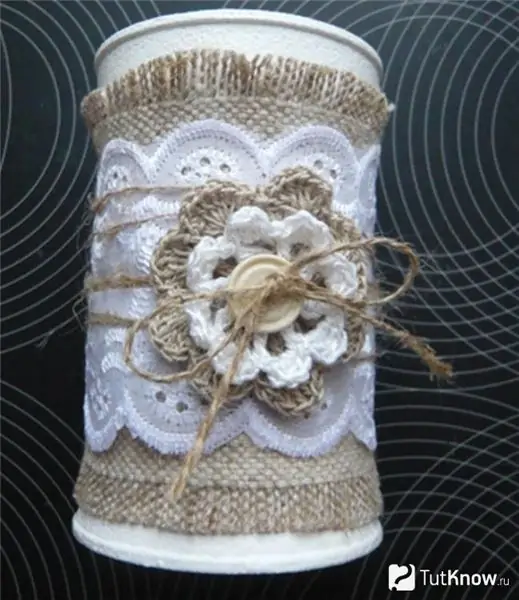
Take a string and crochet a flower from it. Also tie a white thread flower. Now take the string, wrap the jar with it several times. Thread the tips into the middle of the flower, which is made from hemp rope. Then thread the string through the white flower, and then? in the button. Tie a knot and make a bow out of string.
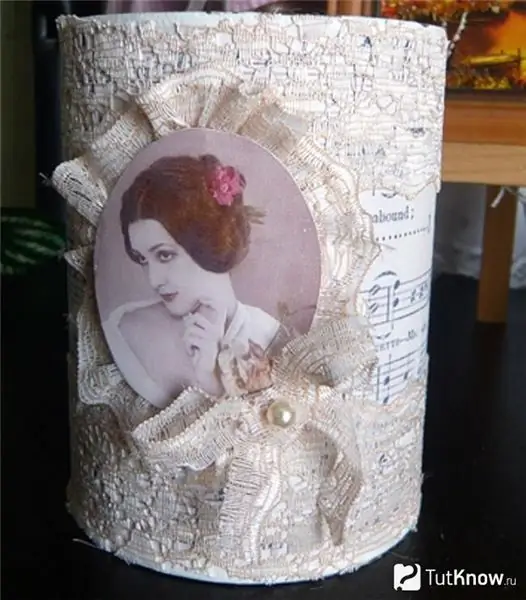
Here's how a tin can craft can help you do another charming thing. Paint the container with white acrylic paint. When it's dry, glue a suitable sheet of music here. If you don't have one, then just print it.
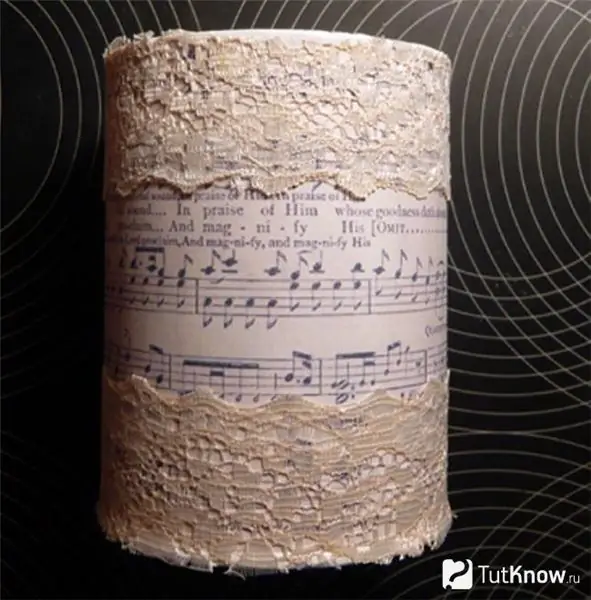
Now take the lace tape and glue one strip on the top and the other on the bottom. You will gather and shape the third segment in the form of a ring and glue a photo in its center. Tie a thin ribbon bow at the bottom and glue an imitation pearl here.
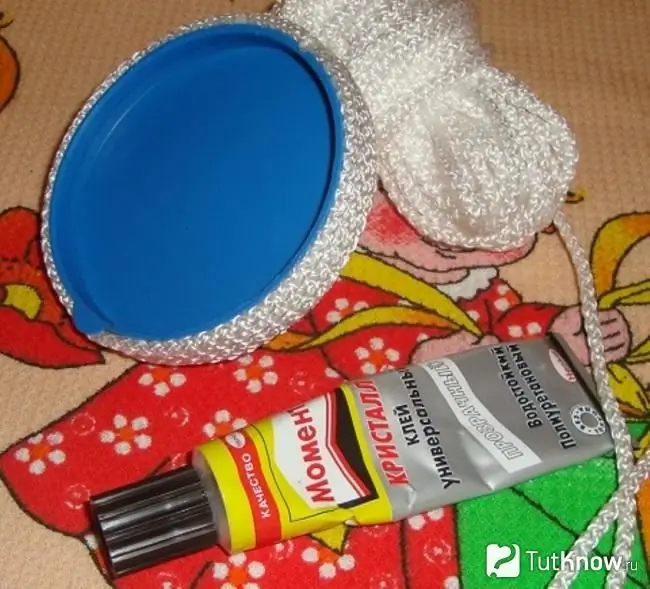
Here's how to decorate a canned food can in a different way. Take the container and degrease it with dishwashing detergent. Now take and completely wrap the container with a beautiful rope. Look, perhaps, in your case, just as an ordinary nylon cap fits to this jar. Wrap it by gluing the turns of the rope to the Moment glue.
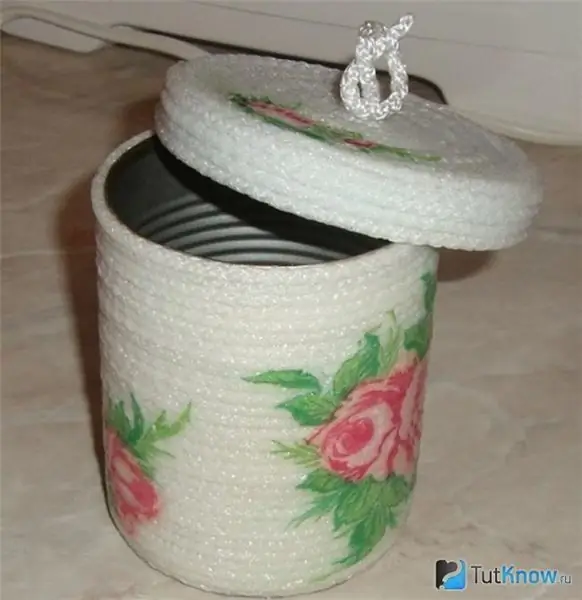
You can not cut the upper part of the thread, but form a loop. Now take napkins, glue their fragments with PVA on this container. To fix the flowers, and they did not get dirty, the jar could be washed, cover your creation with water-based varnish on top. When it dries, the canning craft is ready.
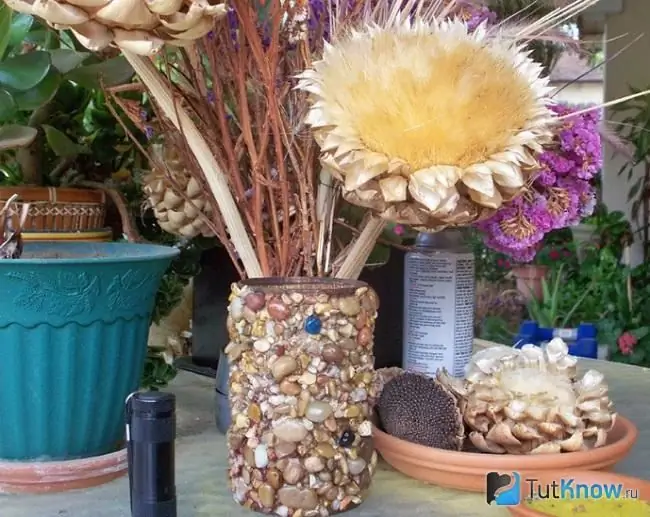
If you have decorative pebbles, shells in stock, then glue them on a previously degreased jar, completely covering it from the outside. Then you decorate this container with varnish. You can put dried flowers in it or pour water and keep cut flowers.
Paint the jar, use stencils to apply patterns on it in a different color. When all this is dry, sew on these ladybugs from fabric filled with padding polyester.
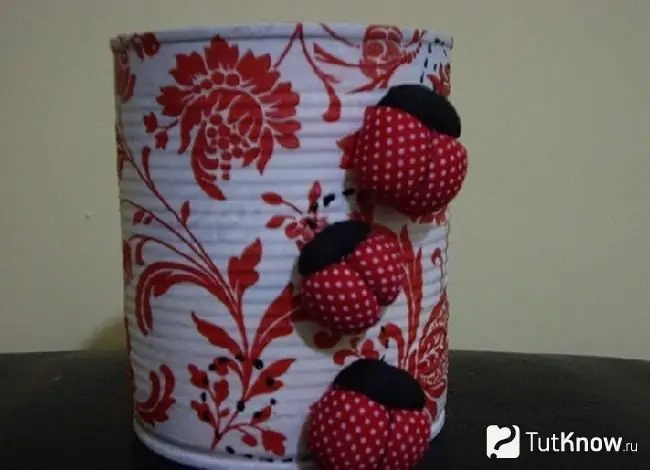
You can also decorate the can with burlap. Sheathe it with this material. Attach the braid on top, on which you want to glue the flowers from the fabric. You can store stationery in such a container, it is very convenient and practical.
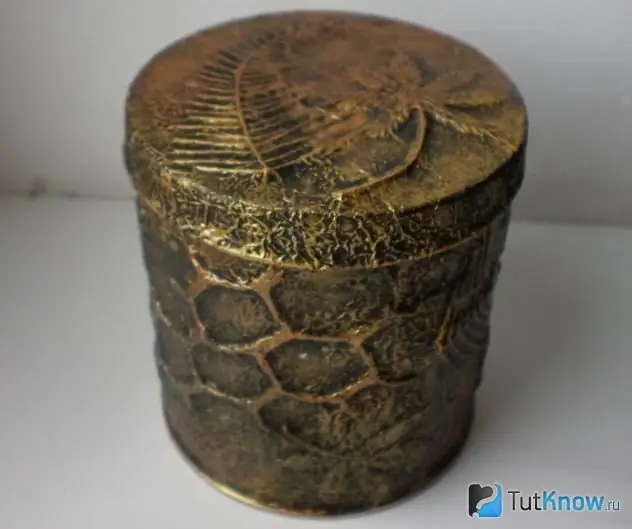
Watch a master class with step-by-step photos, which teaches you how to turn an ordinary jar into an old casket. It will turn out to be an exclusive thing. Take:
- tin can;
- foil;
- plastic elements;
- golden acrylic paint;
- black acrylic.
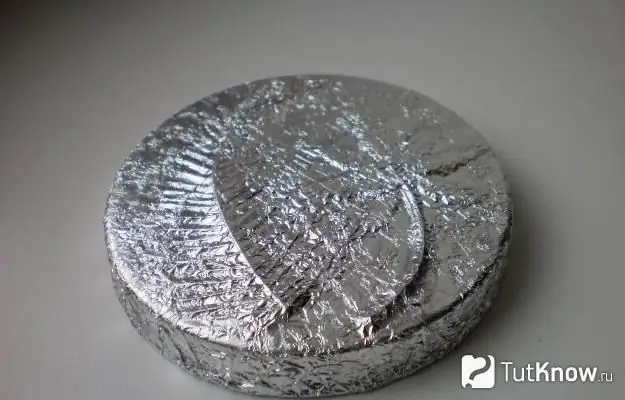
Stick these leaves, plastic greens on the lid, you can even attach a sausage net. The main thing is that such irregularities should appear on the lid. Crumple the foil and stick it here.
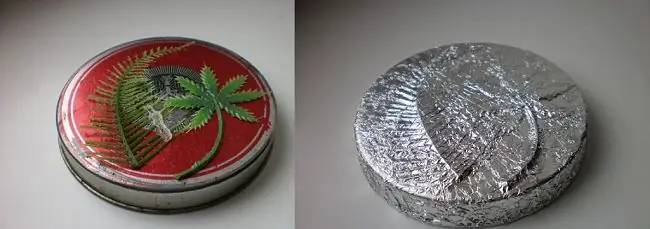
Now do the same with the jar, then cover the lid and the jar with golden paint first and let it dry.
Then take black acrylic and use a sponge to apply it here. Then you get an imitation of bronze. When this coating is dry, the exclusive box from the jar is ready.
How to make toys from tin cans - craft workshop
You will also make them from an ordinary tin can. To create such a craft from a tin can, you will need:
- metal can;
- corrugated cardboard;
- golden braid;
- white twisted rope;
- 4 small wooden and 1 large ball;
- glue;
- white acrylic paint;
- decor elements.
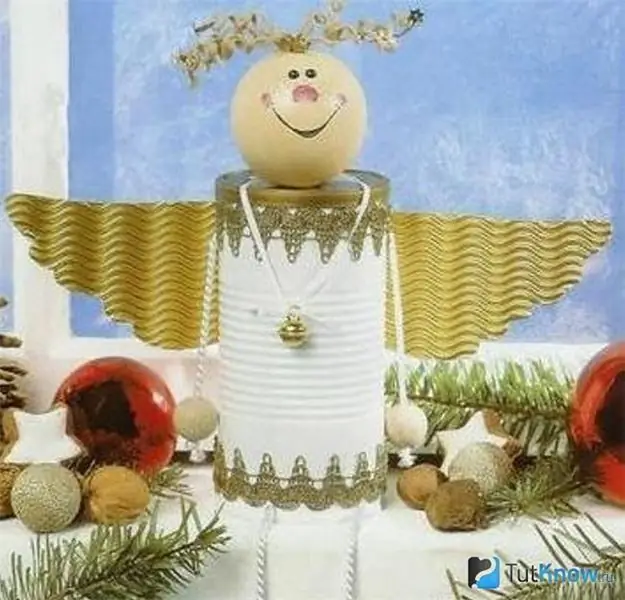
Paint the prepared jar with white acrylic. Cover its bottom with golden paint. It will also come in handy if you do not have golden corrugated cardboard. Then cover it too. And when the paint is dry, cut out the angel's wings. Turn the dried jar upside down and tape the top and bottom to it. Color the large wooden ball so that it turns into an angel's face. Draw his features. Hair can be made from thread or wire by gluing yarn here.
Take four pieces of rope, glue 2 for legs and 2 for arms. Attach small balls to the ends of these ropes. Here's a craft made from cans.
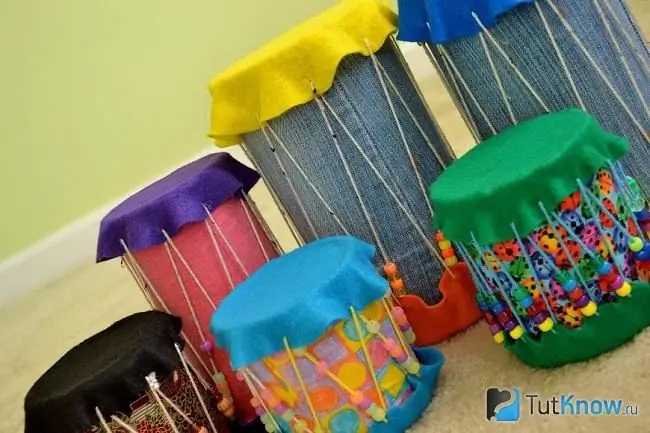
This is a semblance of tom-toms. Make these toys for the kids. Large jars can be arranged this way. Take a leg from old jeans, decorate the sides of such a container with it. Cut two circles out of heavyweight fabric for each can. They must be larger than the diameter of this container. Take a needle with a large eye, thread the thread here and begin to connect these two paired circles. Moreover, sometimes wear beads or elements of old wooden bills with holes on them. You can use other fabrics for sidewalls of tomtams.
See how craftsmen create such unique pieces of furniture for dolls or for home collection from ordinary cans.
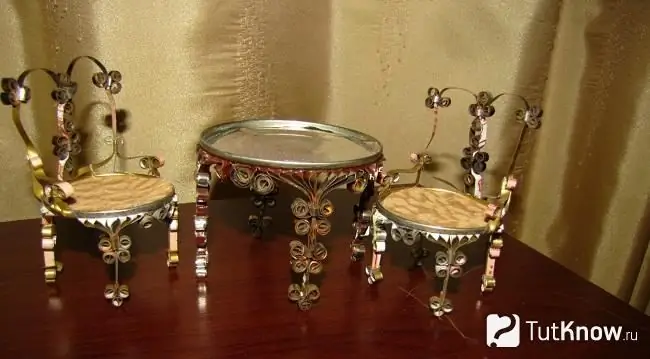
To do this, you need to take a can of coffee. Its sidewalls are more pliable. Cut them into strips with sturdy scissors. Begin to roll these metallic ribbons into curls. This needs to be done from the auxiliary jar. The main can also needs to be chopped into ribbons and connected with pre-made curls.
Some strips of the main can can also be styled with curls. Then you will have a table with four legs. In the same way, you need to make a chair, and with the help of auxiliary cans, create a back and handles for it. The child will certainly be delighted with such a toy, just look if the edges of this furniture are too sharp so that it does not get hurt.
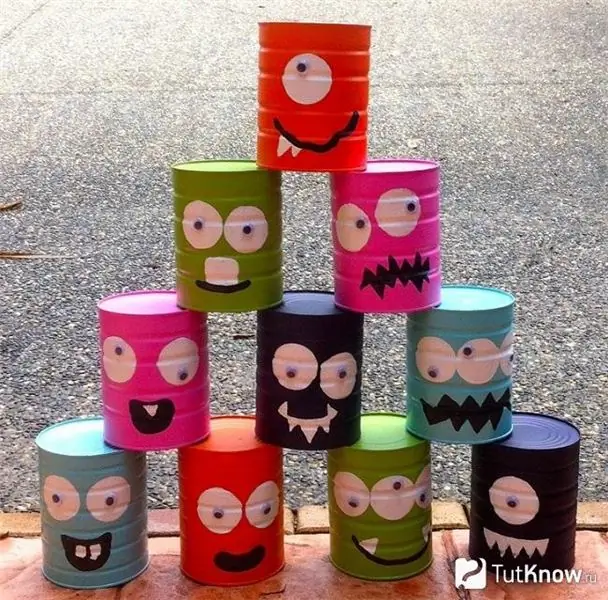
You can also make interesting toys that will become organizers. Cover the outside of the cans with cardboard and together with your child make funny faces on their surfaces. These are the toys you get.
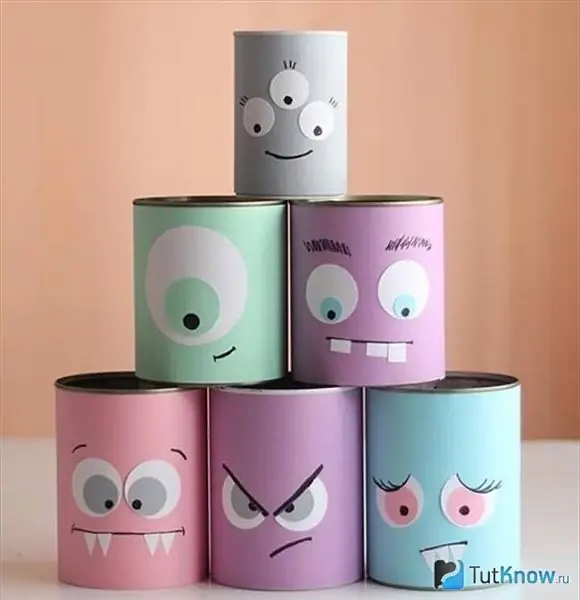
Then you can put beautiful cans one on top of the other and teach your child how to play with them like pins.
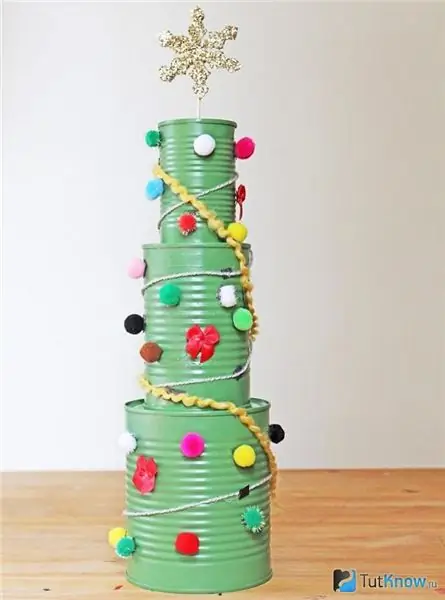
Take three jars of different sizes and paint them green. When the paint is dry, glue pom-poms here, red ribbon bows. Tie up with pretty ropes. Make a star from a Pepsi Cola can, decorate it with glitter, attach it to a skewer and stick this wooden stick into the hole you created. You will have a Christmas tree made from tin cans.
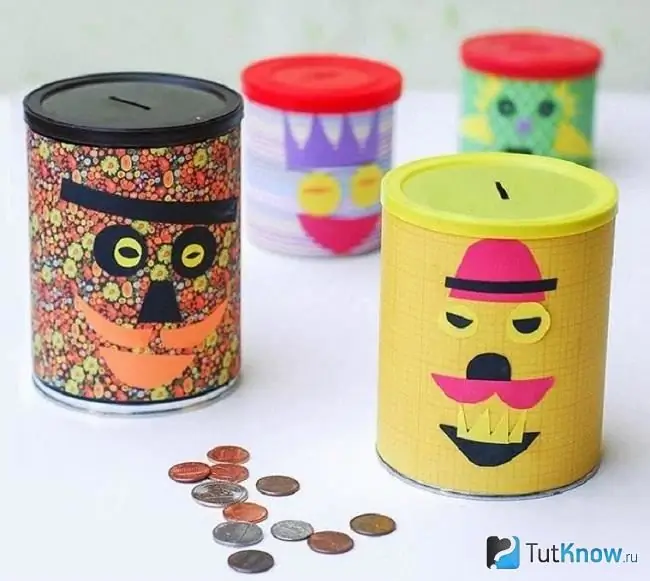
You can also advise making crafts for children from tin cans, which will turn into piggy banks. Take jars with plastic lids or find suitable ones. In such a container, it is easy to cut a hole with a knife to put small change here.
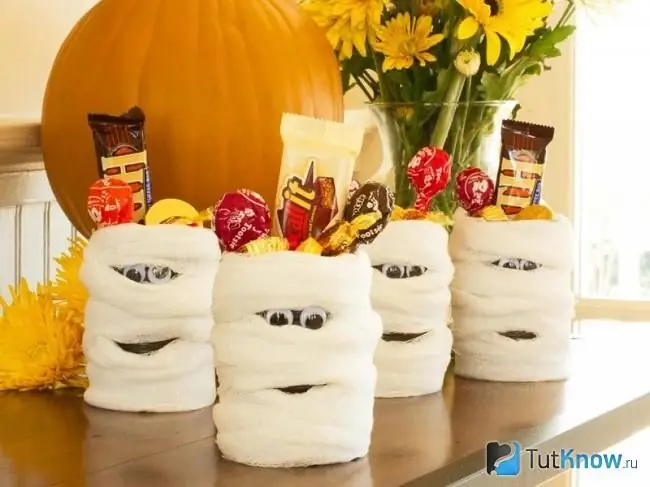
Amuse your child by making such stands in the form of Mummies with him. Then you need to wrap the cans with bandages, after gluing eyes for toys here, or do it later. Free up space for your mouth, and now you can put candy in here and thus store the sweets.
The boy will surely like it if you make robots from cans for him. It is better if he will craft with him.
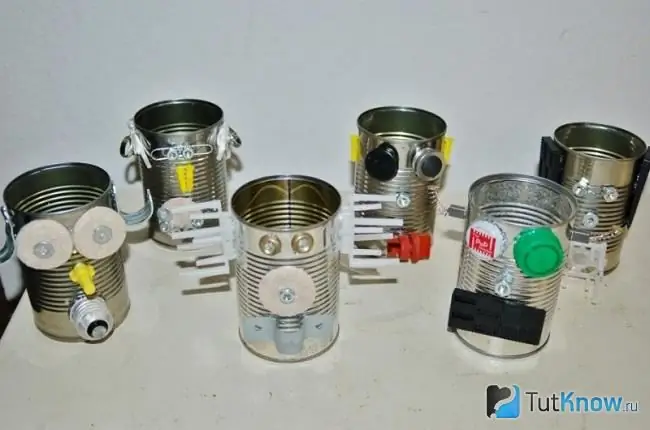
Take the items stored at home and glue various bolts, screws, latch parts, corks and other items to the cans. Imagine, and you will get even more interesting robots or aliens.
Present your child with a new toy by making it from two cans. You will need to glue plastic caps to them. Paint all this in advance so that you get a spaceship.
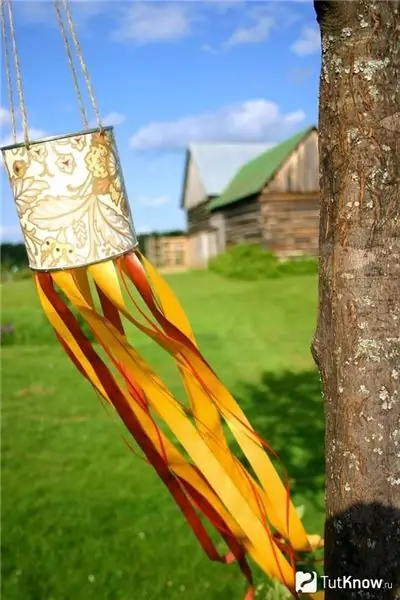
You can also make toys for a summer residence. Then paint the jar or glue a cloth to its surface. Then attach fabric ribbons to the bottom. Such an accessory will develop in the wind and delight everyone who looks at it. To hang it, you need to make four even holes in the top of the can and thread the string through it.
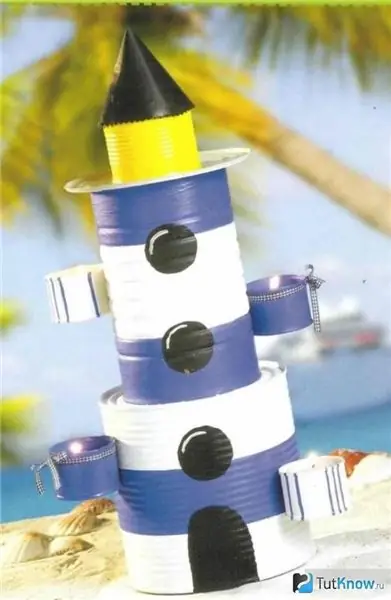
You can decorate the dacha territory with other crafts from cans. Then you don’t have to throw them away, you don’t need to buy new toys for a while.
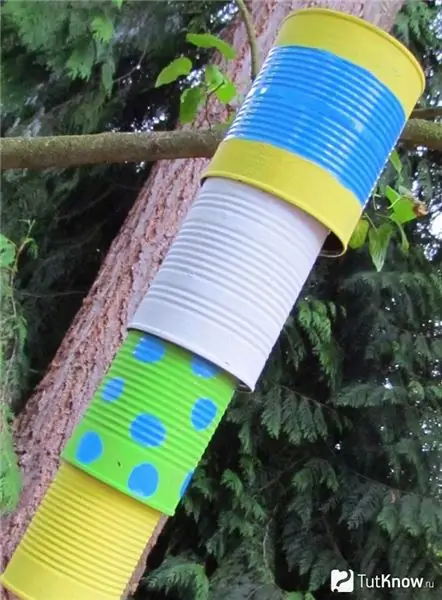
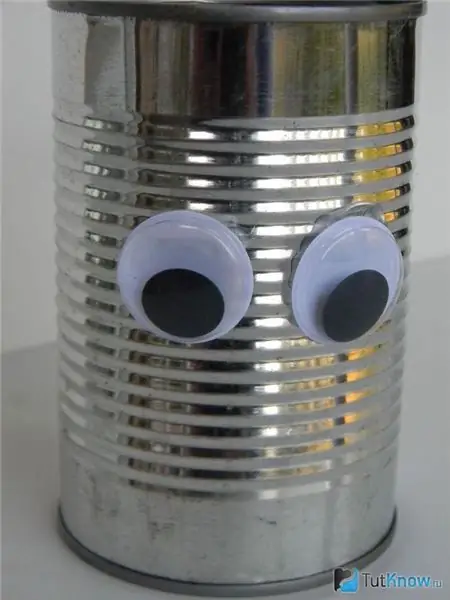
It is enough just to glue special eyes for toys or make them from transparent packaging for tablets. You will put a button inside and glue these elements onto the prepared jar. Here's a toy then it will turn out.
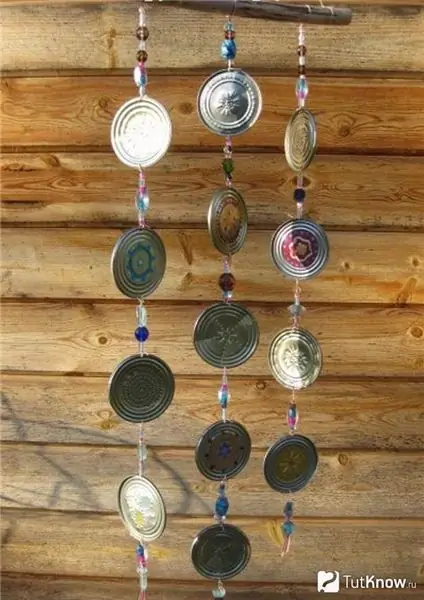
And if you have a lot of metal can lids left, then you will make two holes in each and attach them to a strong rope. Place beads between the lids. Attach these tapes to the wooden beam.
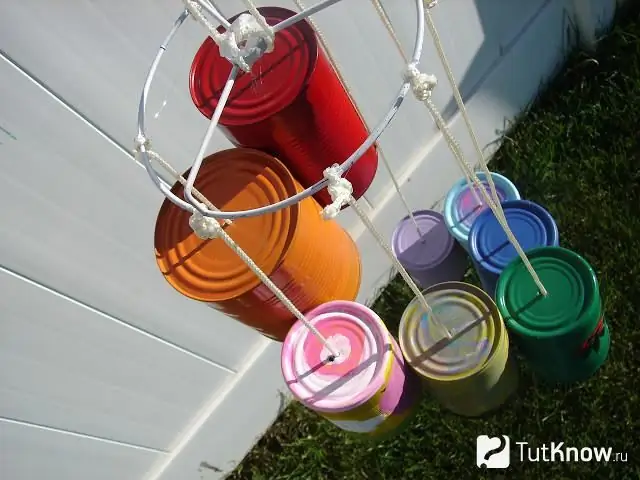
Make a musical pendant using such a container. Then in the bottom of each, make a hole, pass the ropes here, at the ends of which hang bells or metal nuts. When the wind blows, the toy will make sounds.
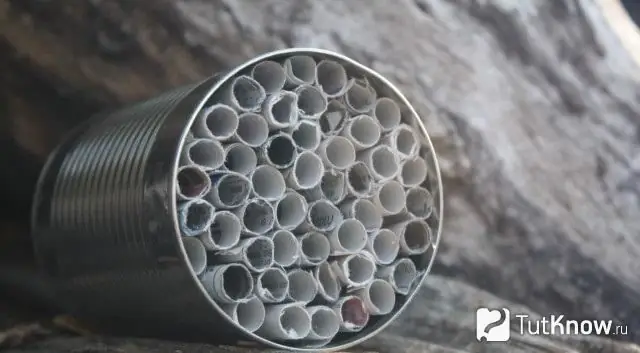
Make a bee house with your child. To do this, roll up pieces of paper with a pencil like this. Glue the tip of each. Insert the blank data into the jar. You can watch with your child if bees come here.
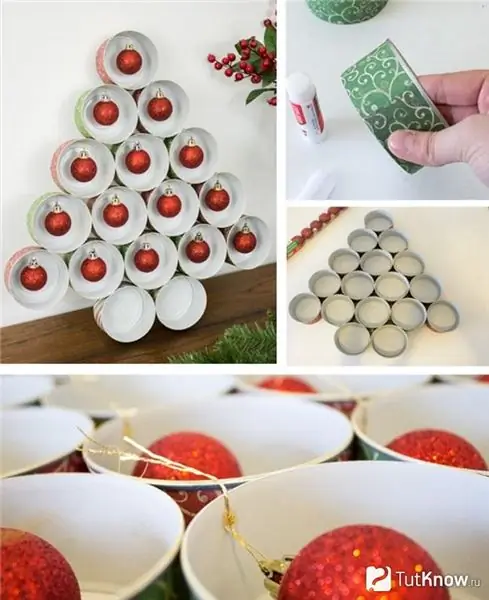
And here's how to make a Christmas tree out of a soft tin can. Cut it into identical rings, then you can glue them with strips of paper of the corresponding color. Glue a Christmas tree decoration on top of each element. Then glue all the elements together to create a beautiful tree.
Also, on the eve of the New Year, you can make Santa Claus from a tin can. Rather, it will be a craft in the style of the costume of this New Year's character.
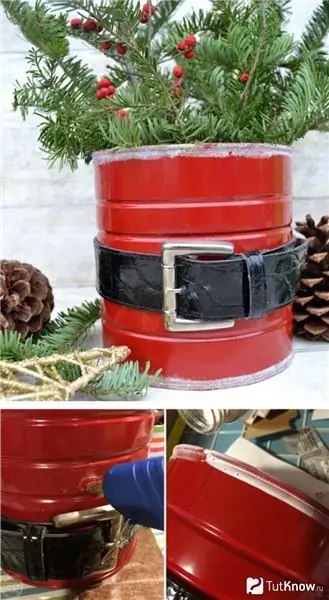
Take a prepared, large enough tin can and coat it with red paint. When it's dry, use a sponge to apply strips of white paint on top and bottom. then take a leather belt, cut off the tip, make a hole so that this belt is about the size of the can. Put it on this container. You will have a Santa Claus costume.
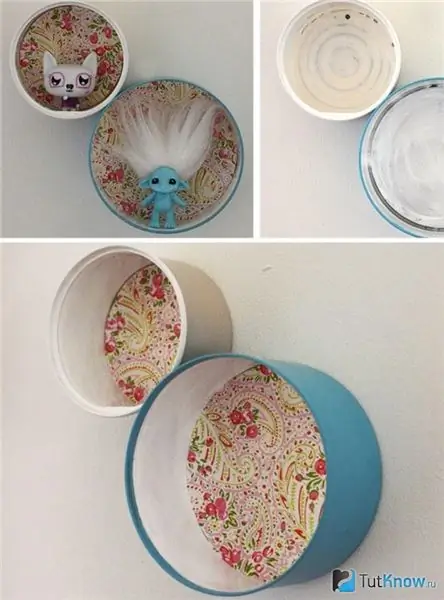
Make toy shelves from a tin can. Then children will not only create toys, but also organizers for them.
Take low cans, paint them white first. When the coating is dry, then glue the circles of fabric inside. Then, using self-tapping screws, attach these containers to the wall, and let the children keep useful little things here.
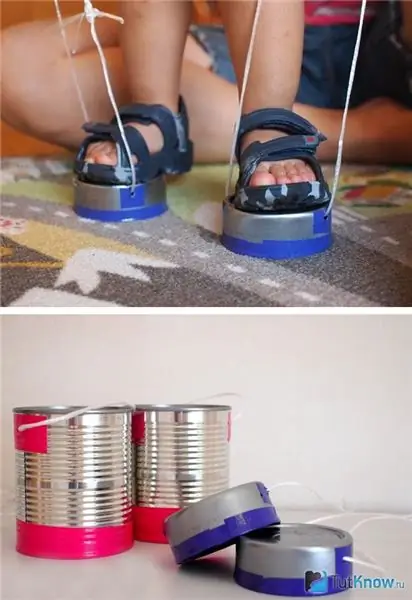
You can also make stilts for children. Take a jar of a suitable size and tape the bottom of each with colored tape or wide duct tape. It is better to take colored materials to decorate the stilts at the same time. A hole must be made in the top of each can. Then thread strong silk threads here, tie them. The child will make wonderful stilts.
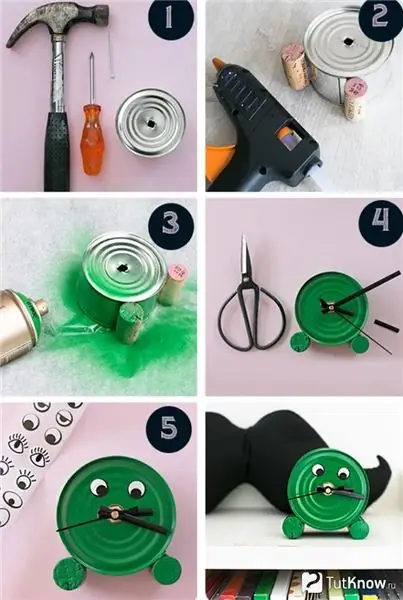
To make your child happy to get up in kindergarten and school, make a watch for him from a tin can.
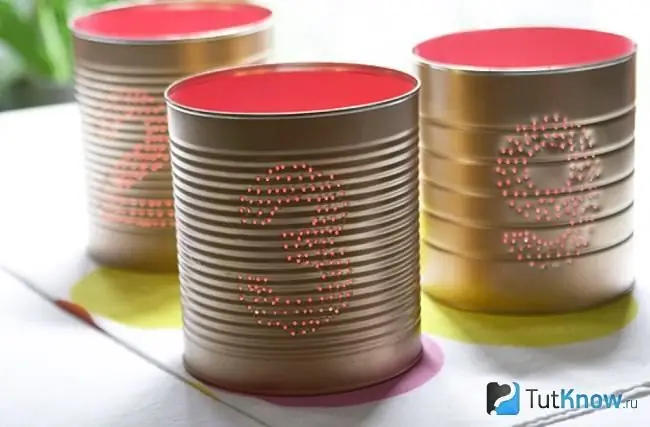
Crafts from tin cans: how to make lamps with your own hands
Paint the washed and dried cans in the desired color. Then, using a thin nail and a hammer, knock out the numbers on the surface. To make them neat, it's best to first draw them using stencils. Then you can put candles inside and place these lighting fixtures to indicate the seat numbers at the celebration.
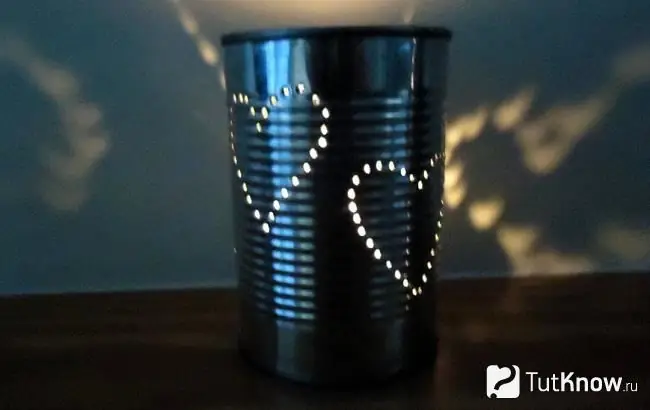
The next tin lamp is made in much the same way. This is perfect for a gift to your loved one. Draw the outlines of the heart and use the nail and hammer to make it more visible. Place a scented candle inside as well.
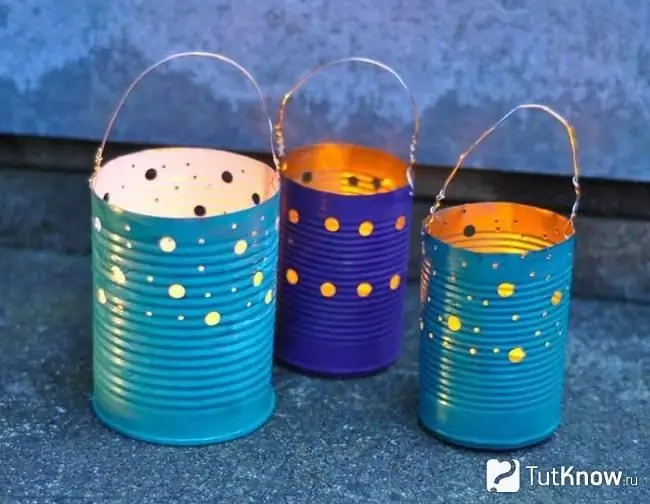
You can do without a template. Then, with nails of various sizes, you will make such holes in the side parts of the can from under canned food. You can place a candle or flashlight inside to make such a wonderful lighting fixture.
And if you take several cans glued together, then you get a gorgeous chandelier. Bring the lighting elements inside so that it performs its function.
Place the cans in this order. Then you will have an original lampshade.
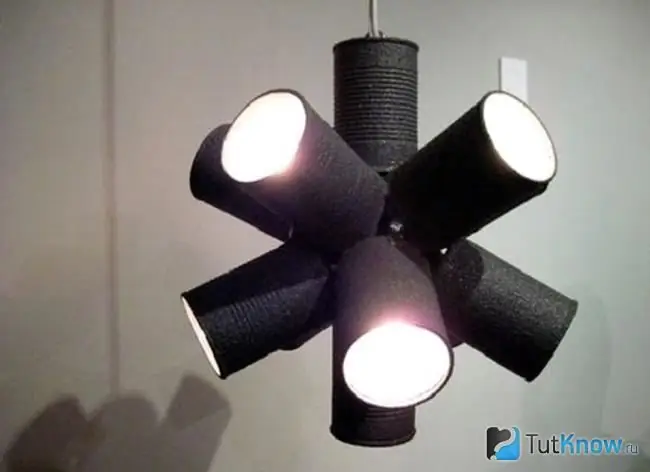
You can not try too hard, but just cover the cans with heat-resistant varnish or paint. If you want, create such wonderful patterns on the sidewalls, and then use such blanks as lampshades.
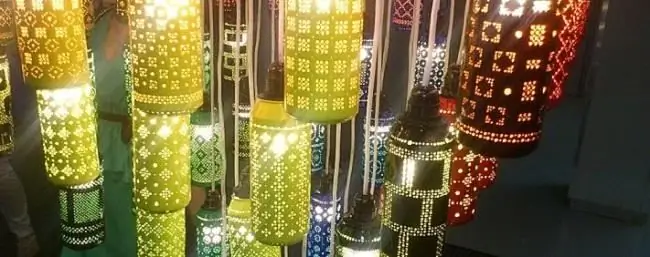
Crafts from cans of this type are very original and will allow you to create original items from waste material.
Autumn has come. Now the topic of leaves is especially relevant. You can transfer it to your work. Insert a carnation and use a hammer to make holes to create such leaves as a result.
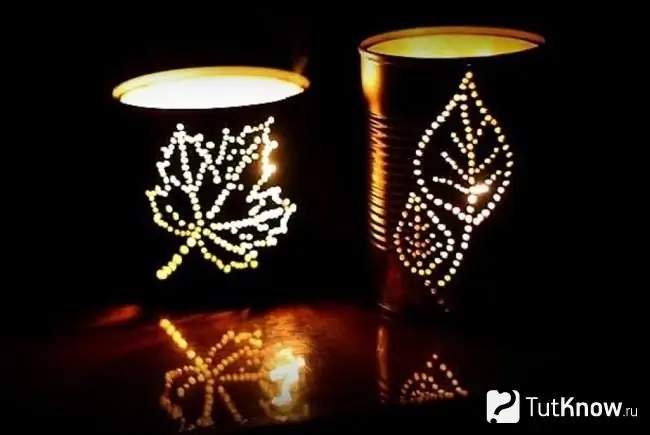
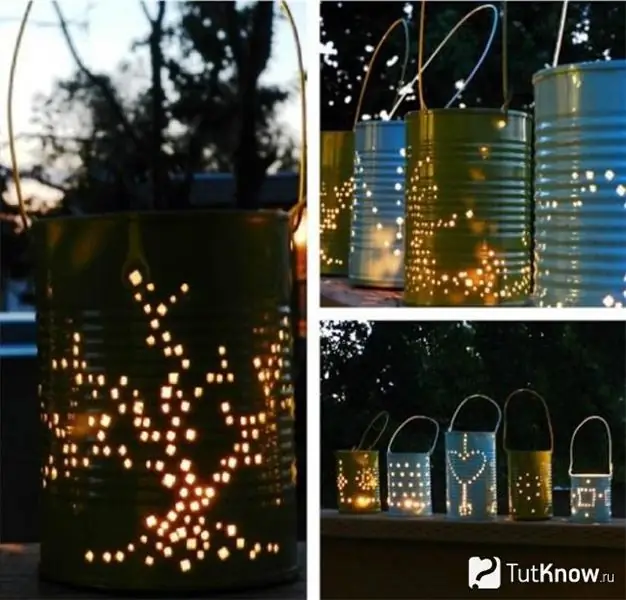
You can provide evening lighting for your summer cottage if you also use canned food cans. Here you can emboss a variety of patterns and designs. Put candles inside. In each jar, on top, opposite each other, make a hole and pass a wire here to then hang these lanterns.
Watch the master class and the photo to it to see how to make a lampshade from a tin can.
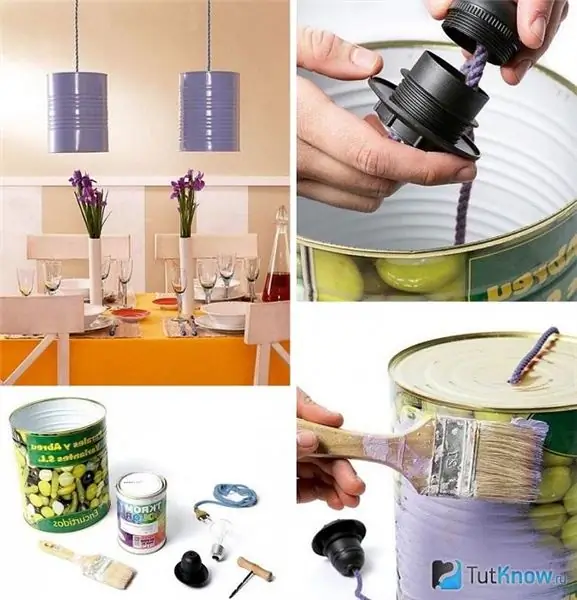
For such work, you will need:
- can of canned food;
- lamp holder and cord;
- low power lamp;
- dye;
- brush;
- hammer.
Using a nail and a hammer, make a hole in the container at the top in the center. Then paint the surface of the can and run the wire through the hole. Attach the socket and the light bulb to it. The other end of the wire must have a plug for a power outlet. Now you can hang the prepared lamp using the eyelet that you place on top. You can place several of these lighting fixtures, see how they will look stylish in any kitchen.
How to make a rose from a tin can - master class and photo
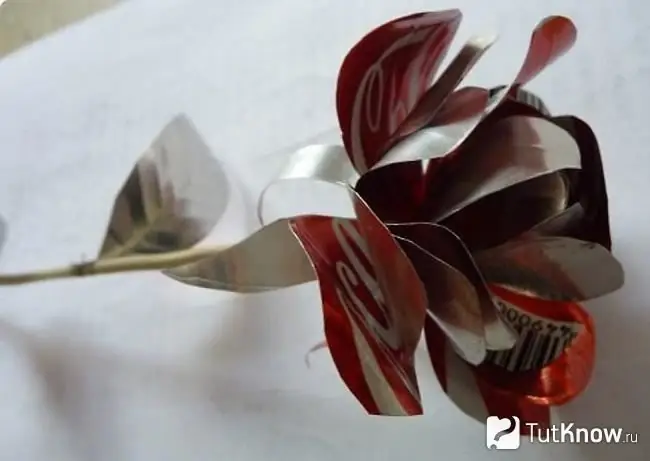
- Such a charming flower will come from a Pepsi-Cola can. But you can take other tin containers. First, you will need to cut off the top of such a jar with scissors. Then, using this tool, make a cut along the sidewall.
- Cut off the bottom of the can and make the resulting canvas smoother. It can be placed with the sparkling part up on a table or other flat surface and with your hand make this canvas more straight.
- Now, using a marker, draw on the shiny side a blank consisting of 4 even petals. In another place of this jar, draw the central rose flowers, consisting of three petals. Sepal resembles a star with thin rays, of which there are 5 pieces.
- If this can is already not enough, then cut out the rest of the blanks from the next can. You also need to get her canvas first. To do this, you will need to make leaves.
- Make the petals more semicircular. To do this, in the center of each you need to put a thick pen or marker and bend the edges of these tin elements here.
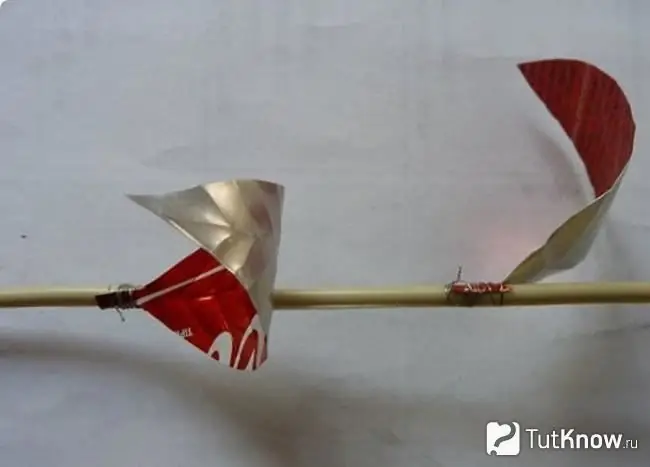
- Then it remains to collect the rose. To do this, take an aluminum rod or wooden skewer and first place a sepal on it.
- If it is a wooden stem, then you must first make a hole in the center of each such blank.
- After the sepal, string the large petals first, and then the central petals of this flower. Attach the leaves. You can do this by wrapping them with wire or thread. Paint your creation as desired.
Crafts from cans can be very different. See how to make a truck out of such a container. A master class with step by step photos will help you.
How to make a car from Coca-Cola cans - master class and photo
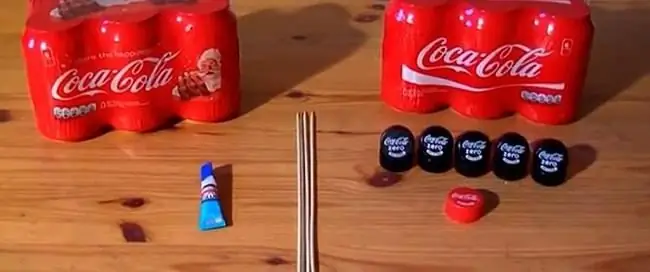
As you can see, you need:
- 12 such cans;
- 4 bamboo skewers;
- 12 plastic bottle caps;
- plasticine;
- Super glue;
- drawing pin;
- 2 key fobs that light up;
- metal ruler.
This car consists of several parts. To make them, you will first need to cut off the upper and lower parts of each tin, then straighten the canvas and draw parts of the blanks on the shiny side.
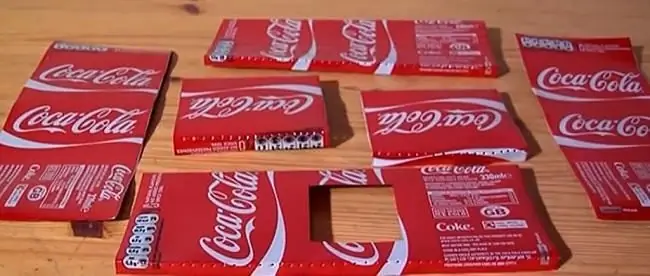
Then, for such a craft from tin cans, you will need to start glueing the parts with superglue. First, they are bent so that the blanks take the desired shape.
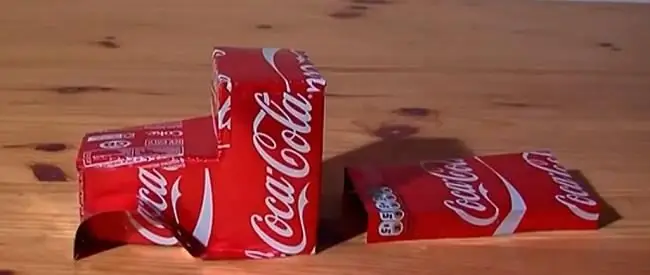
To make two tailpipes, take the leftover tin linen and roll them up with a marker or felt-tip pen. In this case, the shiny seamy sides should be inside. But it is more convenient to make holes in the details first. To do this, do them with a pushpin. On the thicker part of the pipe, attach thinner ones at the top and bottom.

Now you can glue them to the cockpit. When you have completely made it, then you will need to take the parts for the trailer and glue them.
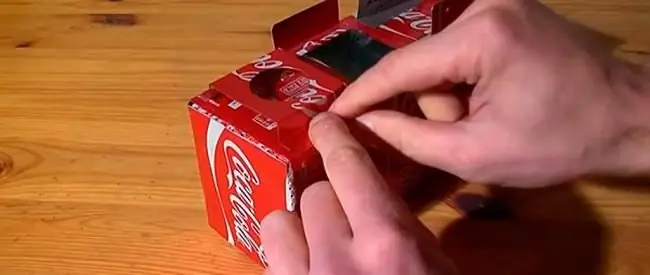
Now make holes in some of the blanks so that you can then thread wooden skewers through them. Saw off the excess parts of these blanks and glue on one side and the other along the wheel made of a plastic cover. Also make wheel rims from tin.
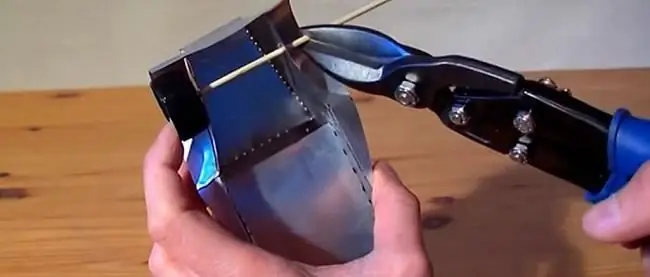
If you have a model glowing in the dark, then you first need to turn on the key fobs, then put them inside the car. In this case, one will be in the cab, and the other you will place in the trailer. But first make holes in these blanks with a button, so that then light will pass through them.

DIY Christmas crafts from tin cans - master class and photo
You can also make a lot of crafts from cans. Take a suitable container, free it from the top and bottom and cut a Christmas tree out of the resulting canvas. Then make a hole in the top, insert a beautiful string here and hang the blank on the tree.
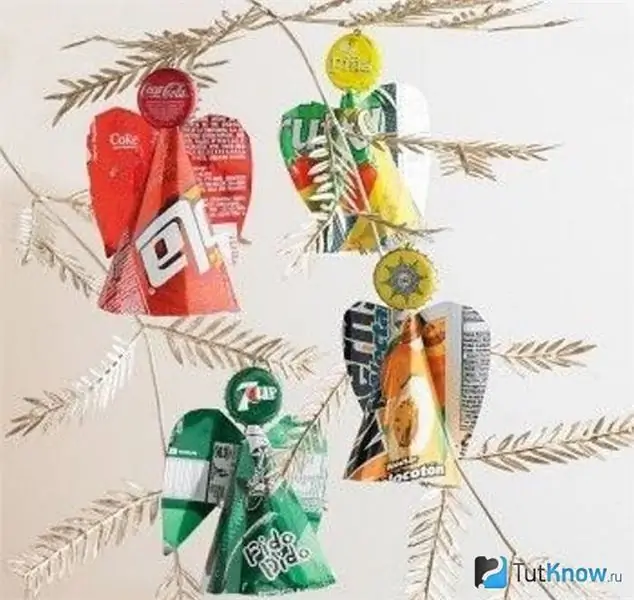
And to make angels, first cut out triangles from the sides of cans, then roll them into a cone. From another container, cut out the wings and glue them, as well as attach the drink lids to such angels.
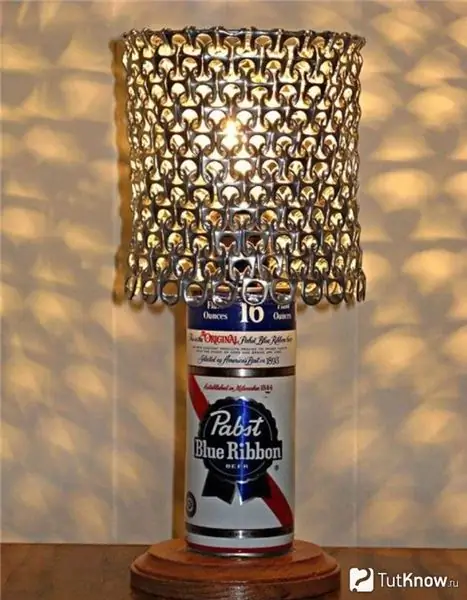
If you made crafts from tin cans, then you still have a lot of rings. Glue them together to make a lampshade. To do this, you can first roll a circle out of the wire, then glue the first row of elements to it. Connect the rest so that each bottom ring is between the top two. For the lamp, you will make a leg from a tin can.
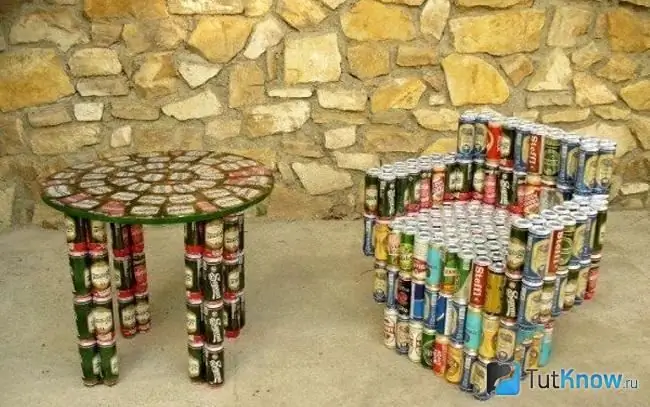
You can make garden furniture from such empty containers. This is not terrible atmospheric precipitation and it can be left in the open air for the whole season. Make a chair, this is such a comfortable table.
Surprisingly, it is even possible to make a house from tin cans, a fence to it. Look at this idea for inspiration.

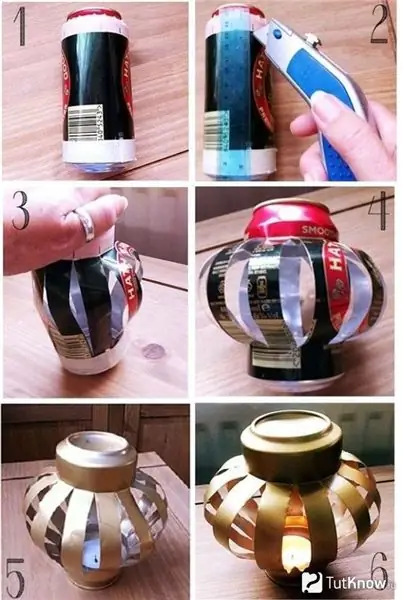
You can also make a flashlight out of a beer can. To do this, chop the sides of this container with a clerical knife to make identical strips. Then you press down on the top of the can and make these stripes more rounded. Now paint your creation in the chosen color. When the coating is dry, place a candle inside.
You can also make a decorative star from aluminum cans. To do this, first draw it on the aluminum sheet of the can, then bend the rays and paint the product if desired.

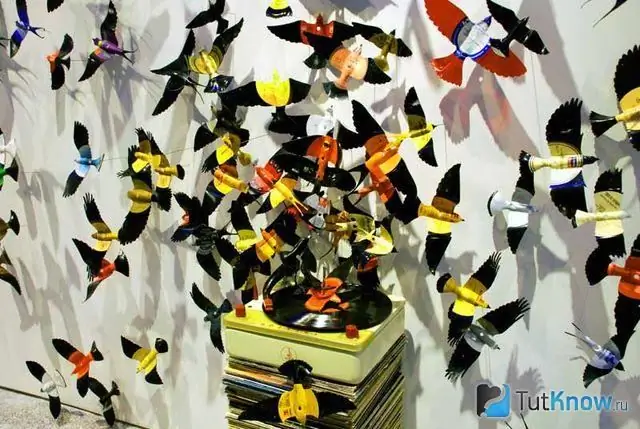
See what wonderful birds will be made from this material. You attach them to the wire, create just such a wall composition.
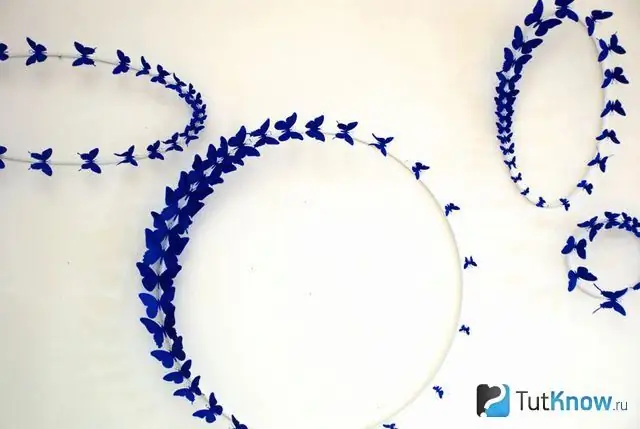
You can make from tin cans not only compositions with birds, but also with butterflies. Cut out such insects of the same or different sizes, distribute them on a metal hoop, having painted them in advance. Now you can hang such an amazing inlay on the wall.
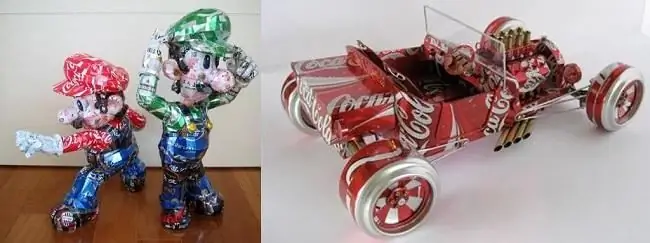
Check out a couple more photos that will surely inspire you, and you will want to make crafts from cans.
And to make your desire in such creativity even stronger, watch the videos presented.
From the first, you will learn what crafts can be made from cans.

The second plot will teach you how to make a rose from a Coca-Cola can.


