
Basic schemes for quilling paintings for beginners. How to make flowers, a Christmas tree, a butterfly, a dog, a snowflake out of paper?
Quilling schemes are samples of compositions that are used by amateurs and professionals in this art form. Rolls are used as basic modules - spirals made of thin multi-colored paper. If you have just started to master this type of needlework, we offer simple beautiful patterns for quilling.
What can be made of paper?

In the photo, a quilling picture
You can make literally anything in the world from twisted paper strips. Masters make paintings and volumetric compositions. For beginners, you can try their hand at postcards, the simplest images of animals, flowers, snowflakes.
The higher the skill, the more complex compositions are made by the master. Easter baskets are made from strips twisted into long spirals. White stripes can be the basis for paper lace.
But for novice quilling lovers, we advise you not to immediately aim at large paintings, but to turn to 1-3-component schemes with light modules. The ready-made scheme will help you think over the arrangement of the elements, their color scheme.
Important! Before starting work, think about what you want to see. Calculate how many modules you need and prepare them in advance. This makes it easier to lay out the picture first, and then glue the rolls.
Basic quilling schemes for beginners
We offer working diagrams that will help you navigate the world of quilling and try your hand. Pictures are simple, their production will not take much time.
Flowers

There are many color schemes in quilling. There are even techniques that are categorized:
- flowers created on the basis of regular modules;
- voluminous using familiar elements;
- openwork;
- without quilling elements (one-piece strip is twisted during the creation of the composition).
We offer color schemes with standard elements available to beginners:
- Cornflowers … Craft 6 drop-like elements. Click on the droplet on the convex side, giving it the shape of an arrow. Cut a strip of paper 1 cm wide with a fringe and roll into a roll. Glue the elements and get a cornflower.
- chamomile … Make a tight yellow roll for the middle of the flower. Make 8 drops of white and attach them with an angle to the middle. A volumetric composition (bouquet) is made of several flowers.
- Carnation … These flowers are perfect for postcards for Victory Day. Form a cone out of green paper by descending the spiral with a ladder. For each flower, make a red and 2 pink drops by pressing them down and forming arrows. Attach the arrows to the cone with an acute angle downward. Make the stem from twisted strips of green paper, the leaves from the base models.
- Tulip … It is a simple flower, which is obtained from 3 teardrop-shaped elements (petals) and 1 "eyes" for the leaf. We form drops from pink or red paper. Glue them together and attach to the green strip. Make the leaf the same shade as the stem and glue it to the strip. Collect the flower on the base of your choice.
- Iris … Another uncomplicated flower. For him you need 2 elongated drops, 2 crescent purple shades, 1 yellow "eye". Place the drops next to them with the convex side down, the crescents at the top, between them there is a yellow detail. Glue the flower elements and attach them to the stem. Make a leaf out of the "wave" element.
There are three-dimensional color schemes, but they are more complex and require more modules.
Snowflake

This is a popular quilling pattern. To make snowflakes, sometimes tight rolls glued together in a fancy composition are enough.
To make the quilling snowflake even and beautiful, make a craft according to the rules:
- On the sheet of the album, draw lines on which the elements of the snowflake will be located.
- Make the middle by twisting a tight roll.
- Make 6 drops and stick them in the middle.
- Form 6 more rolls and press them down at 2 ends to make an eye-like figure. Glue the modules between the petals.
- Take 3 long strips, cut them in half and twist 6 rolls.
- Attach them to the ends of the eye-like modules.
- Make 6 drops from long stripes and glue them to the parts between the drops.
- Roll 6 more pieces and make squares out of them.
- Attach squares to the drops.
- Twist the ring and glue it to the snowflake.
- Pass a rope through it and hang the craft on the tree or on the window.
You can vary how you attach the modules as you like.
Butterfly

Prepare several strips of different shades (depending on your desire). To make a quilling butterfly, prepare a number of details:
- Take 3-4 strips of different shades and form 4 spirals from them (2 large and 2 small).
- Make 2 tight rolls and pull them into cones.
- Connect with the wide ends and glue on both sides of the spiral wings.
- Glue 2 short strips with a width of 1.5 mm (antennae) with an angle.
- Glue 2 small rolls at the ends.
- Attach the product to the base and the butterfly is ready.
In the quilling technique, more complex elements are also performed, but for beginners, an easy composition is enough.
Christmas tree

A quilling tree is made in different ways. Let's look at a couple of simple techniques to create a 3D image. The technique is simple and accessible even to beginners.
To create a Christmas tree in the first version, triangular modules of a green shade are required. Make 8 spirals, flatten into triangles and distribute them in pairs. Each new pair must be longer than the previous one. These will be the branches of the spruce.
For the base, you need another small green triangle, for the top, an arrow. Assemble the composition on a cardboard base, placing the arrow at the top center, then the drops in pairs, expanding the distance between them, at the base between the drops - a small triangle.
Now let's start decorating. Cut them out in brown paper trunk and glue them to the base of the spruce. Place the star at the top. Make balls from tight two-color rolls and place them under the spirals.
Another version of the quilling tree is volumetric. Fold 3 wide strips of paper together and cut into fringes. Twist a roll of them and straighten the fringe to make a voluminous ball. Craft 10 rolls.
Lay them out on the base with a triangle, glue a bead in the center. Decorate the card with a bow, make a frame.
Dog

One of the most interesting and popular compositions is a quilling dog. Despite the complexity of execution, it is popular. Let's take a look at a simple version available to beginners.
A cute puppy emerges from strips of black and white paper of different lengths. To craft a dog, follow the diagram:
- Make a large blob from the white loose spiral. This is the body of a dog. Calculate the size according to the size of the composition.
- From a large, tight roll, form a spiral for the muzzle.
- Make 2 "eyes" and flatten them to make the elements appear flat.
- For the tail, make an elongated module of 2 curls.
- For the ear, form a wide, white drop from several layers, leaving space inside.
- Fill it in with a black, tight drop.
- Connect all the elements and glue them to the base (you get a dog in profile with a raised paw).
- For the eye, use a plastic eye (available at a toy store) or cut out of black paper. Attach it to the muzzle.
- Cut a triangular nose with a rounded end out of black paper and attach to the muzzle.
The dog is ready. The picture can be used as a children's craft in a kindergarten or school.
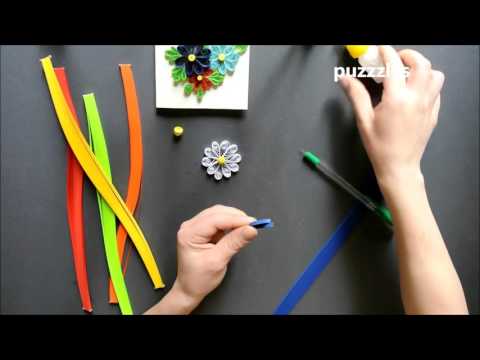
Watch a video about popular quilling schemes for beginners:
Popular quilling schemes allow beginners to try themselves in this original type of needlework. On their basis, a creative process is born, which then develops into complex compositions.


