
Handicrafts for the home are rugs made of corks, stones, threads; lamps from scrap materials. You will also learn how to decorate furniture, create beautiful containers for the kitchen.
Make your home even more comfortable. For this, improvised means are quite suitable, you will need a minimum of materials to turn any house into an example of order and comfort.
Needlework for the home - do it yourself jars for the kitchen
Housewives spend a lot of time in the kitchen. To put everything in its place here, create baskets from available and junk materials, containers in which you can store cutlery for various kitchen trifles.

To make such a cute organizer, you will need:
- empty cans with a capacity of approximately 750 ml;
- small plank;
- leather belt or strip of leather;
- dye;
- self-tapping screws;
- carnation;
- screwdriver;
- hammer;
- file or emery wheel.
Manufacturing instruction:
- Take the jars and use a file or emery wheel to make their upper cuts even. Then paint the inside and outside of the jars in the desired color. Also add some shade to the board. You can even use a wooden kitchen chopping board.
- Now, using a nail and a hammer, make a hole in it to understand where each can will be attached and then it was easier to screw in the screws.
- Such interesting handicrafts for the home will allow you to make such a convenient organizer from waste materials with your own hands.
- When the paint is dry, poke one hole in each jar on the side at the top. Also make this hole in the part closer to the bottom. Put a bar in a jar, place the structure horizontally. Place a nail on the tin and use a hammer to punch one hole and then the other.
- Now it will be convenient to attach the jar to the board and fix it here with a self-tapping screw. If your jar is not wide enough, you can skip the second hole or create it not very low so that it is convenient to tighten the screw.
You can attach the cans to the board with hot glue, do not use screws.
When you fix the containers in this way, you can put cutlery here and admire how such interesting handicrafts for the home helped you to make a comfortable stand.
You can make a jar for bulk products from a regular glass with a screw cap. Transform these things to turn into such a fabulous woodland house that looks like a fly agaric.

- To do this, you first need to wash the jar, dry it and paint it inside with white acrylic paint. Now take a brown outline and make windows with it.
- Then you will need a self-hardening mass of the same color. Make a kind of door out of it. And from colored plastic, mold the plants that decorate this house.
- Use red plastic to create a mushroom cap on the lid, making it semicircular. Then attach some circles here so that you can see it is a fly agaric.
- It remains to wait for the plastic to harden. After that, twist the lid on the jar and tie a beautiful satin ribbon here.
Wicker containers will certainly come in handy in the kitchen. You can put dry cutlery, spices, various rags, and a towel in them. And you will create such from ordinary newspapers. Watch a step-by-step master class that will quickly teach you how to create such cute household items.

Take:
- a cardboard box of the right size;
- newspapers;
- glue;
- knitting needle;
- scissors.
Take newspapers, if they are too large, then you can cut them into rectangles with scissors. Then lean a knitting needle against the corner of the newspaper and start twisting the workpiece. When you have completely done this stage of work, then it remains to glue the free tip of the newspaper to the paper tube.

Thus, create many identical blanks. Take a piece of cardboard and glue it to it in this order. From above, you attach another such cardboard with glue.

Now complete the first row. To do this, you need to take the free tube at the beginning, wrap it around the rest of the tubes.
When its length is not enough, glue the next ones to this tube. When you complete the first row, then complete it like this.

As you can see, the tip of the working tube must be threaded into the loop created at the beginning and pulled upward to create another vertical tube. Then create the second row.
See how you need to connect the tubes so that this place is almost invisible. Make the remaining tip more spacious and insert the narrow end of the second tube here. Additionally secure these places with glue.

Extend the tubes in the same way and continue weaving. And to make the sidewalls, temporarily place a box of the required size inside to braid it.
The tubes that are not currently in use can be attached with clothespins to the top of the box. It's more convenient to work this way.

Now it will be possible to complete the weaving. To do this, you need to wrap the tubes, place them inside the basket, cut off the excess and glue the ends. To give the work a finished look, additionally singe the ends of the tubes. Then you can paint this basket to give it your desired color.

Here is such an interesting handicraft for the home you can offer. Such baskets will bring order to the kitchen, in the rooms. Check out how you can make your bedroom more cozy. For this, the remains of fabrics, threads and other materials are suitable.
Interesting handicrafts for the home - knitting and sewing for comfort

- Even beginner knitters, children and teenagers can make such a wonderful bedside rug. To do this, you need to master only one knitting, it is called a scarf. Take long knitting needles of a suitable diameter and cast on 15 loops on them. Purl 1 row. Flip knitting, purl. To make the edges of the future rectangle neat, it is better to knit the last loop with a purl.
- Thus, create 10 rows. Close the last loop, tighten the thread and cut the end of it. From threads of a different color, tie the same triangles. Then it remains to lay them out by color and simply sew on the hands in order to connect these squares into a single whole. You will get a wonderful rug or even a blanket for the bed.
- You can also make it from leftover fabric. To do this, cut pieces of the same size, sew them on a typewriter so that you first get ribbons. Create several of these, trim them so that they also become the same length as a result. Now you will need to sew to sew these ribbons together.
- You can make a seam on the wrong side. And if you want it to be on the face, then cut rectangles out of these scraps with zigzag scissors, and then sew them right on the front side. You will get such a decor element.
- For extra strength, you can use a narrow tape under the stitching.
- To make the blanket voluminous, cut a sheet of padding polyester to the size of the resulting patchwork blank. The reverse side can be made from a single piece of cloth. Put it down, place a pad of padding polyester on top, put the created blanket from patches on it.
- Sew all these three layers along the perimeter along the edge, you get a wonderful blanket that prompted you how fabric needlework can help you make such a cozy thing for your home.

Patchwork is a pleasant experience. From the remaining scraps, you can create absolutely amazing things. If you want cozy panels to show off in the living room or bedroom, then also collect them from rags.

You can also create a seat for a chair using the patchwork technique. To do this, sew together different shreds of the same size. From this canvas, create a semblance of a bag, inside which there is a filler. Then you can create beautiful chair covers. And you can thus update the existing pads by creating such covers.
Other fabric handicrafts will also add comfort to the home. For your home, create these pillows. To do this, you can take a plain canvas and paint it with a stencil. Then, when the paint is dry, you will sew pillows out of it.

And if you have pieces of felt, then create such an original pillow from them.

You can take an existing one and decorate it in this way. Cut out many semicircular elements according to the template. Cut out triangular wedges at the bottom. Connect these sides, sew to make volumetric petals with folds.
Find the middle of the pillow, attach the first piece of paper here. Then put the 2 sides of the next petal on it and also sew it on. Then connect the others until the entire pillow is closed in this way.
You can also decorate an existing one-color thing by embroidering it from fabric.
Remove the cover from the pillow, sew decorative elements onto it. But it's better to sew a new cover. To do this, take a rectangle of fabric and pin rings made of fabric on one side of it. They will become wheels. Sew these elements here. Sew all the bike parts in the same way. Then you can sew the pillowcase along the sides to give it a finished look.

And if you need to make a baby pillow, then pay attention to the next one. It will also add coziness to your home, and a very interesting thing will complement the science of needlework for the home. Sew a house pillowcase. First, take a regular pillowcase, stuff it with padding polyester. And then, from the free side, sew a triangle of fabric, also pre-filling it with filler. Cover the junction of this roof with the walls with tape. Then you can draw windows, doors, and other decorative elements on the pillow.

How to decorate furniture - the most interesting crafts
This can also be done with patchwork. Then you need to sew new covers for the furniture cushions. You can also cover an old sofa with linen, turning it into a new one.

To decorate the back of a sofa or armchair, you can then stitch the buttons here in a checkerboard pattern to create an original textured pattern.
If you need to make furniture to add coziness to a country house and a place in the yard, then use a regular wooden coil from a large cable.

First you paint it, then attach various tile mosaic elements here. You can also decorate the countertop with apple seeds, watermelons, coffee beans, even cereals. You will cover the space between these small elements with grout or epoxy glue.
And to update the chairs, it is enough to glue an oilcloth cut to the size of the seats here, and just paint the old table.

You can also use paint to renovate an old child's chair. Another option is to paint it first, then cut out the paper pictures and glue them here. When they are dry, cover with varnish on top. You will need to apply three layers in stages.

Decoupage will also make your home more comfortable, such handicrafts for the home will help. But first, on the painted and dried surface, you need to glue the upper part of the napkin. If it is thin, then it is more convenient to apply diluted PVA glue on top.

When it's dry, also secure the design with varnish. And if you want to add a touch of antiquity here, then first paint the chair with a darker paint. When it dries, go over its end with a candle, and then apply a lighter paint. When it dries, go over these places with a fine sandpaper to indicate the lower dark layer and get these scuffs.

You can paint the surface with craquelure varnish so that cracks form on it, and achieve an antiqued effect.
Eggshells will also help. Elements of the shells are glued here to get an original drawing.

How to embroider with satin stitch, rhinestones - interesting crafts for the home
Having mastered this wisdom, you can also decorate your home. Such panels can be hung on the wall directly in the hoop. But if they are useful to you for the next work, then frame the finished canvas, and use the hoop for other work.

To learn how to embroider with satin stitch, take:
- hoop;
- canvas;
- suitable threads;
- a needle;
- scissors.
If you are not creating a drawing by hand, then you will need its template and a pencil or crayon to transfer the outlines of the future masterpiece to the canvas.
- You can draw a selected landscape and then, looking at it, embroider. If you also want to make a similar cactus, then start filling in the first oval first. It is located on one side or the other of the work.
- It is necessary to make straight stitches so that they fall from one side to the other side of this workpiece. When you fill in the first oval without removing the thread, move on to the second. In this way, embroider the cactus. Then take orange or brown threads and use them to create small dots that symbolize the thorns of this plant. After that, it will remain with dark threads to embroider the pots in which the cactus grows.
- To make the satin stitch embroidery more voluminous, first cover such a leaf with horizontal, then vertical stitches.
- To make the sheet look like a real one, then determine where the middle is. You will embroider the first half of the sheet with satin stitch, then the other half.

With such embroidery, your home will become more comfortable. Thus, you decorate not only pillows, but also wall panels. And if you want to decorate your house with unusual paintings, then pay attention to the next one. For her, part of the work is crocheted from thin threads. It is necessary to create a rare mesh pattern.
Then start positioning it on the selected fabric and sewing with the same thread. Use these colors to make the motif look like the waves of the sea, as in this case. You can leave some of the work unfinished so that it seems as if it is pouring sea or ocean water.

And if you want you to have shiny panels, then use rhinestones, beads, sequins, sequins. You can take a ready-made bead thread and embroider with it. From this you will make, for example, a border for the wings of a dragonfly. Then they will turn out smooth without much effort. But do not forget then to string the prepared small shiny elements on a needle and sew them here.

You can make a volumetric applique. To do this, place the sparkles with a slight slope, placing others under them. You will get the scales of a bird. And you will create the plumage on the head from sequins and beads.

Diy patchwork paintings
They will also help you find out what kind of homework you can use and will allow you to use the remnants of fabrics in an interesting way.

Take:
- dense fabric such as felt;
- the remains of various canvases;
- pieces of skin;
- buttons;
- threads;
- braid;
- pencil.
Instructions for creating:
- First, cut out a rectangle of the required size from felt, now draw with a pencil where what will be, start with the house. Cut a rectangle out of white fabric and a roof out of brown leather. Baste these details with a thread and a needle.
- Now lay the remnants of the various canvases horizontally so that you get the semblance of snow or grass, earth and a stream.
- They can be basted with a thread and a needle, or simply pinned with a pin. Determine what the sky will be like.
- It can also be done using a patchwork technique or immediately take felt blue or light blue, and then add the necessary strokes to it with the help of textile paints, so that it can be seen that this is the sky.
- Another option is to make curly clouds out of white braid.
- You have everything attached to the picture, you can start sewing it all on a typewriter. Well, if you want, then do it in stages. After creating a house, sew it on, then move on to other elements.
- When you sew everything so securely, take a bright thread, thread it into a needle and embroider flower buds in the picture. Use green or brown thread to create their stems.
You can also additionally decorate the masterpiece with beads, buttons, sequins.
If you need a panel for a children's room, pay attention to the following.

Such handicrafts for the home will help make a wonderful picture. Use a base fabric of a suitable color. In this case, it is blue, matching the color of the sky. Cut out the clouds from the white. Attach them here with a thread and a needle. Then cut out the sun with zigzag rays from the yellow fabric.
Make houses out of colored canvases so that the children playing here can be better seen, make a sandy strip of a suitable monochromatic fabric. At the bottom are the crests of the waves, create them from the blue shades of the canvases. First, sew all this onto the base fabric. Then you need to take the second and a sheet of padding polyester.
Put a plain canvas down, place a synthetic winterizer on it, put your panel on top. Its corners should be slightly larger than that of a padding polyester. Tuck the edges of the fabric panel on all sides, stitch along the edge. Now you can hang this panel on the wall or make a comfortable rug out of it.
Feel like a modern designer and create a tapestry like this. Here you will need to sew a few pieces of a different color to create the desired pattern.

Patch paintings can include a variety of subjects, invented independently or borrowed from various illustrated books or magazines. You can print a picture of a famous artist, finish it with fabric.
If this is a panel for a children's room, then illustrations for children's fairy tales will be very appropriate. Here is a picture on the theme of the tale "Turnip" will help kids learn its plot.

Cut the characters of this magical story from their respective canvases. Use different fabrics to create clothes and accessories for them. Take a colorful canvas to make a blooming meadow. Complete the painting with the necessary elements. It remains to sew this fabric onto a denser base, for example, felt. To make it look like a painting, make a frame for it from fabric of a contrasting color.
Pictures for the home can also be created using the ison technique. Then you will need to make markings on a board or on thick plywood in order to know where to drive nails. If you want to create the same cup of coffee, then make a border for it with nails around the perimeter. Make the base for the saucer in the same way. Now begin to weave the threads by twisting them onto the nail heads that are opposite each other.

A variety of canvases are created in the same way. If you want to see sea motifs on the wall, then you can also create using the technique of isoning waves from white threads, and from blue to make the tail of a large fish that dived into the depths of the sea.

A variety of threads are used to create such canvases. If you have iris strings, then grab them. Previously, using a pencil or chalk, mark the head of the selected animal on the prepared board. To create such a moose, do not forget to make horns for it, as well as ears. Drive in small carnations around the perimeter, then, starting from the top, wind the threads onto the nail heads located opposite each other to get such a beautiful picture for home comfort.

Such handicrafts for the home are soothing and will allow even beginners to create unique masterpieces.
How to make do-it-yourself rugs for the house - interesting options
They will also become a part of home comfort. Rugs can be created from a wide variety of materials. If you have thick felt available, then cut a rectangle or circle out of it, then start gluing flat pebble stones here. This mat is water and dirt-retaining. And if you create one and put it in the room, then you can knead the soles when you walk on it.

If you have enough wine corks available, then try making a rug out of them. To do this, using a hot gun, you need to glue the plugs in pairs, and then place these blanks at an angle of 90 degrees in relation to each other.

The classic option is thread rugs. Crochet it in a circle starting in the middle with a crochet hook. Then make thread pom-poms and decorate the outside with them. This rug is perfect for a child's room.

And you can make many pompons and create rugs from them. To do this, use pom-poms of various sizes and colors. This is how you can apply the leftover thread. These pom-poms are glued to a dense fabric base, for example, a felt circle.

And if you are thinking of making a set, then in the same technique you can decorate a chair or an armchair by making a similar cover. Pom-poms will also need to be sewn to dense fabric, glue or take a rare mesh and tie the pom-poms here.

Home lighting - the most interesting crafts
This type of handicraft will also add coziness to the house and allow you to make lampshades from almost nothing.

To make a designer piece like this, take:
- beautiful wire;
- glossy magazines with pictures or plastic decor items;
- scissors;
- a light bulb with a socket and a wire.
Cut out pictures of a suitable size from magazines. Take a wire, cut small pieces from it, start rolling various circles of irregular shape out of them. Then use another wire to connect the elements. Or you can take a round base and wrap it with a coil of wire in different directions.
Now take plastic or paper decor elements, make 2 holes in each and use small pieces of wire to attach these elements to the created lampshade. Leave a small space on top so that you can insert a socket with a light bulb here. Secure it to the lampshade with wire.
You can glue translucent plastic elements, thereby also decorating your lampshade.
In this case, the green wire was taken, which will perfectly fit the room in this color scheme.

If you like the plant world, then handicrafts for the home in the form of lighting devices can look like this.

Unscrew the bulb holder carefully from the bulb. Apply moisture-retaining material to the resulting space, water it and plant succulents here.
Then screw the top of the bulb back on and hang it up.
You can pre-grease the outside of the bulbs with glue, then dip them in glitter. You will get graceful light bulbs. In these, you can plant flowers and hang them on prepared branches.
If you want these to be lighting fixtures, then attach an LED light bulb that will illuminate the planted plants at the same time.
If you have a contrasting outline, then use it to draw the desired patterns on the light bulb. You can turn these lighting elements into a balloon. And convert the cartridge into his basket.

The next master class clearly shows how to do this. It will be necessary to draw with the help of black and white outlines on the outside of the bulbs.

See what other interesting lamps you can make with your own hands. Take glass jars, degrease them and glue strips of lace or pretty fabric to them. Or you can specially tie the jars with threads, creating such cozy blouses for them.
By the way, you can tie not only them, but also mugs. Households will surely like this cozy handicraft when you give them such gifts. Such toys will not let your loved ones burn their hands and will become an original gift.

If you love originality and you have unnecessary kitchen appliances in stock, then use them. You can pre-color the colander and grater. When the paint is dry, arrange these kitchen items to create an original light fixture. In this case, the grater can be a leg, and a colander can be the top of a table lamp.

Colanders make wonderful sconces. Such handicrafts for the home will appeal to both adults and children. The kids will be happy to paint these kitchen appliances and then help you hang them up.
If you have an old chandelier, but it has broken shades, then replace them with metal ones. Take a beautiful colanders, drill a hole in the bottom and insert a socket with a light bulb here.
Homemade handicrafts will help to carry out other cutlery. If you have skimmers, spoons and forks in large quantities, then grab them. Drill a hole in the colander at the bottom, also drill a hole in each fork. Now, using strong wire, attach these small elements to large ones.

If you have an old chandelier, but the shades have become unusable, then replace them with metal ones. The same colanders will act as such.

Children will be happy to craft together with adults. Show them how to color such a colander. Then they together with you will hang similar sconces on the wall. These are located in the lower left photo.
If you have only one colander and do not want to paint it, then leave it as it is. Indeed, forks are in perfect harmony with such a metal object. Make a hole at the bottom in a circle on the colander, now attach the forks here, in which you first need to drill holes.

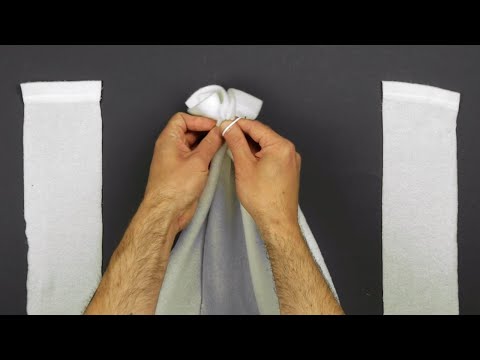
Here is such a needlework for the home, you can advise to take into service. It is quite simple and allows you to turn new items into original design ones. See how you can make rugs out of different materials. Unnecessary fabric, T-shirts, towels will be used. Weaving methods with elastic bands are very interesting.
The following handicrafts for the home will allow you to make original lamps from scrap materials. For this, ordinary PVC pipes will come in handy.


