
The versatility of Rotband plaster, the advantages of gypsum mixtures for wall decoration, advice on the choice of material, all stages of surface leveling. The disadvantages of Rotband gypsum plaster are much less advantages. Competitors note the rather high price of the material and argue that materials of this quality can be bought cheaper. In addition, experience in finishing works is required to obtain a good result.
Preparatory work before plastering the walls with Rotband

To obtain a high-quality surface, you cannot do without special tools. Stock up on the following attachments and tools:
- Plumb line - to assess the verticality of the wall.
- Trowel and spatulas of different widths - for applying and leveling the mortar on the wall.
- Steel float - to create a glossy surface.
- Toothed trowel - obtain a high quality surface.
- Long rule with beveled edges - for smoothing the plaster on the beacons.
- Building level - for placing beacons vertically.
- Measuring containers - to maintain the proportions of water and powder, two identical boxes or jars that are not afraid of water will do.
- Small straight-sided tray - for working with a small volume of mortar.
- A bucket of water - for rinsing the solution off the spatula.
- Grout - for leveling the surface for wallpapering or applying a finishing putty.
- Construction mixer with a power of at least 800 watts. Instead of a special tool, you can use a powerful drill with a stirring attachment.
- Plastering plane - for leveling plastered surfaces in the corners.
Free the walls from all types of coverings - wallpaper, old tiles. Examine the surface and remove the loose plaster. Remove strongly protruding bumps that are visible to the naked eye from the surface. Lime plaster can be removed well with a hard trowel. Protrusions on brick and concrete walls are removed with a hammer and chisel. Remove greasy stains from surfaces. Notches must be made on smooth concrete. Before puttingtying, clean the surface of dust and prime with a deep penetration compound. Cover metal parts with anti-corrosion agents.
For a more accurate determination of the unevenness of the wall in the corners, screw in four long self-tapping screws and connect them crosswise and around the perimeter with threads without sagging. Align the threads in one vertical plane using plumb lines and move them until the minimum distance for which the Rotmand putty is designed is 5 mm. By the position of the threads, you can determine the unevenness of the wall. It is better to cut off large defects, otherwise the material consumption will be too high. At this stage, you can check the location of the outlets and switches, if necessary, move them to a new place or pull them out if the plaster covers them.
The leveling technology depends on the type and size of the unevenness. A deviation of 10 mm with a wall height of 2.5 mm is not visually noticeable, therefore, such a wall in the vertical plane can not be modified. The easiest way to modify the wall is if there is unevenness in certain areas. In such cases, there is no need to put up beacons, the sections of the walls on the sides will serve as the bases for the rule.
After cleaning, the wall must be primed with a product that is selected depending on the material of the partition. Primer "Knauf betonkontakt" is used to treat walls that slightly absorb water - concrete, cement. The primer "Knauf Grundirmittel" or "Knauf Rotband Grund" is specially produced for walls with high absorbency.
Installation of beacons for wall plastering by Rotband

If it is necessary to align the entire wall, install beacons that serve as guides for the rule. For these purposes, factory-made T-profiles made of galvanized perforated steel are best suited. The lighthouses are available in heights of 6 and 10 mm.
The last samples are tougher, but the dimensions increase the consumption of the putty by 1.5 times. For Knauf Rotband plaster, the instructions for use, developed by the manufacturer, recommend beacons with a height of 6 mm.
Lighthouses are placed in a vertical plane using a building level. The guides are placed at a distance of 200-300 mm from the corners. The tool should be slightly shorter than the beacon. From the purchased blanks, cut the profiles, the length of which is equal to the height of the wall. Put putty on the wide side of the profile every 300-400 mm and lean it against the wall. Set the level on the lighthouse, check its position.
Press down the profile with a level, moving it in a reciprocating motion until the rail becomes vertical, and the front side is at the level of the threads stretched over the wall. The maximum gap between the profile and the wall is 0.5 cm. Fill the gaps between the profile and the wall with plaster and let it dry.
Set the next profile at a distance slightly less than the length of the rule. If the length of the tool is 2 m, the distance between the beacons is 1.8 m. For a wall with a length of 4 m, 2 profiles are sufficient, which will divide the partition into 3 equal parts. First, the area between the profiles is processed. After the plaster has dried, the edge is treated using the finished surface as a base for the rule.
Protect the outer corners with galvanized sheet metal corner profiles. They are set in a vertical plane and fixed with putty. Do not use aluminum, they are too soft.
Preparation of Rotband plaster solution for walls

The plaster is sold dry in three-layer paper bags of 5, 10, 25 and 30 kg. The powder can be white, gray, or pink. Each color has different grain sizes, which affect some characteristics of Rotband plaster and wall finishing technology.
Pink grain - large, up to 1, 2 mm, white and gray - no more than 0.5 mm. The gray plaster, after being applied to the wall, flows down a little, as a result of which horizontal waves appear on the surface. The pink powder has no such properties.
For finishing, it is necessary to use plaster with a small grain size, white or gray, but after drying, the surface must be additionally rubbed and sanded. Manufacturers do not indicate the color of the material on the package. It can be recognized by the manufacturer of the goods, which produce only one color putty.
To increase adhesion, special additives are added to the plaster. Manufacturers recommend using the mixture in rooms with normal humidity, but can be used in bathrooms and kitchens.
All types of plaster have a uniform shelf life of 6 months. To protect against counterfeiting, manufacturers indicate on the packaging the original production date, which contains the year, month, day, hour, minute, second. The seconds should differ by 4-6 digits, after this time the next bag comes off the conveyor. If all the numbers on the date of manufacture are the same, then the product is a fake.
The solution is prepared according to the proportion: 2 parts of the volume of water - for 3 parts of the volume of dry material. The amount of the prepared solution is influenced by the hardening time of the plaster - about 20 minutes.
If there will be 1 person to plaster, then for the preparation of the solution you will need a container with rounded corners with a volume of 10-15 liters. A box of water-based paint is suitable for stirring. One person will not have time to work out a larger volume before the solution hardens. For stirring, stock up on a construction mixer with a speed control function.
The solution is prepared as follows:
- Fill the bucket 1/3 full with clean, cold water. The colder the water, the longer the solution will remain liquid.
- Fill a container with as much powder as is needed for a given amount of water.
- Add 70% of the powder to the water and mix with a construction mixer.
- Pour the rest in small amounts, controlling the consistency of the mixture, and continue stirring.
- After all hard lumps have disappeared, remove the instrument from the solution. With good quality plaster, the funnel after the mixer does not fill up quickly.
- Draw the mortar on a trowel and turn the tool over, the plaster should not fall off. If necessary, add dry mass to the solution and stir again.
- After obtaining the permissible consistency, let the mixture stand for 5 minutes and stir additionally.
- Wash the drill bit; the tool does not clean well when it is dry. To do this, immerse the nozzle in water and turn on the tool.
The consumption of Rotband plaster for wall treatment is difficult to calculate, so it is necessary to decide in advance what to do with the unworked solution. For approximate calculations, it is assumed that for processing 1 m2 a surface with a thickness of 10 mm requires 8.5 kg of dry plaster.
Technology for applying Rotband plaster on walls

Before applying Knauf Rotband gypsum plaster, make sure that the wall is completely dry. Manufacturers recommend working with the material at room temperature with a humidity of about 60%.
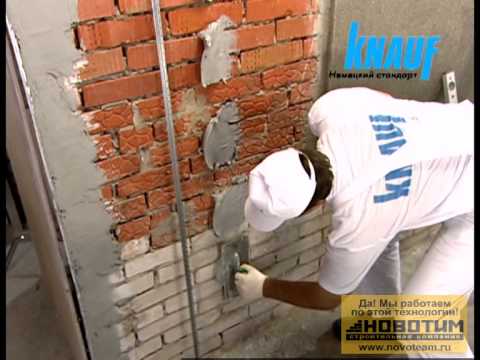
The plaster is applied to the wall with a wide tool, from the bottom up, after gaining some experience, the solution can be thrown. Immediately cover an area 1 m high from lighthouse to lighthouse.
Press the rule against the guide with the beveled side and move from bottom to top in zigzag movements, pulling the solution up. Periodically clean the rule of excess mortar with a spatula and dump it into the bucket. If necessary, add the solution to the place of the defect that has appeared and continue working. After leveling one area, move on to the next.
Rotband plaster is plastic and often floats, so iron the treated areas once again with a rule. One hour after processing the wall, remove the beacons, fill the gaps with mortar and level the place with a rule, resting on the finished wall.
If the wall is very uneven and the maximum plaster layer of 10 mm is not enough to level it, a second coat can be applied. To do this, go over the wet plaster of the first layer with a comb trowel to create a relief. Let the wall dry, then saturate it with Knauf Grundirmittel or Knauf Rotband Grund primer. After the wall has dried, apply a second coat of plaster and level it. For reference: the maximum layer of Rotband plaster is 50 mm.
The second layer on cement surfaces or walls made of expanded polystyrene is applied only to the reinforced mesh. The procedure for plastering such surfaces in two layers is as follows:
- Apply a thin layer of mortar on the first layer of plaster.
- Lay the mesh on it, drown in the solution and carefully level with a spatula.
- Let the plaster dry and then rub over it with a sanding paper.
- Remove dust from the surface and prime the wall.
- Once dry, you can apply a second coat.
In 40-50 minutes after stretching, the solution begins to set, during this period the surface must be leveled. Run a metal strip along the wall and cut off excess parts, fill in the recesses and smooth them if necessary. Large irregularities can be removed with a plastering plane.
You can continue plastering the walls with Rotmand as follows:
- Dilute the plaster to a liquid sour cream.
- Apply the solution to the wall and smooth it out with a trowel. After the applied layer has dried, the procedure can be repeated. The quality of the wall will be better than after the rule.
- At this point, the wall is allowed to structure. To do this, walk over the still wet surface with a grooved roller or other textured tool.
The level of alignment depends on the planned way of decorating the wall. Laying tiles does not require a perfect surface, so after leveling the plaster, as a rule, you can start decorative work.
For wallpaper, the surface quality after smoothing is usually not suitable, tool marks and other barely visible defects remain on the wall.
They are removed by the next operation - grouting. It is performed 15 minutes after finishing work with the rule, the wall must remain damp. For grouting, you will need a hard sponge or grater. Moisten the accessories with water and work the wall in a circular motion. After the procedure, there will be no traces of the spatula on the wall.
If the wall is planned to be painted, a fiberglass reinforced mesh with 2x2 or 5x5 mm cells is used to obtain a high-quality surface. Apply a thin layer of putty to the wall aligned with the rule.
Lay the net on top. The material must cover the corner profile, otherwise a strip will remain on the wall. The mesh is laid with an overlap of 10 mm. Smooth the mixture that is squeezed out through the plaster with a wide spatula, remove the excess solution. After drying, cover the wall with two layers of finishing plaster and sand with a fine-grained sandpaper.
A high-quality paint job requires a glossy wall surface. It is achieved by smoothing the plaster. The procedure is performed 3-4 hours after applying the solution to the wall. The coating is again abundantly moistened and processed with a metal tool - a float. After smoothing the plaster, finishing with putty is not required, the wall can be painted.
The drying time of the treated wall is 6-7 days with a layer thickness of 1 cm. The period depends on the humidity and ventilation of the room. It happens that the wall dries for two to three weeks. Until it is completely dry, further work on wall cladding is not allowed.
How to apply Rotband plaster - watch the video:
It is not easy to work with leveling mixtures, but Rotband gypsum plaster allows even a beginner to cope with the task. The quality of the finish is influenced more by the conscientiousness and accuracy of the performer than by the properties of the material. Compared to a professional, the amateur will spend more time, but the result will remain excellent.


