Advantages and disadvantages of engineered board coatings, the method of laying floorboards on a cement screed and on plywood, the rules for choosing a consumable. Engineered board is ordinary plywood with a glued outer layer of elite wood, with grooves and projections on the ends of the long sides, with the help of which a high-quality seamless covering is created. The methods of forming floors from this material will be discussed in our article.
Advantages and disadvantages of engineered plank decking

Engineering boards have a complex structure due to which they have excellent properties.
Let's take a closer look at their advantages:
- The floorboards are connected using tenons and grooves. With their help, the load is evenly distributed over the surface, the service life of the floors is extended, and the installation time is also reduced.
- The samples are beautifully decorated.
- The flooring elements form a seamless connection.
- After long-term use, the surface can be restored by grinding, followed by coating with decorative agents.
- These floors look good in any interior.
- After laying, the building material acquires good geometric stability and weakly changes shape and size with fluctuations in temperature and humidity.
- It is possible to create floors without sills in doorways.
- The flooring has good sound insulation properties.
- Boards are available in various thicknesses, which makes it easy to remove the coating throughout the apartment in one level.
- Thin samples can be used to form warm floors.
- Visually, the coating is indistinguishable from the elite floors made of solid planks.
- The floorboards can be glued directly to concrete.
There are very few disadvantages of the engineering board:
- The plywood base does not allow floating installation of the floorboards.
- The installation costs are high due to the use of expensive glue.
- Construction work must be carried out strictly in accordance with the technology of installing the flooring.
- If damaged, the floorboards are difficult to replace.
The choice of materials for the installation of an engineering board
When laying engineered planks, you will need plywood and glue. To obtain a quality flooring, only those types of materials are used that are compatible with each other. Let's get acquainted with the characteristics of the main elements.
Engineering board
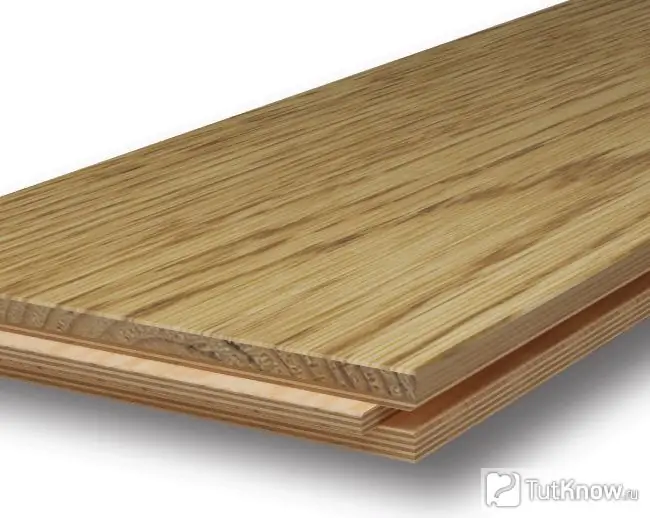
It is produced in the form of a 2-3-layer strip. The base is moisture-resistant plywood with a thickness of 7-14 mm, and the front part is formed by veneer made of valuable species of trees - oak, larch.
When making sheets, wood fibers are arranged in different directions at the base, which ensures the stability of the entire material pie. The product does not deform when temperature and moisture change.
The middle layer is also made from valuable rocks, but their fibers are located perpendicular to the top layer. Another layer of wood is often attached to this structure, so the total thickness of the engineered board can be up to 30 mm.
All components are glued together with polyurethane hot melt glue, which does not allow the material to delaminate under severe operating conditions. During installation, the samples are joined together by means of tool joints.
Adhesive for installation work

The key to a high-quality durable flooring from an engineered board is a correctly selected adhesive composition.
General requirements for glue can be formulated as follows:
- The adhesive ensures a high-quality connection of the floor components throughout its entire service life.
- An engineered floorboard can change its size under the influence of the environment, therefore, after hardening, the adhesive layer remains elastic.
- The product does not shrink, resulting in a squeak.
- There should not be a lot of water in the solution, which causes the lumber to swell.
- After drying, the solution should not emit harmful vapors.
The above properties are possessed by only a few types of adhesives:
- Water-dispersed adhesive … Used to fix moisture resistant material. The plywood must be moisture resistant, and the hardwood face must be oak or larch. It must be remembered that products from some species do not tolerate moisture well, for example, beech. The product is completely harmless, odorless.
- Synthetic glue … It is used for fixing timber that quickly absorbs moisture. Mixes based on rubbers or synthetic resins are popular. These substances contain solvents, so observe fire safety regulations. After being applied to the surface, it remains liquid for 15 minutes, which allows you to correct the position of the boards. Finally, the product hardens only after 5 days.
Two-component glue has significant advantages over other compositions: the ability to use on a variety of surfaces, the bond strength is several times higher than that of other products. After a day, the glued surface can be sanded. However, when applied, the product emits harmful substances, so you need to work in respirators.
One-component glue - universal, can glue any products, including lumber, which absorbs moisture well. Once glued, the floors may be sanded after 24 hours. Positive aspects of the solution: it has no smell, does not lose elasticity after curing, it is produced without solvents, epoxy resins and water, has good adhesion to any materials, has high sound-absorbing characteristics.
Engineered board underlay
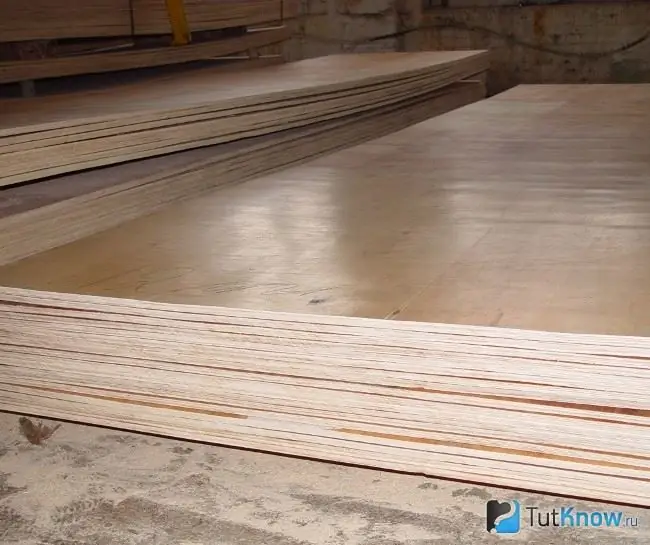
The choice of material for use as a substrate depends on the operating conditions. For such purposes, FC or FBA sheets will be used. Construction moisture-resistant plywood FK is used when laying on concrete and when operating in wet rooms, including in the kitchen, in the bathroom, and in the hallway. Ordinary FBA plywood is laid in dry rooms.
When buying, pay attention to the following points:
- If the sheets are laid on concrete or cement screed, a 12-15 mm thick sheet will be needed, if on logs, the material is placed in two layers. Remember that two 10mm sheets and 1 20mm sheet have the same stiffness.
- The surface of the products must be sanded.
- Plywood is sold in sheets of various sizes. For work, choose panels of such dimensions that will give the least amount of waste.
The moisture resistance of the product can be increased by impregnating it with a solution based on polyvinyl citate. After drying, a layer of antiseptic-fungicide is applied to the surface.
Technology of laying engineering boards on concrete
Laying an engineering board on a screed is by far the most common installation option.
Preparatory work before installing the board
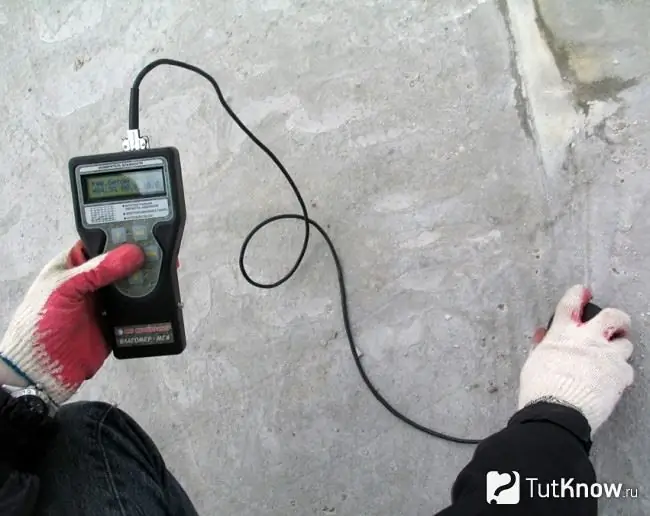
Before starting work, check the condition and quality of the screed:
- Permissible concrete moisture content - no more than 3%. The value is easy to determine with a moisture meter. In the absence of a device, the quality of the screed is determined by indirect signs. To do this, tape a piece of plastic wrap to the floor. If water drips from it in a day, it means that the base is not dry enough.
- Check the flatness of the surface. To check, use a rigid ruler 1.5-2 m long. Lay it on the concrete and measure the gap under it with a feeler gauge. The permissible non-flatness is 2 mm per 2 m of the ruler. Repeat the operation anywhere else. Unevenness can cause unpleasant noises when walking, squeaks and sagging of floorboards.
- Measure the deviation of the floor surface from the horizontal plane. The operation is carried out using a building level. A slope of 0, 2% and higher between the most distant points on the floor is not allowed.
- Remove high areas by sanding, underestimated ones by filling with a self-leveling mixture.
- After finishing, apply a few coats of polyurethane primer to the concrete screed.
Bring the material to the room where the work is planned, unpack the packaging and leave it for a week to acclimatize. Place the samples on the floor and match the floorboards so that they form a beautiful pattern. The wood is not homogeneous, and to get a good result, you need to find the right order of the planks. Mark the location of the floorboards on the floor.
Inspect them for defects before laying the engineered boards. Make sure that the pins of the products fit into the grooves without effort, with a barely audible click. If you find defective floorboards, contact your dealer and replace them. After installation on the floor, no claims will be accepted. Buy blanks only in their original packaging, which ensures the safety of the material for a long time.
Instructions for fixing the engineering board
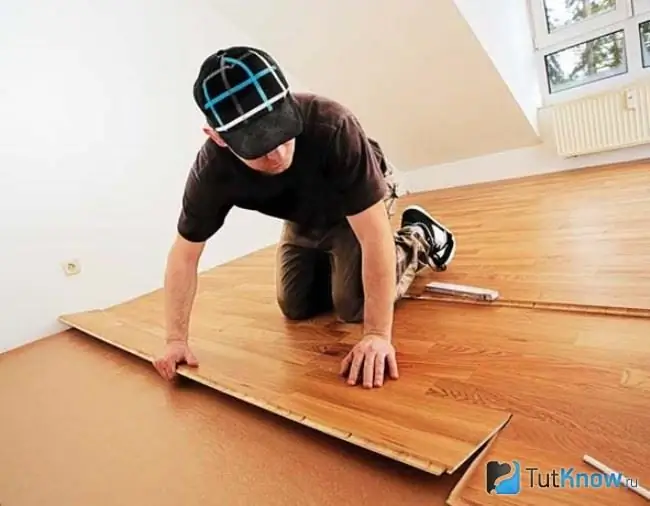
Installation of an engineering board can be performed at a temperature of + 20-25 degrees and a humidity of 45-60%. Subject to these conditions, the material will not deform during operation. Work starts from the far wall towards the front door, so as not to walk on the new floors.
The board is laid as follows:
- Place a 10-15 mm expansion block along the wall.
- Lay the first row in accordance with the marking and slide it all the way into the rail. Cut off any excess planks to lengths, ensuring adequate gaps along the walls.
- Draw a pencil around the first row. Remove the boards and apply the engineered board adhesive to the marked area using a straight trowel. Run over it with a serrated tool to create a thin, even layer.
- Place the boards on the mortar and slide them towards the wall until they stop.
- Place the next sample next to the first one according to the marks and slide towards it until the groove joins the tenon. Use a rubber mallet to hit it if necessary.
- Repeat the gluing procedure for the second board and all subsequent ones. During installation, the spikes are not lubricated with glue, the connection is made dry. After installing several rows, press down the floorboards with a load.
- It is advisable to complete the work in one day in order to avoid the appearance of steps due to uneven curing of the glue.
- Saw the last element lengthwise, providing a gap of 10-15 mm between the floorboard and the wall.
- If the deck meets a floor made of a different material, fit expansion joints, such as a cork pad, between them.
It is forbidden to walk on the new floor for 3 days. After the glue has completely dried, remove the technological bars along the walls, cover with decorative and protective solutions and install the skirting boards.
Methods for mounting a plywood substrate for an engineering board
Mounting an engineered board on plywood is considered a classic option for forming a flooring. The substrate acts as a damping layer for it. The volume and procedure for performing work depends on the structure of the base on which the lumber is attached.
Installation of plywood on concrete
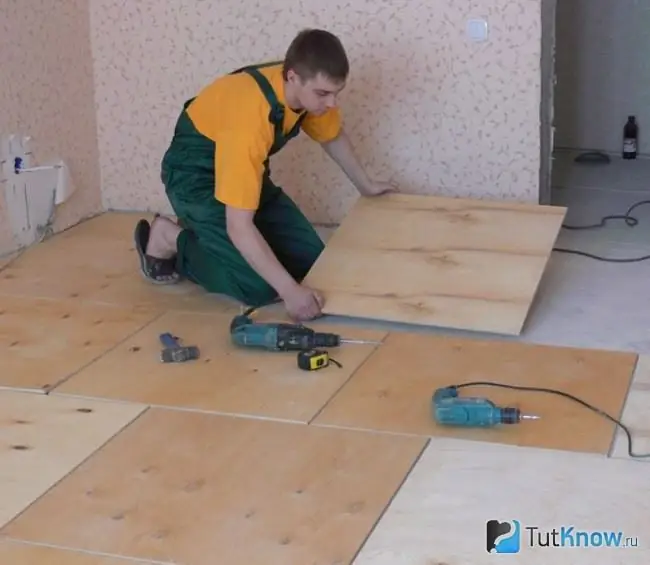
Installation of plywood on a screed can be performed provided that the surface of the base is of high quality.
The work is carried out in the following sequence:
- Check the flatness and horizontalness of the surface under the substrate.
- Cut the sheet into 75x75 cm or 50x50 cm squares to relieve internal stress.
- Apply a layer of glue to the base, wide enough to fit one row of plywood. If you have a choice, use a resin based product or a one-component parquet compound.
- Place the first row of material on the mortar and secure with dowels, 9 pcs. US2… Sink the heads of the screws into the wood. Leave a gap of 2-3 mm between the workpieces, and provide an expansion gap of 15 mm near the wall.
- Repeat the operation for all subsequent rows.
- Grind the sheets with a sander or power drill with an abrasive head. For work, sandpaper with coarse grains P24 or P36 is suitable.
- At the end of the operation, remove the dust with a vacuum cleaner.
- Check for greasy and other difficult to remove stains. Use a solvent for cleaning.
Plywood flooring on logs
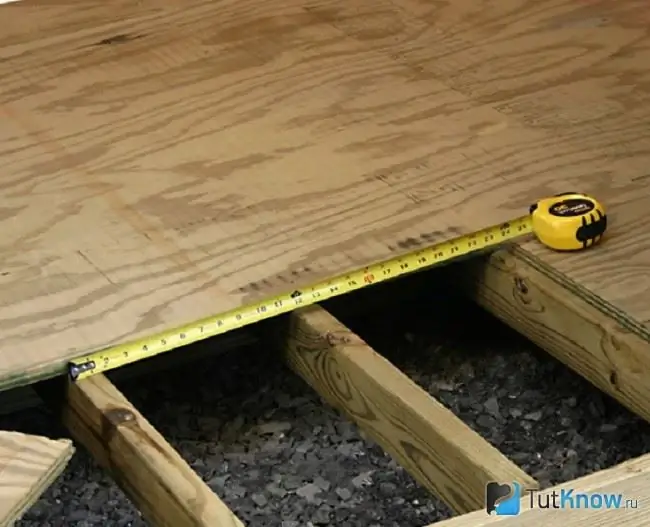
This option is used in the following cases: if it is necessary to ideally remove the floor in a horizontal plane; with a large slope of the flooring, when a thick layer of screed is needed for leveling; to ensure ventilation of the space between the wood flooring and the concrete; for floor insulation.
The preparation of the base is carried out in two stages. First, a crate is assembled on a hard surface for a plywood substrate. To create a supporting structure, you will need beams with a thickness of more than 50 mm and a height of 100-150 mm.
When making the frame, use our recommendations:
- The standard distance between the beams is 50-60 cm. Jumpers are installed between them to make nests 50x50 cm or 60x60 cm. Jumpers are attached at 50x50 mm corners. Form the nests in a checkerboard pattern.
- The dimensions of the cells are chosen according to the dimensions of the insulating boards.
- There should be a gap of 30-40 cm between the partition and the nearest beam.
- To make walking on the finished flooring noiseless, put a layer of sound insulation on the beams - glassine, laminate backing, synthetic winterizer.
- In the room, the logs are fixed in such a way that the boards lay parallel to the direction of the window lighting. In the corridor, floorboards are placed along the main movement of people.
- Attach the joists to anchor bolts or dowels, which should go 5 cm or more into the concrete base.
- Install waterproof and heat insulating panels in the nests, for example, made of polyurethane foam or mineral wool, at least 5 cm thick. In order to save money, you can use sawdust or expanded clay. The panels are laid without a gap, if necessary, the excess is cut off.
- Cover the insulation from above with a vapor barrier tape and fix it to the logs with a stapler.
- Make sure there is a gap of at least 2 cm between the plywood and the insulation layer.
- Cut the plywood sheets to eliminate internal stress into squares of 55x55 or 65x65 cm in size. The dimensions may be different, the main thing is that they overlap the slots on the crate, and the joints are located in the middle of the log.
- Install the workpieces on the logs and fix them with fasteners every 20-40 cm. For such purposes, black self-tapping screws with a length of 35-50 mm are best suited. To prevent the floor from moving when fixing, drill small holes in advance.
- Lay the sheets in a checkerboard pattern, according to the location of the lags. Leave a gap of 2-3 mm between them. They are then sealed with wood putty before installing the topcoat. Cruciform joints are not allowed. Provide 15 mm gaps along the wall.
The plywood surface is treated and the engineering board is fixed in the same way as in the case of mounting the substrate on concrete. The sheets of the second layer are stacked with an offset so that the joints are located in different places.
Installation of plywood on the old floor
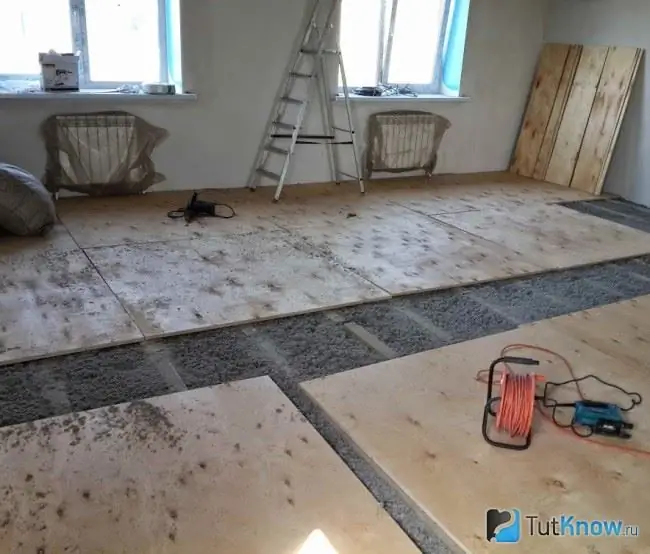
Check the strength of the existing flooring before starting work. Replace decayed and broken floorboards.
Perform the following operations in the following sequence:
- Remove protrusions, sand the floor with a 40 or 60 grit abrasive, preferably a sander.
- Remove dust and rinse the surface.
- Make sure the floor does not require moisture protection or thermal insulation.
- Lay 12mm plywood on top of the old flooring. Attach the sheets to the old floor in the same way as to the logs.
The technology of laying the engineered board on plywood is similar to the installation of the material on concrete. The difference is in using a different glue. It is best to use a two-component polyurethane adhesive for fixing to plywood. How to lay an engineering board - watch the video:

Engineered board allows you to get a practical coating, which is not inferior in quality to the best parquet samples. The main condition for obtaining a good result is adherence to the installation technology and a responsible attitude to work.


