
Surface marking and installation of the frame are the main stages of equipping a plasterboard suspended ceiling. If the work is carried out incorrectly, the structure will turn out to be uneven and unsafe in operation due to its low bearing capacity. When equipping a suspended plasterboard structure, special attention must be paid to the correct installation of the profile. It is on the rigidity of the frame and its strength that the reliability of the gypsum plasterboard ceiling and its durability depend. Before starting work, understand the existing types of bases and materials that are used for their installation.
Varieties of frame for a plasterboard ceiling

By the type of material used, frame bases are distinguished:
- Metallic … They are inexpensive, have good performance characteristics, ease of installation, and practicality.
- Wooden … The material is more expensive, less durable and requires processing before use. There are certain difficulties in installation due to periodic changes in the parameters of wood and its dependence on temperature and humidity conditions. One of the advantages is environmental friendliness.
Nowadays, more and more often the frame for the ceiling under the drywall is equipped with metal profiles. By its structure, such a crate can be:
- Honeycomb … The attached profiles and lintels form the same mesh.
- Transverse … This method of fixation is more often used by craftsmen who have the skills to equip frames. In this case, the drywall sheet is attached only to the transverse profiles.
By the number of tiers of the structure, the base is distinguished:
- Sibling … The ceiling profiles are in the same plane.
- Multilevel … Designed for the installation of several tiers, and therefore more complex in execution.
Having selected the material and type of construction, you can proceed to the preparation of the base surface.
Installation of a cellular metal frame for a plasterboard ceiling
This type of base is the best option for installation in cases where you do not have special equipment skills on the ceiling of the frame for drywall. To properly mount the crate, you will need not only the literacy of marking and the reliability of the fastening. First of all, you need to select the components and understand their purpose.
Preparatory work before installing the honeycomb frame

First, you need to clean the ceiling from the old finish and remove the loosely fixed elements. If there are spots of mold, rust, mildew on the surface, you must also get rid of them at this stage. Otherwise, after a while they will appear on the false ceiling.
After cleaning, it is worth assessing the condition of the coating. If necessary, cover large cracks with a cement-based putty and prime the surface. It is advisable to choose a primer containing antiseptics.
Selection of materials for the installation of a honeycomb cellular frame

The frame consists of profiles, connectors and fasteners. All parts are metal. If you plan to equip a false ceiling in a room with high humidity, for example, in a kitchen or bathroom, then it is recommended to give preference to galvanized elements. They are resistant to corrosion.
For work you will need: guide profile UD, support profile CD, hangers for fixing the profile CD, anchor dowels, self-tapping screw TN 0, 35 * 2, 5 cm for fixing the suspension, self-tapping screw for fixing the ceiling profile, cross-shaped connector (crab), extension of the bearing profile, sealing tape.
All components must be purchased with a margin. From the tools, stock up with a screwdriver, a perforator, metal scissors and a hydro level (if possible, it is better to use a laser level).
Drawing and marking of the surface for a metal honeycomb frame

Before starting work, you need to draw up a frame diagram for a plasterboard ceiling. The entire course of further work depends on her literacy. At this stage, it is necessary to present an already holistic picture of the suspended structure and take into account all the nuances, starting from the sufficient rigidity of the frame and ending with the arrangement of a place for installing the elements of lighting devices.
Instructions for creating a drawing for marking the ceiling:
- We measure the length of all walls. Measuring only two walls and multiplying them by two in this case can give erroneous results if the surfaces in the room are uneven. And we need an accuracy of the centimeter.
- We measure the height of each corner and center of the room.
- We select the lowest angle and from it we measure the distance between the base surface and the suspended structure. The length of this segment depends on which communications are planned to be placed in the interceiling space and which lighting elements will be used. Five centimeters are enough for wiring, but more space may be needed to install pipes, ventilation ducts and certain models of spotlights.
- We put on a sheet of paper a diagram of the location of the profiles and their attachment points.
- We mark the sections for fixing the guide profiles with a step of 0, 3-0, 4 meters.
- The fixing lines of the ceiling profiles and crossbars are marked in the drawing with a step of 0.6 meters. As a result, the diagram should display a flat surface with a mesh grid.
- At the same stage, we mark the areas for fixing the junction box, laying electrical wiring and installing lighting devices.
- With the help of a chopping cord, tape measure and a level, we transfer the markings from the drawing to the walls and ceiling.
Note that the sheets are placed away from the window. This should be taken into account when drawing up a diagram.
Fastening the cellular frame under the plasterboard ceiling

The cellular frame is a kind of mesh, which is installed as follows:
- If there are no holes on the guide profile with a pitch of 0, 3-0, 4 meters for fasteners, then we drill them before starting work. If they are, then go directly to the next item.
- At the level marked on the walls with the chopping cords, we apply the UD-profile so that its bottom coincides with the line on the wall.
- We glue a sealing tape to the back of the guide profile and fix it with anchor dowels around the perimeter of the room.
- We measure 30 cm from the wall and attach suspensions with self-tapping screws or six-millimeter dowels along the line of placement of ceiling profiles with a step of 60 cm. Each suspension should be in the middle between two jumpers.
- We cut off the bearing profiles, subtracting 0.5-1 cm from the length to prevent deformation.
- We glue the sealing tape on the profile and attach it with self-tapping screws to the hangers with bent ends. If necessary, use a special connector to extend its length.
- With the help of "crabs" we fix the jumpers. They must be located at the junction of two sheets (every three meters), therefore their optimal step is 60 cm.
It is not recommended to fasten jumpers along one line, they must be staggered. GKL also cannot be fixed to profiles butt-to-joint. During work, it is imperative to use plumb lines and a level to strictly observe the horizontal and vertical structure of the structure.
Do-it-yourself transverse metal frame for a plasterboard ceiling

Installation of the frame for plasterboard on the ceiling can be done from transverse profiles. This method has several advantages, among which are simple installation and reduced costs, because jumpers and crabs are not needed here.
We carry out the work in the following order:
- We draw up a frame diagram. We calculate the optimal height of the interceiling space and make a drawing taking into account the step of the transverse profiles of 0.5 meters.
- In the lowest corner of the room, make a mark at the level of the suspension structure and mark the lines from it along the perimeter using a paint cord.
- Along the line we fix the guide profiles, on which we preliminarily glue the sealing tape.
- We mark the ceiling with lines with a step of 0.5 meters using a chopping cord.
- We attach a sealing tape to the back of the supporting profile.
- According to the marked scheme, we fix the ceiling profile.
Thus, one sheet will cross six profiles. In this case, two sheets will be attached to the last one at once. If the work is done correctly, then the bearing capacity of the transverse frame will be no worse than the cellular one.
Installation of a multi-level metal frame for a plasterboard ceiling

This design is made in several ways. Previously, the most common was the method by which the upper tier was first installed, and then the lower one. However, it has outlived its usefulness due to a decrease in the strength characteristics of the first level and high costs (in particular, long self-tapping screws were required for installation).
The method of fixing first the lower and then the upper level of the frame for the plasterboard ceiling with your own hands is more complicated and will take more time, but the structure will turn out to be reliable, rigid and durable.
In the process, we adhere to the following algorithm of actions:
- We mark the level of the lower tier at the lowest corner of the room.
- We beat off the installation lines around the perimeter of the room with a painting cord.
- We attach the guide profile with a sealing tape in such a way that its lower edge is placed strictly in line with the level.
- We make markings on the ceiling, marking the contours of the boundaries of the second and first tiers.
- We fix the guide profile along the applied contour. To bend it, if necessary, make notches on the opposite side. Please note that the steeper the bend should be, the smaller the distance between the notches must be observed.
- We cut segments from the bearing profile, the length of which corresponds to the height of the interceiling space.
- We attach the workpieces in a vertical position to the guide profile on the ceiling.
- At the bottom of the parts, we fix the guide profile.
- Over the entire area of the ceiling, which is occupied by the second tier, we install the ceiling profile, connecting the guides on the wall and along the contour of the level border.
At the same stage, it is necessary to start laying the wiring. Do not forget to be sure to use a plastic corrugated sleeve for this, in order to avoid contact of the wire in the event of a current breakdown with the metal profile.
How to make a wooden frame for a plasterboard false ceiling

If you nevertheless decide to make a wooden crate, then when choosing a material, keep in mind that the humidity indicator should be up to 12%. Most often, coniferous wood is used to install the frame. It is durable and also relatively inexpensive.
The work should be performed in the following order:
- We treat slats with a section of 5 * 4 cm with an antiseptic composition. This is necessary to protect the wood from mold, mildew, insects and rodents.
- On the ceiling and walls, we make markings using a chopping cord, tape measure and a laser level. At this stage, it is important to take into account the pitch of the longitudinal fastening of 0.4 meters and fixing the suspensions - 0.6 meters.
- In the marked places for attaching the suspensions, we make holes with a diameter of 0.6 cm and a depth of 4 cm using a puncher.
- We fix the rods in the holes, previously fixed in the suspension, and hammer them in with the dowel-nails. Remember to glue sealing tape to the back of the gimbal at this point to prevent sound bridging.
- When all the suspensions are installed, temporarily fix the strips on them.
- Stretch a strong thread across the installation lines of the lathing at the same level with the line of attachment of the suspended structure.
- We align the bars along the stretched cord and attach with four self-tapping screws first to the outer suspensions, and then to the rest.
Thus, the gypsum board will be attached to the halves of adjacent bars. To give additional strength to the structure, jumpers can be made by cutting out the parts and securing them with self-tapping screws. But if the instructions are followed, such a base will also have a high bearing capacity.
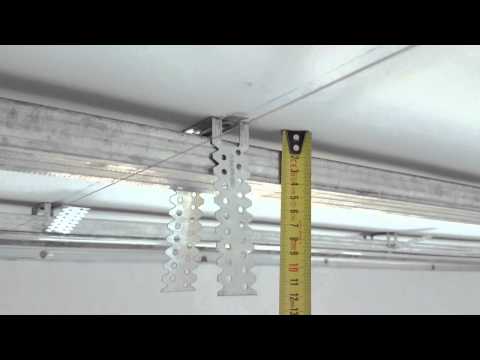
Watch a video about installing a drywall profile:
After studying the proposed instructions, you can easily figure out how to make a frame for a drywall ceiling with your own hands. In addition, our recommendations will help you choose the right material for installing the battens and the optimal design. By following the rules, you will equip a solid and reliable foundation that will last for decades.


