
Knowing the necessary techniques and tricks, which are described in the article, you can quickly assemble and lay laminate panels on the base, thereby installing a new modern floor. Of all types of existing flooring, laminate is now the most popular. With proper use, it will last a long time. Laminate flooring is easy to maintain and looks great. This type of floor is also good because, with the necessary knowledge, it can be laid not only by a professional, but also by a beginner with his own hands. Panels are assembled according to the principle of the constructor, "in the lock".
Related article: How to choose a laminate
Required tools and materials

Materials and tools that you need to lay your laminate flooring:
- hammer;
- roulette;
- block for knocking the laminate - boss;
- jigsaw;
- pieces of laminate used as spacers for wall gaps;
- angle ruler;
- clamp;
- sound-absorbing underlay or its substitutes.
Before you start laying the laminate, the panels must be allowed to rest for two days at room temperature and humidity. In this case, the packs of laminate flooring cannot be opened, they must be sealed. This is necessary in order for the flooring to adapt to the installation conditions.
What you need to know

- Attention! Laminate flooring should not be installed in showers, bathrooms, saunas and similar rooms where there is high humidity.
- The laminate is mounted in a floating way, therefore it is not attached to the base. It is inadmissible to rigidly fasten the boards to the base with nails, screws, glue, etc.
- The laminate is placed on a clean, dry, solid and level surface: chipboards, cork or plywood sheets. A substrate must be laid on them. If the floor on which you are laying is not too deformed, you can use old parquet, linoleum as a base. In this case, you will avoid painstaking work on dismantling and removal, removal of elements of the old floor.
- Some people make warm floors. In this case, the laminate is laid on a water-heated substrate. This type of heat will not give a sharp heating of the floor, which would be extremely undesirable for this type of flooring, as it can break the lock connection, which will lead to the formation of cracks.
Laying the first row of laminate
Begin laying the boards so that the light from the window is directed parallel to the seams. Otherwise, if it falls perpendicularly, the seams between the laminate flooring will be more clearly visible, and this does not look very nice.
Now that the underlay is laid, you can start laying the first row of laminated flooring. The boards are fastened to each other using a lock connection.
First, put the first two parquet floors, not forgetting to install spacer wedges between the wall and the laminate. The gap should be 0.7 to 15 mm. Then the laminate, after laying, will be able to narrow and expand without hindrance, and the wall will not interfere with it. If you do not follow this rule, the parquet flooring can stand on end. Lay the laminate with the lock towards you. This will make it easier for the panels to snap into place.
Laying the second row

The first row is mounted, you can start forming the second. Laying the laminate in half a board is considered correct. In this case, the floor pattern will look like a brickwork in half a brick. In addition to the aesthetic appearance, this method will help to evenly distribute the pressure between the laminate planks when the panels contract and expand. You can install a new floor and with a shift of 20 cm as described in the instructions.
The panel of the second row must be brought to the panel of the first at an angle, inserted into the lock and snapped into place. At the ends, the laminate does not snap into place yet, but "tries on".
The second row has been created. Now you can take the boss, place it against the edge of the second row, and gently tap on it. This will help the boards of the second row go into the panels of the first row, without creating gaps between them. It is important to remember to insert wedges between the laminate and the wall around the entire perimeter of the room. At the end, the ends are fixed.
Next, you need to lay the remaining rows of the laminate in the same way.
How to make cuts, laying the last row
Usually cuts have to be made near the door frame and where the central heating pipes run through the floor. To make a rectangular hole, you need to determine its length and width with a tape measure and carefully cut out an extra piece using a wood saw or electric jigsaw.
Round holes for pipes can be made with a drill. First, a small circular hole is made and then expanded using the same saw or jigsaw.
A clamp is used to install the last board that will adjoin the wall. It will allow you to easily connect this with the previous panel.
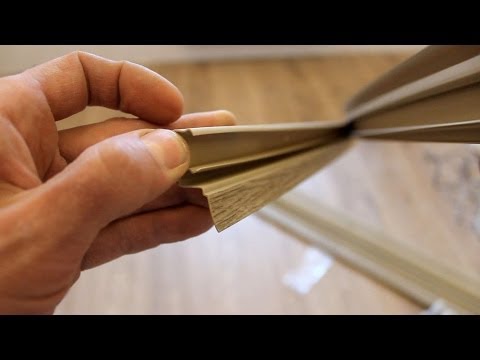
Installation of skirting boards

After the laminate panels are laid, the skirting boards are installed. It is convenient to use the skirting board with clips. If ventilation substrates are used, then the plinth must be positioned so that its lower part does not interfere with the evaporation of the residual moisture in the screed.
Video about the installation of PVC plastic skirting boards:
Important tips for laying laminate flooring
If the laminate is laid in large layers, its total area in length or width exceeds twelve meters and is more than 120 × 150 square meters, then it is important to leave expansion joints, which should be at least 12 mm wide. Otherwise, gaps will form in the laminate.
If there is an obstacle in its path when laying the laminate, you need to cut off part of the lock, and then fix the panel with laminate glue.
Laminate care

In order for the new coating to last a long time and not lose its original appearance, you need to properly operate it. Usually, the laminate is wiped most of all where chairs, armchairs move, under the legs of a sliding sofa. Therefore, it is recommended to use rubber tips on chairs, sofa legs. Swivel chairs and armchairs with rubber wheels would be appropriate. Felt pads will also help, they are glued to frequently moved and moved objects. Caring for your laminate flooring includes both wet and dry cleaning. It can be swept, vacuumed, washed with lukewarm water. Do not use aggressive detergents on the surface of such a floor, as this can spoil the appearance of the coating. Abrasive cleaners are also not acceptable when cleaning laminate flooring. It is necessary to squeeze the rag well when washing the floor so that excess moisture does not harm the material.
The use of detergents recommended in the manufacturer's instructions is acceptable. You can use K-Floor Laminate Detergent Liquid. In the event that it was not possible to avoid the formation of small scratches on the flooring, special repair compounds will help, they will eliminate these minor defects from the floor surface and return it to an excellent appearance.


