
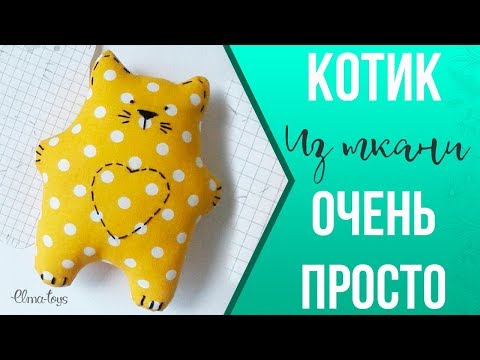
It is easy to create original toys from socks and leftover fabric. See how to sew a pillow toy, Basik's cat, make an educational board. Original toys can be made from improvised materials that have served their owners faithfully and it is a pity to throw them away as unnecessary. Without spending money, you will make a doll, soft toy and please your daughter, son.
Original toys with your own hands from socks

Please the children, make such dolls for them. To do this, you need a little, namely:
- socks;
- threads with a needle;
- scraps of light plain yarn;
- filler;
- narrow braid;
- dark beads;
- scissors.
Even those who do not know how to use a sewing machine can make such original toys. Only the possession of a needle will come in handy.
- Cut the sock in half. One part is the foot. The second is the heel with an elastic band. You only need the first one. Stuff it with filler, but not very tightly. Sew on the right and left with a needle to define the sides. You also need to make the legs, stitching in the lower part in the middle. Sew up the top hole through which the body for the baby doll was stuffed.
- Cut a small circle out of a light-colored fabric, gather it on a thread, tighten it a little, fill it with filler. Then you need to tighten the thread, fix it. Do not cut yet, but sew the resulting head to the body using the same thread.
- Sew on beads instead of eyes. You can rub blush across your cheeks to brighten them up. Tie the junction of the head with the body with a braid.
- Take the second part of the sock, cut off the heel, you won't need it. Only the upper part is needed - with an elastic band. Tuck in at the cut, sew along the edge here on your hands. Put the cap on the doll's head, sew it at the top so that at the end you get such a "tail".
Look at the original toy that turned out, which is quite simple to sew with your own hands. You can make several of these and please your little ones with new dolls. There are other examples of using socks if one of the pair is lost or the items become too small for the child.

To make such an adorable cat, you will need:
- 2 socks;
- threads;
- needle;
- scissors;
- synthetic winterizer;
- marker - better water-soluble.
One sock should be half filled with filler. To make the base of the muzzle, roll a ball out of padding polyester and put it in the top of the sock.

Sew the hole in a straight line so that you have two ears.

Use a marker to draw the facial features of the original toy.
If the marker is too bright or not water soluble, then a plain pencil is best.

Now you need to embroider according to these marks, taking a thread of the appropriate color.

In order for such original cat toys to acquire front legs, you need to make them from a second sock. To do this, first cut it in half across, and then - as in the photo.

Now these paws need to be sewn up, stuffed with padding polyester, and stitched to the toy's body.

Here is such a wonderful animal turned out. If you like him, make a friend for him.
DIY soft toy cat

This character is very similar to the cartoon character. The pattern clearly shows how such a soft toy cat is made. It will require:
- soft dense fabric of beige and dark brown color;
- filler;
- threads;
- eyes for toys.
Crafting workshop:
- Cut out two parts of the abdomen, grind them down the center. The two side blanks need to be sewn on the back. You have 2 parts. Sew them together in the area of the paws, tail, on the sides.
- Create a kitten's head from the corresponding details. Cut out a muzzle for him from a dark canvas, stitch it onto the character's face. Stuff your head with filler through the bottom. Put it on the kitten's neck, sew with a blind seam on your arms.
- Each eyelet consists of two parts - brown and beige fabric. These triangles are sewn in pairs, turned inside out through the still unsewn bottom. Then the ears need to be sewn to the head, making them along the fold.
- It remains to sew on the eyes, embroider the mustache, eyelashes, mouth and nose with light threads, and a soft toy, which is so interesting to create with your own hands, is ready.

How to sew an original pillow toy?
Kids love these items very much. First they play with these stuffed toys, then when they get tired they use them as cozy pillows.

Before you sew a pillow toy, prepare:
- fabric that is pleasant to the touch;
- filler;
- scissors;
- pink canvas for decoration.
Cut the following pieces from the base fabric in the following quantities:
- 2 pcs. for the head;
- 4 - for the ear;
- 2 - for the body;
- 2 - for 2 tails;
- 2 - for overlay on the ear.
A pattern will help to sew a soft toy. Remove it, attach it to the fabric, cut with allowances.
Stuff the body and tail with filler. Sew the tail to the body where the markings are. Sew on the head, after filling it with a small amount of filler. Attach the patch to the ear with pins, stitch it by turning the edges. Decorate the second ear in the same way.
Cut out the nose, heart, ornaments for the tail from pink fabric. Sew on them too. It turned out to be a wonderful product. If you want to know how to sew a pillow toy so that it looks like a funny bear cub, then watch another master class.

This will require:
- beige and white fabric;
- a piece of black leather;
- filler;
- threads;
- needle;
- scissors.
Cut out the base for the body from the beige cloth, cut out the front legs from the remnants.

As you can see, they are oval, straight from the bottom. Sew the details in pairs. Sew a light face, black nose on the front of the bear. To make it, cut a small circle out of leather, gather on a thread, fill with filler. Sew the toys onto your face.

Now fold the front and back with the right sides, inserting the stitched legs between them. Sew around the edge leaving a gap. Turn out the workpiece through it. Fill it with filler, sew up the hole.
You can make such original toys from the remnants of fabric. If there is a monochromatic one, you get the muzzle of a dog and a cat, and from a colored one - their bodies.

The following pattern will help to sew a toy pillow in the shape of an owl. It is created from the main fabric, and from the colored one - a beautiful bird's skirt.

If you want your child to like the toy even more, then sew small owls as well. Sew a wide strip of fabric on the owl's belly, stitch it vertically to create pockets. Put owls in them. To keep them well, cover with the wings of the mother bird. Fasten them with buttons.

Pom-pom toys
They come out warm and cozy.
To do them, you will need:
- cardboard;
- pencil;
- round templates with a diameter of 2, 5–7 cm;
- multi-colored yarn;
- sharp scissors;
- felt;
- glue gun.

Using the covers, draw circles. Place smaller coins in the center and outline them. Cut out the resulting cardboard rings. Make cutouts on the side of each.

Align two cardboard blanks of the same size. Wind the yarn around them tightly. Separate the cardboard. Cutting the yarn in the center, insert the thread in the middle, tighten it, tie it.

For each animal, you need to make two pom-poms of different sizes. The smaller one will become the head, the larger one will become the body.

Connect these elements by tying them with threads. Cut out ears, eyes, nose for an adorable animal, attach them with a glue gun.

The lamb is made of white thread, the eyes are cut out of black fabric, the nose is made of pink, the ears are made of white.

Create the chicken with yellow pom-poms.

These are the original toys you can make with your own hands.

If you have kids at home, make useful things for them from the leftover materials.
DIY original educational toys

Soft books are an irreplaceable thing for a kid. It is interesting to do such developmental aids with your own hands, thereby saving a lot of money. To make such educational toys, you will need:
- the cloth;
- threads;
- scissors;
- sheet filler;
- finishing elements.
Cut out rectangles from the fabric, fold each in half, insert the filler sheet, topstitch the edges, the first sheet is ready.
If you do not have a sewing machine, sew each sheet with a basting stitch on your hands, making long stitches. Do the same for the rest of the pages. Each should teach something to the baby. On one you can sew a sneaker, fasten a lace on it so that the child practices lace up it.
Let the girl learn to weave a braid. To do this, sew three ribbons to the top of the page.
It is useful for a child to get acquainted with the clock. Cut a circle out of light dense fabric, sew numbers to it. Cut out the hands of the clock from their dark canvas. Clip them in the center of the dial.
For a child to study geometry from an early age, cut out various shapes from the patches, sew them onto a book. The same pair must be created from fabric and Velcro attached to them. The kid will look for paired figures, match them.
You can not sew a book, but attach geometric shapes to a dense drape, let the child find pairs for them.

If you have cardboard boxes, make a whole complex for cars out of them for the boy, which will include:
- washing;
- gas station;
- garage;
- riser.

Cars can be made from the same material. You will make them from wood, plywood.

DIY development board

You won't get bored with such a toy! After all, there are so many interesting things here, you can scroll through the phone disk, learn how to close and open a real lock. Now you do not need to click the door chain, latch, since all this will be on the board. Abacus will help the child learn to count, scales - to weigh objects.
To make such "smart" original toys with your own hands, you will need:
- door lock, latch, chain, handle;
- abacus;
- scales;
- switch;
- buttons;
- the cloth;
- rubber bands;
- switch;
- glue gun;
- colored cardboard;
- self-tapping screws;
- MDF sheet;
- sneaker, etc.
Manufacturing sequence:
- Lay out the items on the prepared board. See how to position the lock so that it closes well. The same goes for the latch, door chain.
- Screw one half of the lock to one plank with self-tapping screws, and the other and the doorknob to the other. Attach these boards to the MDF in the same way.
- To keep the abacus in working order, you could rattle it with your "knuckles", attach only the frame to the board.
- Glue the scales, housekeeper, and other items using the hot gun silicone rods. Cut out the base of the phone from cardboard, glue it to the board, fix the dial in the center.
- Cut out a small dress from the fabric, sew buttons and an elastic band to it in the form of loops. Let your child learn to unbutton and button clothes.
You can use various items that you have at home to decorate the development board.
Original toy - Basik cat
This toy is loved by both children and adults. A cute cat is sewn from a material that is pleasant to the touch.

If you want to quickly create such an original toy, then use a simple pattern.

At the bottom of the back and tummy, you need to make a groove, then these details will become more voluminous.
On Basik's pattern, the groove points are indicated by triangles. You just need to match the opposite sides of each shape and sew on the wrong side.
- The muzzle consists of two identical parts, cut out in a mirror image. They need to be connected by stitching in the center.
- For each foot, you need to cut out 2 did. In total, you will need 4 parts for the hind legs and the same for the front legs.
- Sew the paired pieces on the wrong side, leaving the top unstitched. Turn out the legs, stuff them with filler. Sew the muzzle to the tummy.
- Here's how to sew Basik further. To assemble this original toy, place the front on the back, put the front and hind legs between them, placing them in place. Turn the toy out through the hole left at the bottom.
- Stuff the little animal with a little filler and sew the hole on the hands.
For experienced dressmakers, another option can be advised. This Basik pattern will suit them.

Here are paws with toes. Don't forget to sew a tail on the toy. It is given on a pattern.

Sew a fish from a piece of colored canvas, put it in Basik's paws.

You can dress up the cat at your discretion, clothes for Basik are also easy to sew.

If this is a winter version, a hat with earflaps and a scarf will do. You will sew the first one from the remnants of fur, and knit a scarf from yarn.
Here are some original toys you can create with your own hands. Choose the ones you like and get down to needlework. And to simplify the process of creating new things, get ideas for inspiration, watch selected videos.
[media =


