
Garden figurines are important elements of garden decoration. But they are not cheap, the presented ideas for giving will help to make chickens, chicken, geese-swans from waste material - bags, plastic bottles. The content of the article:
- Animals
- Herringbone
- Snake
- Hen and rooster
- Swan geese
- Other birds
- Casket
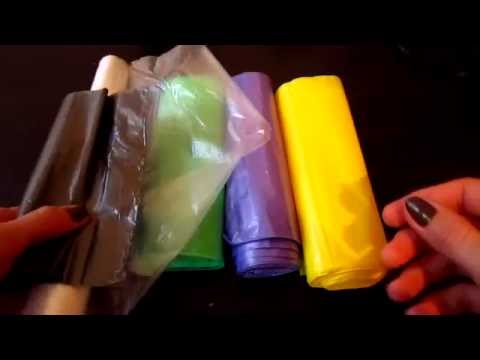
Plastic packaging is just a storehouse of interesting ideas. It can be used to make toys for the home and garden, which are not afraid of precipitation, they are easy to clean and look amazing.
Self-made animals

Not everyone will guess that this motley hen and her fluffy chickens are made from plastic bags. It is very easy to make such crafts, further it will be described how to make a hare, a Christmas tree in this technique. Check out this section, then it will be easy for you to create a whole bird kingdom.

Before you make a hare, like this white and fluffy, prepare everything you need, namely:
- scissors;
- cardboard;
- white plastic bags;
- 3 beads (2 eyes and nose);
- glue.
First, you need to cut 2 rings out of cardboard, with which we will make pompons. It is also necessary to cut the bags into long thin strips. To do this, fold them in an accordion and cut them into identical strips. Now fold the two cardboard rings together, wind the first tape around them, then the second, and so on. Do this until the cellophane strips completely cover the rings.
Now cut the polyethylene between the two cardboard rings along the outer edge. Put a rope between them and pull tight, tie. You can insert the thread between the cardboard rings before wrapping them with ribbons.

Remove the cardboard pieces, straighten the resulting pom-poms. Here's what you should get. This is the body of an animal.

Make another pompom of the same size or slightly smaller, it will become the head of a hare, which is very interesting to make with your own hands. Tie the threads of both pom-poms to connect the head and body of the animal in this way.
To make the ears, cut a 3 cm wide strip of cellophane, twist it in the middle twice. Then fold in half and straighten.

Rewind the part with a thread just below the middle, cut off the excess cellophane with scissors. Make the second ear in the same way, glue them and two beads in place of the eyes, and one as a nose.
Using smaller cardboard rings and strips from the bag, make 4 legs, glue them into place. The hare craft is ready. If you create it from packages of purple color, then the animal will turn out for you as in the photo.
Now you know how to make a bunny. In the same way, you can create a chicken with your own hands, as well as chickens and a rooster, and then place this bird kingdom in a summer cottage, at home. It will also be a great craft for kindergarten, which you can make together with your child.
Each chicken is made from yellow plastic bags. The head is slightly smaller than the body. When the yellow pom-poms are made, they need to be tied and glued together, and then glue the eyes of the chickens. To make a beak, cut a small triangle out of cardboard, glue a piece of red cellophane of the same shape and size onto it. Place one large side of the triangle on the exact opposite side, smeared with glue. Use it to attach the beak to the head.
In the same way, a comb is made for adolescent chickens, for a chicken.
How to make a Christmas tree

To create a beautiful tree, you will also need plastic bags, but green. In addition to them, prepare for work:
- compass;
- a ruler with patterns of circles of different sizes;
- cardboard or paper;
- bugles or beads:
- scissors;
- threads;
- strong thread;
- ballpoint pen.
Using a compass, a ruler with round holes, draw several circles of different diameters on cardboard or paper, put them on 2 plastic bags, outline and cut out.
Find the center of each circle with a compass, mark here a point with a ballpoint pen. Here's how to make a Christmas tree with your own hands next.
To make the tree fluffy, use scissors to make notches in the form of a fringe at the ends of the cellophane blanks. Arrange the circles cut from the bag in size and begin to collect them on a tight thread. So that it does not jump out after piercing the cellophane, we first string a button on a needle and thread. Alternate cellophane circles with beads or bugles, stringing 1 bead after each cellophane blank.

We begin to collect a tree from the largest circle, and end with a small one. Decorate the top of a handmade Christmas tree with tinsel or an asterisk bent from wire.
A snake that is easy to make with your own hands

After reading the previous section, you will understand how to make a snake. For her, you also need to cut circles, but of the same size, so such a product will take less time.
Fold each bag several times and place one stack on top of the other. Place a round cardboard template on top, cut out. Do the same with packs of other colors.
Blanks can be strung on a thread, but better on wire. Then it will be easy for the snake to give a different position, for example, at the dacha, twine a tree with such a craft and observe the reaction of neighbors who have come to the light. The snake's body is made of circles of the same diameter, and the face is made of circles gradually narrowing towards the tongue. At the end of the wire, put on a cellophane blank, which will become the sting of a reptile.
Garden figures for the garden - chicken and rooster

Such a colorful bird figurine can also decorate your garden plot. But, first of all, you need to draw its outlines on a piece of paper. If you want a rooster or hen to flaunt in the clearing, use the diagram above. If you want a magpie to hide on a branch, also made of plastic bags, then use the second picture.
Now attach a wire to the outline of the diagram, bend it along the contour of the drawing. The bird can be of any size - full size, larger or smaller. Next, you need to wrap the resulting wire frame with cellophane bags to give it volume, securing the structure with tape.
To make the chicken stable, you can make paws out of strong wire, screw them to the frame, without creating the bird's toes. Then you will pierce the ground with a wire, and the chicken will stand steady. We will consider the second option a little later. But in any case, the wire for the legs should be attached to the frame immediately, before you add volume to the bird.
If you are making a chicken for the house, then you can use a cloth to wrap the frame of the newspaper. For a street figure, take only cellophane, otherwise other natural materials, getting wet, will begin to rot.
Now cut the strips from the packages:
- for the body - 3 cm wide;
- for the head - 2 cm.
Try to make them as long as possible. Lay the first strip horizontally next to you, step back 1 cm from the top and string it on a long wire.

When you finish decorating the first cellophane strip in this way, string the second, third, and so on on the same wire. We start assembling this figurine for the garden with our own hands, which is so interesting to do, from the tail. Weave 5 braids of varying lengths. Attach them with a stippler to the base of the tail, with the longest braid on top and the smallest on the bottom.
Also, use a stippler to secure the edge of the first tape from the bag at the tail and wrap the bird with cellophane ruffle. When you get to the chicken breast, decorate the ruffle in the form of a frill. Decorate the whole bird in this way.
It's time to tell you how to make chicken legs in the second way. From a thinner wire, twist 4 fingers, securing them to the main thick wire for the legs. Pour hot glue in this place.

Cut out the comb and beak of the bird from a piece of plastic, use a heat gun to glue these parts into place. After a while, paint them in the desired color. It remains to glue the eyes, made of buttons, and wrap the paws with packing tape. This is how beautiful birds master.
Now you can arrange the figures for the dacha that you made yourself: a chicken, a rooster, chickens, and place the Christmas trees next to them, which you also made with your own hands. Such crafts are durable, look great, and are made from waste material.
There are other interesting ideas for giving. If you want to arrange fabulous swan geese around a decorative pond, cellophane bags will also help. Greenhouse film trims can also be used.
Figures for giving - geese-swans

This is what beauty you can get as a result.
You will need a little materials for this, namely:
- aluminum wire;
- 2 five-liter plastic bottles;
- linoleum underlay isolon;
- white or transparent bags or plastic film 150 microns thick;
- scissors;
- Scotch.
Bend the plastic bottle as shown in the photo. You can do it differently, cutting off one of its large sides, lay it up with the whole side, giving it a curved shape.

Cut the isolon into strips, wrap them around the swan.

If you are making such figures of birds for a summer residence, then the option with an isolon will be ideal. If you are creating a swan for your home, then you can wrap its frame with burlap or a thick light-colored cloth. Wrap duct tape around the bird for strength.
Cut the bags or film into strips, and then trim the long edge with a fringe with scissors. Start wrapping them around the swan from the tail. To keep the fastening strong, periodically heat the screwdriver over the burner and burn the film so that it is soldered to the base of the figure. Do not heat the screwdriver too much, so that it does not burn through everything.
Finish the garden figurine by attaching cellophane feathers to its head. Glue the eyes, the beak to be painted scarlet. Bird wings are made from two sides of a 5 liter canister. If you cut out one when creating the bird's body, use it. The wings should be semicircular at the top, and taper towards the other side.

They also need to be wrapped with foil, attached to the base with a heated screwdriver or fork. Here's how to make a swan for a summer residence. You can create several of them and decorate your personal plot.
Other do-it-yourself birds for the garden

Such a bright, beautiful peacock is also made from ordinary trash bags, but first you need to create a frame. As you can see, it is created on almost the same principle. Several long pieces of wire are pushed into the neck of an open bottle, from behind they form a tail, and from the front, by weaving, a neck and head. The film is stretched over two large feathers and one smaller one - the central one.

Then the frame is wrapped with a film cut into strips 8-10 cm long, which is decorated with fringe.

In this technique, you can make other figures for the garden, for example, such storks that promise an addition to the family.
Openwork box

Such a wonderful thing is also made from garbage bags. Here is a list of the little things you need to make it:
- garbage bags;
- thin sheathed wire;
- scissors;
- hook;
- beads or beads;
- tape measure.
Unfold the package of bags, cut from the first edge. Using scissors, cut it into strips 5 cm wide. Unfold each tape.

They will help to knit a square crochet pattern. This box will be created with just such a shape. The diagram shows that it begins with a single crochet.

When the first tape runs out, attach the next one to it like this.

For greater strength of the product, and in order to subsequently bend the part as needed, we weave a soft wire.

Now we knit the folds on the box. Having tied it to the desired height, we cut the wire and with the help of single crochet posts we make out the edge.

Pull the end of the bag through the inside of the side wall, tie a knot and cut it off.

Next, focusing on the diagram, we knit the top of the box.

Then we create the folded part of the lid. Finally, we make the edge of the box lid wavy.

Work is done. It remains to sew beads or beads to the lid, and the box, made with your own hands, is ready.
You can see how bags for needlework are cut by watching the video:
And here it is shown how to knit a basket of bags, which will also come in handy at home and in the country:


