
The combination of plasterboard structures and stretch fabrics on the ceiling looks stylish and original. Using this method, you can create whimsical shapes with an interesting background and lighting with your own hands, highlighting the unique design of any room. In addition, perfect alignment of the base surface is not required for installation. The disadvantages of this method of finishing the ceiling are:
- Decrease in height … Like any two-level structure, the combined ceiling will take at least 10 cm. And if the installation of spotlights is planned, then only for the first level 10-15 cm will be needed.
- High price … High-quality profiles, drywall sheets and stretch fabric will cost significantly more than installing the same type of coating.
- Temperature and humidity conditions … Drywall and PVC (fabric) are operated at a certain temperature and humidity. If these indicators go beyond the norm, then the materials may be damaged.
If you nevertheless decide to equip a two-level ceiling made of plasterboard and stretch canvas, then be sure to weigh the pros and cons.
Combined ceiling design options

The combination of stretch canvases and plasterboard suspended structures on the ceiling, when successfully combined, can create stunning optical effects. Any fantastic options are available for implementation - both with hidden and open backlighting. Consider the most popular options for combining stretch canvases and drywall:
- GKL box around the perimeter of the room … In this case, the PVC sheet is attached inside the box. The dimensions of the latter may vary. But there are certain rules. So, if you want to visually raise the ceiling a little and emphasize the beauty of the stretch canvas, then the side panels from the gypsum board should be made thin. A good visual effect is achieved if spotlights are mounted inside the box.
- Circle and oval in the center of the ceiling … It is considered a good alternative to the standard plasterboard rectangle around the perimeter of the room. A tension cloth is attached inside. In this case, this section of the ceiling often imitates the sky - day or night. However, you should not equip such a ceiling in a small room. It will seem even smaller, since all corners will be "tightly" sealed with drywall. Remember, if the "starry sky" is installed on a stretch canvas using fiber-optic threads, then the difference in ceiling levels will be 8-10 cm. If the height of the room is within 2.5 meters, then it is not recommended to install such a structure. Level differences can be used if the height of the room is more than 2, 8 meters.
- "Tablet" … This is a kind of ceiling structure in which a plasterboard circle is equipped in the center of the ceiling. As a rule, a chandelier is also fixed here. The rest of the space on the ceiling is occupied by a stretch canvas. A kind of "pill" is a "circle in a circle" - a plasterboard box is additionally installed along the perimeter of the room. Such combinations allow you to create expressive and voluminous structures on the ceiling.
The simplest option that even a beginner can create is a structure with a drywall box around the entire perimeter of the room.
Preparatory work before installing the combined ceiling

In advance, it is necessary to free the room from large-sized furniture, remove curtains, paintings and lighting fixtures, insulate the ends of the wires, cover the floor with film or newspapers.
Work on the preparation of the base surface before installing the combined ceiling is carried out in the same way as before installing a conventional stretch or suspended structure:
- We remove the old cladding layer.
- Clean loose plaster with a spatula.
- We cover large gaps with a cement-based putty.
- We prime the coating.
Stock up on accessories for mounting a suspended and stretch ceiling. To install a frame for a drywall construction, you will need: starting profile (guide) - UD, supporting profile (ceiling) - CD, single-level connector ("crab"), self-tapping screws, flared dowels. In addition, drywall itself is required, with a thickness of 9 mm. If you plan to install a combined ceiling in a living room, then you can use ordinary drywall. If the work is carried out in a room with high humidity, for example, in the bathroom or in the kitchen, then it is better to give preference to gypsum plasterboard. These are sheets with silicone granules and anti-fungal additives, which have increased moisture resistance. For the equipment of the stretching cloth, you need: a baguette made of aluminum (plastic is not suitable because it does not bend), self-tapping screws that fix the baguette to drywall, a spatula for filling the cloth. In addition, you will need a heat gun, which is more expedient for a one-time use to rent than to buy.
As for the material itself, here you need to decide which type you will use - fabric or film. The first is more durable, not so afraid of temperature changes, while the second is available in a wider variety of textures and colors, and is also completely moisture resistant.
Drawing up a drawing of a combined ceiling and surface marking

Before starting work, you need to create a design diagram on a sheet, for which we adhere to the following instructions:
- We measure the length of all walls, the height of all corners and the center of the room.
- In the drawing, we mark the height of the first level (plasterboard box) and the distance between the base ceiling and the stretch canvas.
- Draw the outline of the border of the two levels.
- We draw on the diagram the lines of attachment of the guide profile and the carrier with a step of 60 cm along and 40 cm across.
- We mark the areas of attachment of suspensions and the path of laying communications.
Next, we transfer all the lines from the drawing to the walls and ceiling. The entire further course of work depends on the correctness of the marking. It is much easier to install the frame in the marked areas, and this will significantly speed up the whole process. To do this, we use a tape measure, a chopping paint line and a laser or water level.
If the outline of the border of drywall and stretch ceiling is made in the shape of a circle, then it can be transferred to the ceiling using a self-tapping screw screwed into the center of the circle with a tied thread and a pencil fixed at the end. To draw curved lines, we make a blank of thick cardboard and circle this template on the ceiling.
Sheathing technology for a combined ceiling

Before fixing the guide profile, make sure that the holes for fasteners are made in it in increments of 0.3-0.4 meters. If not, then do it yourself with a drill.
Next, we work in this order
- We attach the bottom edge of the starting profile to the marking line. Through the holes for fasteners on the wall, we make marks with a pencil.
- We drill holes in the marked places for fixing and attach the supporting profile along the perimeter of the room using flared dowels.
- Along the contour of the border of the suspended and stretch ceiling, we install a guide profile on the base surface. If its bending is required, then we make cuts on the opposite side and bend in the desired direction. The steeper the bend angle, the more cuts need to be made.
- In the marked places we attach the hangers to the flared dowels.
- We pull the nylon thread to comply with the level of the ceiling profiles, which we insert into the guide and fix to the suspensions.
- We attach the trimmed guide to the ends of the bearing profiles. It must exactly follow the contour of the UD profile, which is already fixed to the ceiling.
- We prepare sections of the ceiling profile with a length corresponding to the height of the plasterboard box. Cut off the side parts on one side.
- We connect the upper and lower guide profiles with blanks made from ceiling profiles. To do this, insert each segment from above into the guide, and fasten it from below with a plane formed after removing the side jumpers.
After installing the frame, you need to start laying the communications. All wires must be placed in a plastic corrugated pipe and fixed to the base coating, drawing conclusions at the places where the fixtures are installed. All electrical work must be carried out after de-energizing the room.
How to sheathe the frame of the combined ceiling with plasterboard

Before sheathing the frame with plasterboard, the material must be given time to adapt to the temperature and humidity indicators in the room, so it can be left to lie in the room during the installation of the frame. It is strictly forbidden to store sheets in an upright position. This can cause them to deform.
It is desirable to work together with an assistant. The drywall sheet is quite heavy, and therefore it is almost impossible to cope with the fastening alone.
We carry out the sheathing of the metal crate in the following order:
- We fix the first sheet in the corner of the room with self-tapping screws. If the area of the level in the corner is less than the area of the sheet, then we first apply the contour according to the template and cut out the details from it. Please note that the caps of the screws need to be deepened into the material, but do not overdo it so as not to break through it.
- We attach the second sheet to the remaining half of the profile, to which the first one was previously fixed. We leave a gap of 0.5 cm between the gypsum board and the wall. The step of fastening with self-tapping screws should be no more than 30 cm. In the same way we sheathe the entire area of the level.
- We attach drywall to the vertical part of the box. For installation on curved sections, we bend it, making shallow cuts on the back. You can also bend the sheet by treating it with a needle roller and soaking it in water. Before installation, the wet part must be dried by fixing it with weights in such a position in which it will be attached.
- After sheathing the frame with plasterboard, we glue the joints with the wall and between the sheets with a reinforcing tape-serpyanka.
- Put putty into the gaps and fasteners with a small spatula.
- We glue the horizontal and vertical parts of the plasterboard box with fiberglass overlapping. If it is not on an adhesive basis, then we use it to fix PVA.
- In the places where the reinforcing mesh overlaps, draw a line with a clerical knife and remove the remnants.
- We cut out with a drill with a crown the installation site of the lighting fixtures.
- We putty the coating with a finishing layer. Its thickness should not exceed one and a half centimeters.
- After the putty has dried, we rub it with fine-grained sanding paper.
- We remove dust from the surface with a dry sponge or vacuum cleaner.
- We prime the coating for additional protection, leveling and improved adhesion.
- We carry out the finishing of the coating. Usually, in combined ceilings, the plasterboard part is painted with an acrylic compound.
To install the stretch canvas, you need to wait until the drywall is completely dry.
How to fix a PVC canvas on a combined ceiling

You will need a fan heater to work with this material. It is recommended to choose a film with a harpoon type of fastening, since it is recognized as the most reliable. In addition, if necessary, such a film can be easily dismantled and re-installed.
We fix the film stretch ceiling in the following sequence:
- We mark the level of placement of the canvas on the vertical part of the plasterboard box.
- We attach a baguette along the marked line with a step of 7 cm. If the design is curvilinear, then we make cuts on the profile, carefully grind them with a file or emery paper and bend them in the desired direction.
- We warm the room up to 40 degrees with a heat gun and unfold the material. If it is glossy, then it is recommended to work with gloves so as not to leave marks. Please note that you cannot bring the canvas close to the heat gun. Otherwise, dark spots may appear on it.
- After the room warms up to 60 degrees, we fill the harpoon of the base angle of the canvas (noted by the manufacturer) into the baguette.
- In the same way, we fix the part opposite along the diagonal and then the remaining two.
- After fixing the corners, we proceed to tightening the harpoon into a baguette along the perimeter of the level.
If, at the end of the installation, wrinkles have formed on the coating, they can be smoothed out by heating the area with a fan heater again.
Specificity of installing fabric on a combined ceiling

To fix a stretch ceiling made of fabric, no special equipment is required, and the canvas is fixed in the following order:
- We install at the marked level to the vertical part of the plasterboard box with self-tapping screws a profile for clip fastening of the fabric.
- In the center of the sides, we fix the material in the baguette on each side.
- We tighten the fabric from the center to the edges and fasten it in the baguette.
- We fasten the canvas in the corners and cut off excess pieces, if they appear.
- When wrinkled areas appear, they need to be warmed up with a hairdryer and smoothed. In this case, the device must be kept at least 20 cm from the ceiling.
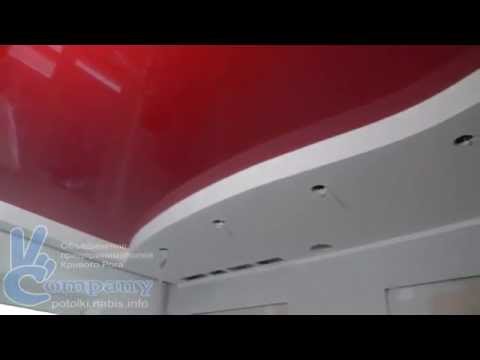
How to make a combined ceiling - watch the video:
The equipment of a combined structure with plasterboard and stretch ceiling is a laborious, complex process that requires certain knowledge and skills. To do the work on your own, you need to select high-quality material, draw up an accurate diagram, apply the correct markings, make a reliable frame, correctly fix the drywall sheets and, in compliance with all technological nuances, pull the canvas. The given recommendations, instructions and photos of two-level gypsum plasterboard and stretch ceilings will help you not to get confused in the processes and do the installation yourself.


