
Levkas can be prepared according to different recipes, in order to then paint an icon, create a picture. To decorate the walls, putty and even papier-mâché are used to decorate them based on the levkas technique. Painting is a multifaceted art. There are interesting techniques for creating adorable objects. Even in the old days, craftsmen painted on a tree. In just half an hour you will be able to do it yourself.
We create paintings using the gesso technique
This word comes from the ancient Greek leukós, which means "white". During the Russian Middle Ages, this was the name of the soil that was used in such painting. After the 17th century, this was the name of the icon painting technique. They used white chalk mixed with fish glue or prepared on an animal basis. It was applied to a wooden board and masterpieces were created.
Now craftsmen use modern materials more. You can repeat the presented master class and find out which ones.

To create such a painting sample, you first need to prepare the board. It doesn't matter if it's smooth or rough. In this case, the master used one.

Lubricate this blank with PVA glue and wrap it on the front and sides with gauze. Then apply PVA glue on top of the gauze with a brush.

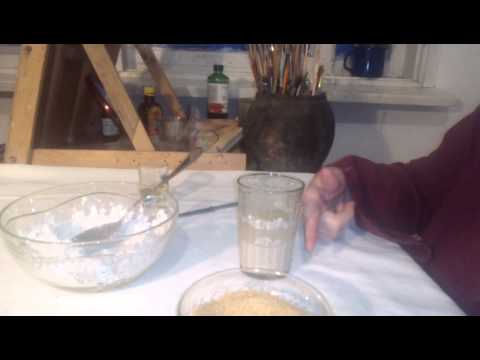
In an unnecessary container, mix gypsum and PVA in a ratio of one to two. Now pour water and stir vigorously so that the consistency of this mass resembles thin sour cream.
Plaster hardens quickly. Therefore, at the moment it is necessary to deal only with this material, not to be distracted by phone calls and smoke breaks. Add a small amount of brown pigment to this mass and stir again vigorously. You have got a gesso, similar to the one used by ancient icon painters. In this case, the fish glue was replaced with PVA and gypsum.
Armed with a plastic knife or other suitable material, you need to spread this mass on gauze, which is glued to the board. You can use a palette knife instead of a knife.

The layer should be large enough to give the feel of a canvas. Therefore, you do not need to achieve perfect evenness.

If you seriously decide to engage in such creativity, then it is better to make several such boards at once, so as not to mess with each of them separately.
When the mass dries, the surface must be sanded with sandpaper. Use paper of medium to coarse grit, but do not get carried away too much, as this can significantly damage the gypsum glue layer and the gauze underneath will turn into threads. Then the work will look sloppy.

Now you can draw the outline of the future picture with a pencil on the prepared canvas, and draw the masterpiece with acrylics. Draw the details with oil paints, they fit perfectly on acrylic paints.

Now you need to sprinkle this masterpiece with matte varnish, which is sold in art stores, and when it dries, your painting is completely finished.

See how else you can prepare the base using the levkas technique. This template is then used to draw icons.
How to make an icon board using the gesso technique?
They can be of different sizes. Usually boards are fastened with counter, through or end dowels. In this case, end-caps were used. They preserve the decorativeness of the board and give it greater strength.

A recess must be cut on the face of the board, it is called an ark, which has spiritual significance. There is a transition between the ark and the fields, which is called the husk. The fields are decorated by covering them with monochromatic paint, patterns or by applying the image of saints.
Now this blank needs to be covered with a canvas. For this, a cotton fabric is suitable, which must be glued to the board. In this case, the craftswoman used natural materials, so she took skin glue.

It is sold dry and needs to be soaked in water overnight to get it wet during this time. Then in the morning it needs to be heated in a water bath to 60 degrees so that it becomes more liquid. Now a little drying oil is added to it, then the glue becomes plastic.
It is necessary to wash and dry the fabric in advance. Now it is placed in ready-made glue, and after it is soaked, it is squeezed out and applied to the board so as to remove air from under the fabric. To do this, rub the canvas lightly with your palms from the center to the edges.
Leave this blank to dry for a day, but for now read how the levkas is made according to the second recipe. Buy a special peeled chalk, pour it into a large jar, fill it with water and also leave it for a day so that it sinks. Now drain the water, fill it with a new one. After a day, remove the water again.

If you have time, rinse the chalk this way for a week. Then the gesso needs to be welded. To do this, heat the skin glue again to 60 degrees, also pour drying oil here and pour chalk. You will understand how much is needed. At first, the chalk will begin to settle, and when it is already on the surface of the sticky liquid, it means that you do not need to pour any more.
Remove container from heat and cool slightly. Now you can apply the first coat of this product to the prepared board and leave to dry. The remnants of the glue will need to be covered with a lid made of cotton wool, which is wrapped in a bandage, and the container should be removed to the refrigerator.
If you painted the icon board in the evening, then the next day you can apply gesso on it. Smooth it out on the surface of the board with a palette knife or other similar object. You will need 7 such layers in total. So you will be applying them throughout the week.

As you can see in the photo, you can even distribute the levkas with a plastic card, and the surface will be flat. When all the layers are dry, it will be possible to sand the surface of the workpiece, first with coarse sandpaper, and then with finer one.
Now you need to brush away the rest of the chalk with a brush and you can apply a sketch to the prepared workpiece in order to write an icon.

Many works in the terra technique are made on the basis of levkas. For such canvases, the base is primed, then flowers are glued to it and the work is decorated with spray paint, gouache.
Terra technique - do-it-yourself panels

To make this landscape in the moonlight, you will need:
- flower of celosia;
- dried flowers;
- wand;
- canvas;
- primed cardboard;
- PVA glue;
- putty;
- dark color;
- spray paint;
- gouache;
- frame.
Dry the whole cello. You can also use Rigan inflorescence, mimosa greens.

Take primed cardboard with canvas, apply PVA on it and dry for half an hour. Make a solution consisting of PVA, putty and dark color. Apply this mass to the canvas and wait for it to dry.

Dry plants must be soaked in advance and then glued according to the planned plan.

Make a yacht from dried flowers of a suitable shape. Create a mast from a stick by gluing it. Make the sail from a pre-prepared solution, which includes glue, putty and dark color.
Place the plants on the prepared surface and cover them with a solution on top. When you lubricate all the work with this mass, it will need to be left for one day to dry.
After that, you will need to spray the panel with paint in an aerosol and see if the picture needs to be filled with something else. We continue to create in the levkas technique further. In this case, it was necessary to glue twigs in the upper corners to fill this space.

Now you need to paint the work with blue gouache and dry to the end. It remains to sprinkle the panel with varnish in a spray, and after that - paint in a spray can.
Give the finishing touches with a brush and paint. Draw the moon and light highlights that it leaves on the water surface.

All that remains is to select the frame of the desired size and color. If you are not satisfied with the finished one, then do it yourself.
Using the levkas technique, you can create not only a picture and a panel, but also decorate a wall. Putty will be used here as the main material.
How is embossed plaster made?
First, see how the volumetric panel is created. It will be done on the wall behind the bed. First you need to make a sketch of the future work on paper and take a suitable tool.

Now you need to mix the finishing and starting acrylic putty so that the composition resembles thick sour cream. Apply this compound to the cleaned surface in a layer of 1–2 mm. Now turn the spatula with the edge towards you and apply the relief in a wavy motion, then remove the edges of these waves so that they become flatter.

Make the strokes wider by already holding the spatula almost flat. Taking a palette knife, draw leaves on this pattern.

Here is how such a levkas is made further. Using a palette knife, you need to make a few more leaves in a similar technique, and also depict flowers.

Dilute the acrylic putty so that it does not run off the wall as a result, but lays down in a thin layer. Type it into a medical syringe without a needle and apply it to the wall, follow the drawing. It remains to prime and paint over it.

If you are interested in the method of drawing with a syringe, then read it in more detail. This technique is also good in that the hands remain clean and the smallest elements can be created. Here is the phased implementation of the work:
- Take the syringe. The needle does not need to be inserted into it, but it is necessary to raise the piston, at the same time picking up the liquid putty.
- This mass must be squeezed out onto the lines of the drawing on the wall previously drawn with a pencil or a water-washable marker.
- Wait until the putty dries, after which you need to dilute the water-based paint with a dye and cover the finished work with this composition using a sponge.
- Thus, redraw all the details, they need to be painted over. Why do you take a thin brush and paint.

If you want a more voluminous picture on the wall, then create it using not only gesso, but also paper.
Papier-mâché jewelry
Such a wonderful fish can flaunt on the wall or on a thick canvas.

For this you need to take:
- paper pulp;
- PVA glue;
- floor mastic, which is made on the basis of beeswax;
- acrylic paint;
- as decoration: CD disks; sequins; beads; beads.
If you want to make a mobile picture, then use hardboard, plywood, chipboard and other similar materials as a basis. Prepare the base and transfer the drawing onto it using a carbon copy or draw it by hand. Now you need to make a mass for papier-mâché out of paper. To do this, you can mix toilet paper with PVA glue or use other recipes.
Apply PVA glue to the base and attach pieces of papier-mâché here as a panel, and combine the large ones so that these materials create a graceful peacock. Make his tail out of wrapping paper, which must be moistened with a liquid mass consisting of water and PVA glue. It is good to create such elements from such material, since it drapes beautifully.

Make separate light feathers from cardboard, then you will need to paint it. Glue on glass beads to decorate the peacock's tail.
Some of the butterfly fragments were made from debris from CDs. To do this, you need to cut them out with scissors, and then glue them on the wings of this insect.

The finished work must be primed, and then apply several layers of paint.

You can use light rainbow colors or dark ones. It all depends on the color scheme of the room and your preference.

If you don't know which color to work with, then go with white. After all, this neutral color suits almost any room design.

You can play with paints, apply them in several layers to get amazing shades.

When the paint is dry, you will need to apply varnish or wax on top of it. The wax is applied with a piece of foam rubber. And when it dries, polish the work carefully to a shine with a soft cloth.
Now you know what levkas is, how to create planks using this technique and decorate a room using the ideas of this ancient creation.
We invite you to get acquainted with the video materials. The first plot shows how to make levkas for icon painting.
The second mini-movie will help you understand how gesso is used to decorate surfaces.


