
Thermal insulation of the house blind area with expanded polystyrene plates, features of this process, its advantages and disadvantages, preparation and installation of insulation, finishing of the blind area. The disadvantages of polystyrene foam insulation include the flammability of this insulation and the ability to attract rodents to it. The first drawback can be minimized by using non-combustible materials as protective layers. A reinforcing mesh can serve as an obstacle to the invasion of rodents.
Preparatory work on the insulation of the blind area with expanded polystyrene

The main difficulty of the blind area is not so much in the process itself, but in the calculations, the result of which depends on two main factors - the size of the roof overhangs and the type of soil on the site.
If this is an ordinary soil, then the width of the blind area should exceed the eaves overhang by 20-25 cm, and if the house is erected on collapsible soil, then its width should be at least 90 cm. In order to eliminate errors in determining the width of the blind area, it is recommended to use a construction plumb line … With its help, you can determine the projection of the extreme points of the roof departure. The distance from the outer edge of the blind area to the walls of the house should be the same everywhere. After carrying out the calculations, you can begin to prepare the base for the blind area.
To complete the preparatory stage, you will need: a shovel and bayonet shovel for trenching, a wheelbarrow for soil removal, a cord for marking the blind area, a building level to ensure the required slope, clay, sand, crushed stone, roofing material and geotextiles to create an underlying layer.
The first step is to mark the groove. To do this, remove all vegetation along the perimeter of the building and determine the contour of the future structure with pegs, hammering them in the corners and every 2 m.
After the end of the marking, you need to dig a recess for the blind area. You should go deep into the ground by about 35-40 cm, that is, one and a half or two bayonets of a shovel. When performing this work, it is imperative to remove the roots of trees and shrubs in the marking area. If they remain, they can damage the finished blind area during germination. The dug trench must adjoin the walls of the house along the entire perimeter.
Then its bottom should be covered with a 5 cm layer of clay and roofing material should be laid, which will serve as a waterproofing layer. After that, sand should be poured into the trench with a layer of 10 cm and carefully tamped.
The next step is the formwork device. It can be assembled from boards, and then fixed along the outer edge of the planned blind area according to the markings.
The sand layer must be covered with geotextiles. It will keep it from deterioration under the influence of weather conditions and will serve as a drainage function, removing water from the construction of the blind area.
When the formwork is ready, you need to fill it with rubble. The thickness of its layer should be 15 cm. Crushed stone should also be tamped. All layers must be performed with a slope of 3-5% from the walls of the house.
A drainage channel must be made next to the blind area. This requires a perforated pipe. It should be laid in the rubble at the lower level of its layer. Before laying, the drainage pipe must be wrapped in geotextile. This will prevent soil particles from entering it and thereby avoid clogging.
Installation of a blind area with expanded polystyrene

After the installation of the underlying layer, you can proceed to the main stage of work - insulation of the blind area with expanded polystyrene. For him you will need: expanded polystyrene plates, bituminous mastic, cement M300-M400, waterproofing material, reinforcing mesh, concrete mixer, mortar container, trowel and buckets.
On the compacted layer of crushed stone, it is necessary to lay insulation plates with a thickness of 50 mm in 2 layers so that the "cake" of the insulation coating does not have through seams. The seams of the first row slabs should be covered with the second row slabs. This will help to avoid the appearance of cold bridges in the insulation. The gaps between the slabs and the walls of the house must be filled with waterproof mounting foam.
After that, the insulating covering of the blind area must be covered with a reinforcing mesh. Its canvases should be laid with an overlap of 10 cm. This is necessary in case of a mesh shift when pouring concrete into the formwork. In addition, the reinforcing mesh must be raised above the insulation slabs by 2-3 cm so that later it is located in the middle of the concrete layer. To do this, you can put pieces of cut-to-size polystyrene foam under the mesh.
In order for the concrete screed on the blind area not to crack in the future, every 2-2.5 m it is necessary to arrange expansion joints in it, laying vinyl tape or wooden boards up to 20 cm wide across the formwork before pouring concrete. expansion joints in areas of maximum structural stress.
After the mixture has partially hardened, the boards can be pulled out, and the joints formed in their place can be filled with a special sealing compound. If the boards are supposed to be left in the concrete body, they must first be covered with bituminous mastic.
It is recommended to install boards for expansion joints at an angle corresponding to the slope of the blind area. In the future, it will be easier to level the concrete mix with the rule, using these boards as beacons.
Pouring concrete into the formwork of the blind area must be done in portions in accordance with the number of cells separated by boards in the transverse direction. The concrete layer should have a thickness of 5-10 cm. A large thickness is undesirable, since with temperature changes this can lead to cracks in the blind area.
After pouring and the beginning of hardening of the concrete mixture, it is recommended to cover the surface with a water-resistant composition Kristallizol W12.
If the project provides for a warm basement floor, then, in addition to the blind area, it is necessary to insulate both the basement and the foundation with polystyrene foam plates, having carried out a complex of waterproofing works in advance. Usually bituminous materials are used for this purpose. This is the only way to ensure a comfortable microclimate in the basement.
Finishing the blind area with expanded polystyrene

Finishing the finished blind area can be done with various materials - clinker, porcelain stoneware, special paint, cobblestone, paving slabs, etc. Paving slabs in terms of price and quality are the best option.
After insulating the blind area with expanded polystyrene under the paving slabs on the concrete blind area, it is necessary to form a layer of mortar 3-5 cm thick, with a slope of 3% from the wall. You need to control the thickness of the layer using wooden beacons that determine the level of the surface.
Tiles on a cement backing must be laid with special glue or mortar. The gaps between the elements of the tile covering should be set using plastic crosses. Two days after the polymerization of the solution, it is necessary to grout the joints.
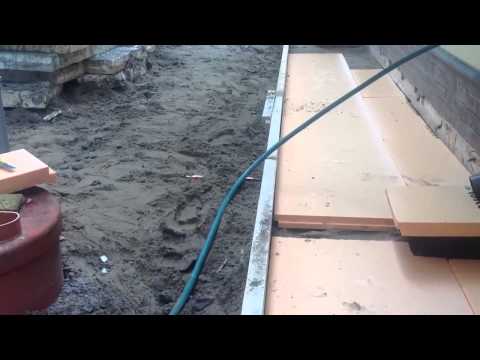
How to insulate the blind area with expanded polystyrene - look at the video:
According to many owners of private houses, finishing the blind area and garden paths with the same material is the most effective and practical option. If you do everything according to technology, the work done will give excellent results, and your home will be warm and reliable.


