
Advantages and disadvantages of wall insulation with foam glass, the technology of mounting the insulator on two-layer and three-layer partitions, conditions for the effective use of the material. Wall insulation with foam glass is an effective thermal insulation of premises for any purpose. The unique covering in the form of rectangular blocks is easily attached to partitions made of any material and can serve for 100 years. The article will discuss how to insulate a building with this material.
Features of work on wall insulation with foam glass

Foam glass is a heat-insulating material in the form of blocks and granules, produced from molten glass and gas-generating substances. It contains many bubbles with a diameter of 1 to 10 mm, which provides porosity up to 95%. The blocks are available in rectangular shapes in various sizes and are designed for use outside or inside the building. For external insulation of brick and concrete buildings, sheets with a thickness of about 120 mm are used, wood and expanded clay concrete - 80-100 mm. Thermal insulation from the inside of the house is performed with 60 mm thick samples. In order not to be mistaken with the choice, it is best to calculate in advance the dimensions of the foam glass, which should provide the dew point in the material itself, while the surface temperature behind the insulator should be within + 3-5 degrees. The calculations take into account the thickness of the wall, its material and other parameters. The thicker it is, the more massive the insulating blocks should be. The best option for this insulator is a partition thickness of one and a half bricks.
Filler granules are used to fill voids in three-layer brick walls and gaps between the main and cladding partitions. To prepare the working solution, they are added to the glue and mixed until smooth, and then the gaps are filled with the mixture.
Foam glass is fixed mechanically or with glue. The choice of installation method depends on the material from which the wall is made (brick, wood, concrete).
The insulation retains its positive qualities at temperatures from minus 20 to plus 50 degrees. If the temperature exceeds +50 degrees, the blocks lose their rigidity and can change their shape. The material does not burn, so it is often used to insulate fire-hazardous buildings. The absence of harmful impurities will make it possible to use it indoors, if another method of thermal insulation is not possible.
Advantages and disadvantages of using foam glass for wall insulation

The material has unique qualities and surpasses most traditional heaters in terms of performance:
- It does not swell from water, does not sag or shrink, it withstands temperature changes well, so cold bridges do not form on the walls.
- Foam glass is not subject to decay. It is not attractive to rodents, microorganisms and fungi. The service life is up to 100 years.
- The material is easy to process, it can be drilled, cut, sawed without the formation of shavings and sawdust. Adjustment of the slabs during installation is carried out as soon as possible.
- The insulation goes well with all building materials.
- The surface of the blocks consists of many cut bubbles, so the protective and decorative coating adheres well to it.
- After installation, the sound insulation of the room is increased.
- The product is environmentally friendly, it can be used to insulate buildings with increased sanitary and hygienic requirements.
- The material has great strength and in most cases does not require additional fixation during installation.
Among the disadvantages of wall insulation with foam glass, the high cost of the product can be noted due to the complex technological process of manufacturing and the use of special equipment for its production. Another disadvantage is low resistance to shock loads, but walls are rarely exposed to this type of mechanical stress.
Wall insulation technology with foam glass
Installation of thermal insulation is carried out in several stages. After surface preparation, the modules are glued to the surface, and then a protective and decorative coating is applied to them. The scope of work depends on the composition of the insulation layer.
Preparing walls for insulation

Foam glass panels are always glued, so it is very important to check the condition of the partition in advance and eliminate its shortcomings:
- Remove dirt and dust from the surface. Remove greasy stains with a solvent or mechanically.
- Make sure the substrate is free of mold and mildew. If necessary, treat problem areas with antiseptic, fungicidal and bactericidal compounds.
- Paint the metal parts on the wall with anti-corrosion paint.
- Coat porous and gypsum substrates with a primer recommended by the adhesive manufacturer.
- If necessary, level the surfaces with cement-sand or polymer-mineral mortar, and then apply a primer.
The choice of adhesive for the installation of foam glass

It is advisable to put blocks of insulation on glue, which is specially designed for this material. Such compositions include, for example, BOTAMETN BM 92 Shnell glue, made on a water-bitumen emulsion. It is sold in two containers, which contain the liquid and dry components. To prepare the mixture, pour dry into the liquid component and mix thoroughly.
There are also universal solutions. For example, the boards can be fixed with ordinary tile adhesive, for outdoor use it must be frost-resistant. The solution is prepared immediately before work, because its adhesive properties deteriorate very quickly. 10 minutes after application to the wall, nothing sticks to it.
In order not to be mistaken with the choice of glue for foam glass, make sure that it complies with STB 1072. It is prohibited to use a cement-sand mortar during installation, since it cracks and shrinks after drying.
Features of the installation of foam glass in the presence of decorative cladding

To increase the efficiency of the heat insulator, it is necessary to form all layers of the insulating "cake" correctly. Cladding materials have a great influence on the installation technology:
- Wall cladding with heavy stone … In this case, the foam glass is glued to the partition and additionally fixed with dowels. After finishing the installation of the insulation, assemble the metal profiles to fix the finishing stone.
- Plaster walls … The blocks are fixed with glue, and then a mesh is laid on it, which is attached with disc dowels with pressure washers. The total thickness of the preliminary and final plaster can be up to 30 mm.
- Walls for facing bricks … In this case, granular foam glass is often used. When erecting a decorative structure, leave a gap of 250 mm to the partition, into which the heat insulator is poured.
- Profiled sheet wall … The surface is pasted over with plates, and then a wooden crate or metal profiles are attached to it. Installation of a profiled sheet is carried out in the same way as installation on any other surface.
- Indoor walls … After warming with foam glass, plaster the surface for painting or wallpaper. Often a wooden crate is attached to it and the insulation is covered with plasterboard sheets.
Insulation of double-layer walls with foam glass

The option involves the use of two layers of foam glass blocks with a thickness of no more than 100 mm each. It is recommended to create the first layer from products of smaller thickness (40-60 mm), the second - from blocks of 80-100 mm.
Work can be carried out at temperatures from +5 to +30 degrees. In some cases, for example, when using reinforced layers, it is allowed to be insulated at a temperature of minus 15. If the work is carried out at the stage of building a building, at least 6 months must pass after the construction of the box.
At the bottom of the outer walls, create a horizontal base on which the first row of sheets will fit. Usually this is a metal strip fixed at the level of the base. It will allow you to get a perfectly even coating.
For gluing the first layer of blocks, the solution is applied along the perimeter of the sheet in a strip from 2 to 5 cm wide. If the surface is nervous, create beacons 10 cm in diameter, in 5-6 places. With external insulation, the ends of the plates are also lubricated with the composition, with internal insulation they are left dry. Apply a layer of adhesive to the wall and smooth with a trowel as well.
Place the first sheet slightly above the horizontal base and move it to the pants place in a circular motion. Press the panel against the surface and tap lightly with your hand. The use of a hammer is prohibited.
Before gluing subsequent sheets, first attach them to their regular place and check the coincidence of the ends with the already glued block. Modify products if necessary. After gluing, press down the panel with a 500 mm long wooden float, aligning it with the already glued insulation. Remove the glue that has squeezed out and hit the ends. Mount the rest of the sheets in the same way.
Lay the blocks of the second row with an offset to ensure that the seams are tied vertically by at least 50 mm. Periodically check the flatness of the insulation with a long ruler. Remove irregularities by sanding.
Docking the modules at the corners of the openings is not allowed. In these places, the blocks must be glued with bandaging and overlap. Cut off the excess parts after the glue has set. The thickness of the foam glass for insulating the slopes of door and window openings is 20 mm.
It is not recommended to move the already glued sheets, it is better to dismantle them and fix them again. It is not allowed to level the surfaces of adjacent sheets with glue.
The panels must be tightly pressed against each other. If there are gaps between them, seal them with foam glass crumbs.
If a heavy decorative coating is planned, each sheet is additionally fixed to the wall with two dowels. They are installed after laying the reinforcing mesh on the plaster. The use of "L-shaped" ties for fixing is also encouraged, but they must be embedded in the base at the stage of its construction.
When installing insulation on wooden structures, it must be remembered that wood is subject to thermal expansion, so use only special fasteners. Hammer in the dowels only after the adhesive has completely solidified. Anchor brackets can be used for fixing sheets. They are pressed into the end of the plate and driven into the wall with a special pistol.
Stick only whole slabs near window and door openings. No special cutting tools are required to cut the slabs, you can use a hacksaw.
Form the second layer of insulation after the glue has completely hardened on the first. Make sure that the dowels of the first layer are recessed into the foam glass and do not interfere with the installation of the outer row.
Apply the glue on the second layer panel to the entire surface and smooth with a notched trowel. When installing the product, position it so that the seams on the first layer are overlapped. After the adhesive has dried, prime the surfaces for protective and decorative coatings.
For exterior wall decoration, it is allowed to use plaster based on minerals and polymer minerals. Use only vapor-permeable paint. During finishing work, it is necessary to form horizontal shrinkage joints with a thickness of 5 to 10 mm (at the level of interfloor floors).
Apply the leveling plaster to the foam glass in the following sequence:
- Cover the entire surface with a rough layer of mortar.
- Glue the serpyanka mesh on it.
- Work over the mesh with a wide spatula and submerge it in the mortar. The tool should only move in one direction, for example horizontally.
- Apply a second rough coat, smoothing vertically.
- After drying, treat the surface with a special hand sander.
- Prime the wall.
- Apply a fine filler.
- After drying, sand it with fine sandpaper and prime it again.
The surface is ready for painting or wallpapering. Such a base is not afraid of heat, precipitation and frost.
Foam glass insulation of three-layer walls

Foam glass blocks are also used as an intermediate layer in three-layer brick partitions. This method of insulation is best created at the stage of building a house. It must comply with the requirements of SNiP 2.01.07. The document specifies the thickness of the load-bearing bases made of different materials, which ensures the maximum effect from the use of foam glass, as well as examples of calculations of the permissible load acting on each layer.
Sequence when working with three-layer walls:
- Erection of the bearing base.
- Fastening foam glass blocks to the partition. Installation of sheets is carried out in the same sequence as when insulating double-layer walls.
- Fastening to the surface of flexible metal ties that will hold the facing partition. For this, holes are made in the base through the sheets, into which dowels with pins are hammered. Connections can be fixed to partitions even at the stage of their construction. In this case, for the installation of products, holes for connections are preliminarily made in them.
- Typically 1 m2 the facing wall is held by 5-7 flexible elements. Additionally, fasteners are installed along the perimeter of the openings, at the parapets, in the corners.
- Erection of a facing wall. Usually its thickness does not exceed 120 mm. During construction, a gap of 30-50 mm is left to the insulation layer through which air can circulate.
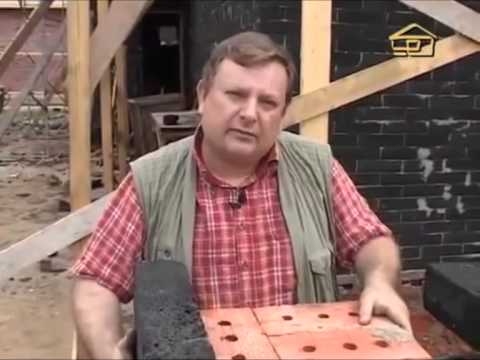
How to insulate walls with foam glass - watch the video:
Foam glass is relatively recently used for thermal insulation of walls, and many users still do not know the criteria by which the quality of the material is checked. Therefore, we recommend purchasing products from well-known construction companies, which guarantees a long service life of the material.


