
The attic room of the bath is often used as a utility room for storing brooms or a rest room. For access to the second floor, a compact wooden staircase is usually built. You can build it on bowstrings or kosoura with your own hands. Content:
- Types of stairs
- General recommendations
- On kosoura
- On bowstrings
- Screw
To climb to the second floor or attic in the bathhouse, they install a production (collapsible) staircase or build a structure with their own hands. In the latter case, it is necessary not only to correctly build it, but also to correctly calculate the angle of inclination, dimensions, type of steps. A ladder for a bath should be compact, comfortable and safe. Calculate its location so that the exit to the second floor is near the wall. So you can significantly save space and expand the usable area of the dressing room.
Types of wooden stairs for a bath

Often, a small structure with several steps is erected to enter a room or a porch. It is optimal to build it according to the calculations recommended by GOST:
- tilt angle - less than 45 degrees;
- step length - 80-100 cm;
- lifting step - from 17 cm;
- width - from 30 cm.
For the construction of an entrance staircase to the bathhouse, pine or larch is considered the best option. Moreover, they must be treated with an anti-fungal impregnation. Such structures are installed on a columnar or pile foundation.

The staircase in the bathhouse to the second floor can be made in various modifications:
- Direct one-march … The simplest option, however, requires a lot of installation space.
- U-shaped … For its construction, it is necessary to design the mines in the room in advance.
- L-shaped … They can be designed along one or two walls.
- Screw … Designed at an angle of 270 to 360 degrees. It must be installed counterclockwise, since most people start lifting with their right foot.
- Samba or goose step … Compact, but inconvenient enough.
General recommendations for the construction of stairs in the bath

Before you start building a bath with your own hands, you need to decide on the materials of manufacture. For bath structures, they are most often used:
- Stainless steel … The metal ladder does not deform or corrode. At the same time, it is easy to install and economical.
- Granite or concrete-based artificial stone … Model for Turkish baths.
- Wood … Traditional material for Russian baths.
We will focus on the construction of a wooden staircase. IMPORTANT: the wooden components for the stairs must be moisture resistant. They must be treated with an impregnation to protect them from fungus, decay and insects. For a sauna staircase made of wood, it is best suited: teak (about 500 rubles per step), larch (from 12 thousand rubles per cubic meter), ash (from 30 thousand rubles per cubic meter), wenge (about 100 thousand rubles per cubic meter), pine (from 100 rubles per running meter), oak (from 18 thousand per cubic meter), spruce (from 6, 5 thousand rubles). Wood for stairs is used with a thickness of 4-5 cm. It must be carefully polished. It should not be slippery, but also free from roughness.
Then we make some rough calculations. At the same time, we take into account several main points:
- It is undesirable to do more than three or four cross-country steps.
- The width of the steps must be designed along the length of the foot.
- The size of the opening must be calculated so as not to hit your head when descending.
Instructions for the construction of stairs on kosoura for a bath

Staircase structures are built on stringers and bowstrings. In the first case, each step is laid on the protrusion of the sawtooth profile. This method requires certain joinery and carpentry skills. The work is carried out in the following sequence:
- We choose solid and dense wood for the manufacture of stringers.
- Cut out a template of the shape of steps with the appropriate size and slope from thick cardboard.
- To connect the stringers with the upper overlap and the base, we make special grooves at the ends and markings according to the prepared template.
- According to the markings, we cut out the protrusions using a jigsaw and process them with a grinder.
- We cut out a recess for fasteners in the floor beam and mount the metal supports.
- We fix the support bar with anchors along the line of the bottom step.
- We set the stringers at the desired angle. We fix them from below and from above with anchors.
- For steps, we use boards from 3, 6 cm thick, for risers - from 2 cm.
- We cut and grind each piece.
- Lubricate the lower cut of the stringer with wood glue or PVA to prevent squeaking. We apply riser elements exactly along the edges.
- We fix the parts with self-tapping screws and set steps above them.
- After laying all the steps, we mount the railings. For the manufacture of the rack, you can use curly wooden blanks. The handrails of the railing are mounted on a clearly corresponding slope of the staircase.
Construction of stairs on bowstrings in the bath

It is much easier to mount steps on bowstrings. It is possible to independently build such a modification by adhering to the following plan:
- We measure the height from the floor of the room to the top of the future staircase. Rounding the number and dividing it by 18, we get the required number of risers.
- We fix the brass ladder calibrators to the carpenter's square in pre-calculated places.
- We check the material of the bowstring so that it is straight, and put a square on it exactly. We draw the line of the riser and, without moving the tool, draw the line of the step.
- Using the calibrators and lines, draw the outline of the bowstring until all the steps are output.
- We remove the calibrators from the square when drawing the last element.
- With the help of a circular saw, we make cuts along the edges.
- Cut out the middle with a sharp hand saw, apply the resulting part to the material and draw a contour.
- We make two edge and one middle bowstring.
- Adjust the height of the lower riser so that it is shorter by one step thickness.
- We attach a plywood sheet where the landing connects to the steps.
- We make marks for installing the bowstring and screw it onto the plywood.
- We cut out the same risers and fasten them with screws to the bowstrings.
- We attach the steps with screws and glue to prevent squeaking and increase strength.
- For the general connection, we attach the upper step to the plywood part with screws.
- We mount the handrail post in a vertical position and attach it with screws.
- We install the railing beams so that they repeat the angle of inclination of the stairs, and fasten them sequentially with screws.
- We collect the handrails (railings) with nails and fasten the fasteners to the staircase structure.
- We attach the railing over the last crossbar, observing the correct slope.
- We prime and varnish the surface.
DIY spiral staircase for a bath

The technology for constructing a spiral staircase is distinguished by more in-depth calculations. To correctly build such a structure, you should do it according to the following scheme:
- We make run-in steps without risers. This will provide additional comfort when lifting.
- We design the step so that its width in the center is 20 cm, and 15 cm from the racks is at least 10 cm.
- We calculate the diameter of the structure from two meters, and the length of the steps - from 80 cm.
- We leave the height of the passage to the upper loop from 2 m.
- We use a thick-walled stainless steel pipe with a diameter of 5 cm or more as a support element. We install it strictly vertically at the very beginning of work. This will increase the strength of the ladder.
- We fasten the main support to the wooden floor with fasteners and anchors. If the floor is cement, then we concrete it using stretch marks.
- We drill a hole (stand diameter) in the narrow part of the tread to fix the step. For the installation of each element, we use bushings with the appropriate height.
- To prevent deformation of the steps, place a washer between the tread and the bushing. Its thickness is important to consider when designing the height of the sleeve. Otherwise, the staircase will turn out to be much higher than it was designed.
- We determine the length of the steps according to the size of the rise in the floor. To calculate their number, the height of the entire structure is divided by the height of the opening between them. It should be between 18 and 20 cm, excluding the thickness of the step.
- We install steps with a slight overlap. We fasten the structure with brackets between the edges of the wide part.
- The final step is mounted on the ceiling with fasteners.
- We install the railing posts vertically to the steps and attach the handrails to them at the angle of the base of the stairs.
- We carry out decorative finishing.
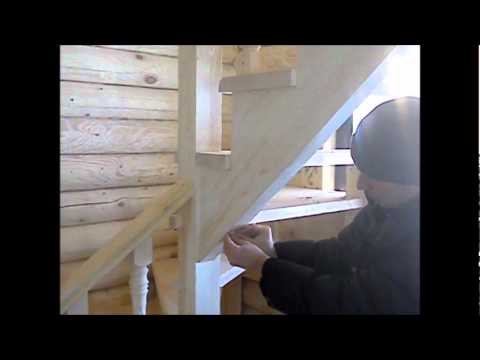
With the help of this step-by-step instruction and a photo of the stairs for the bath, you can complete all the work quickly and efficiently, the process is demonstrated in more detail in the video:
The sauna ladder is a compromise between convenience, safety and compactness. Remember that before you make a staircase in the bath, you need to draw up a thorough project. A high-quality staircase should not only be reliable, but also fit well into the interior of the room. If you are not sure that you can make your own design that meets all standards, you can pick up a ready-to-install option in the store.


