
The summer kitchen in the country can be open or closed, detached or in the form of an extension. See how to make a barbecue, grill and oven for your summer kitchen. Housewives do not always cook in the country house itself. If it's hot, then you don't want to cook indoors, so culinary creations are created in the summer kitchen. There is also an argument in favor of this. When it's time to preserve vegetables, you don't always want to do it indoors, then the process of creating winter stocks is transferred to the street.
The summer kitchen can be different. Sometimes it is a free-standing building, and sometimes a stove, near which there is a table and a bench or plastic chairs. You can get acquainted with the main attribute of a summer kitchen, without which cooking is impossible, right now.
How to make a do-it-yourself oven for a summer kitchen?

Isn't it true that such a structure resembles a fabulous attribute that Emelya rode. To make this type of outdoor oven, you will need:
- brick;
- cement;
- sand;
- water;
- metal fittings;
- level and other tools.
Follow this plan of action:
- First mark out the area, remove the sod of this rectangular area.
- Put the reinforcement here, fill it with the prepared concrete mortar - this is the foundation of the future structure. Here's how to make a do-it-yourself oven further.
- Cut another indentation in the soil to form a kind of wall formwork. But you can use a pre-made timber formwork for this.
- You will need several of these panels, then you place them vertically as side and back walls. Check the evenness of the laying of this material with a level. This will create the bottom of the oven for your summer kitchen, which will store the dry wood. Lay the panel horizontally, cement it in place. Place the bricks at the top, we also fix them with this solution.
- Use the bricks to make the rest of the oven device. Cover your creation outside with cement mortar. When it dries, it remains to whitewash or paint the stove, which will become a decoration of the summer kitchen.
If you want to make something simpler, to place a metal pot over the fire and cook soup for the family or barbecue, bake potatoes on coals, then you can make another hearth.

This is done pretty quickly. To make it you will need:
- red and white bricks;
- sand;
- cement;
- decorative rock;
- crushed stone;
- shovel.
Draw a circle on the ground. Remove the soil here, deepening it 40 cm. Pour some rubble, decorate the walls with vertical bricks. Strengthen them together with cement mortar. Decorate the top of the notch with decorative stones.
All that remains is to put firewood in the hearth and you can cook in such an impromptu summer kitchen.
If you are unsure how to build a barbecue to indulge your family with fire-cooked food, then check out the next section.
How to build a barbecue for your summer kitchen?

To implement this idea, you will need:
- gas silicate blocks or thick bricks;
- cement;
- sand;
- wooden boards;
- metal grill;
- nails;
- hammer.
Arrange the blocks as shown in the photo. Knock down the formwork from the boards. Pour the concrete mortar, after placing a metal grate here. But it is needed to give the product strength and in order for it to have good traction. Cover it with a brick, but not tightly, leaving a blower.
Place the main rack on top, on which the cooking process will take place. Not everyone knows that you can even make a barbecue from an earthen pot. You can see how this device works in the next photo.

A heating element is built into the bottom of the pot, which can be an ordinary electric stove. A metal frying pan is placed on it, on which coals are placed. They will smoke the food on the top rack. To make the chicken, fish or meat baked well, cover such a mini oven with a lid.
But if your summer kitchen does not have electricity, then the stove may be slightly different.

For this you will need:
- clay pot;
- ceramic elements for legs;
- metal grid;
- foil;
- coal.
To have a summer kitchen with barbecue on your site, start making this mini stove. Place the mesh on top of the pot, trim off any excess. Place the foil underneath the container so that it covers the bottom of the pot. Pour coals on it and set them on fire. Place the wire rack on top, it is better to fix it on the edges of the pot. Lay vegetables on this grid, cook them using such a barbecue for a summer kitchen.
To make the place for cooking not only convenient, but also become a subject of your pride, try to build the following building.
Summer kitchen with barbecue

This Gudkov oven weighs quite a lot, so a foundation must be made for it.
To know how much you need to purchase materials for the foundation, check out how many of them are needed per 1 cubic meter:
- 325 kg of cement grade M400;
- 1, 3 tons of crushed stone;
- 1, 3 tons of sand;
- 205 liters of water.
In the selected area, drive in pegs in the corners, mark the area, remove the soil. In this case, the resulting rectangle has dimensions of 1, 6x1, 2 m.

Depending on what type of soil you have, this will be the thickness of the sand cushion. Sometimes it reaches 1 meter. But do not immediately fill in this entire layer of building material. Stack the sand by 15 cm, then tamp it down and spill it with water. For this, such a device is suitable.

Drive in the posts along the contour of the pit, to which you need to attach the boards for the formwork so that they rise above the ground surface. Install the reinforcement belt.

Pour the formwork with concrete at a time, then the foundation will be the most durable.

Cover its surface with a tarp, after 4 hours pour sand on top. Moisten the concrete surface periodically until it hardens completely. This can take from one to two weeks.
A brick is laid on a mortar made of coarse sand and plastic varieties of red clay. Here you need to observe certain proportions. So:
- for skinny clay, it is 1: 1;
- for one part of oily clay, add 2.5 parts of sand;
- in one part of clay of medium fat content - 1, 5 parts.
First, the clay is poured with water for a day, then kneaded until a homogeneous consistency and sand is added. Such a solution will make it possible to make a Gudkov oven or another. Check out the summer kitchen project. You can recreate it or any other you like.

How to equip a summer kitchen in the country?
This place for cooking is done based on the preferences of the owners of the site and their capabilities. To prevent precipitation from spoiling the stove, it is better to build a canopy. It can be the simplest one, hold on only four, but reliable pillars.

A roof is attached to them, on which the roofing material is spread. To fix the structure, you need to stuff the bars onto the pillars, attaching them to the roof.
If you do not want to buy a stove or do everything yourself, then you can put a gas stove on the summer kitchen, which will work from a cylinder. Various lockers will help the hostess store everything she needs here. A large dining table and benches are what you need to accommodate a large family.

On such an open veranda it will not be hot even on a sultry July noon, and the roof and plants will shade this area.
A summer kitchen can be quite simple, consisting only of a stove, a sink and a work area.

Sometimes stainless steel metal objects are placed directly in the open air, they do not erect a roof. But you can make a room for cooking by combining the stove and the work area.
Hang up lights here so that on dark evenings the summer kitchen becomes a source of comfort.

It can be made in the form of a gazebo.

If you have little space on the site or you want to save materials, then you can make the summer kitchen not stand-alone, but as an extension to the house. Carved lathing will decorate this open space, giving it additional charm and charm.

If you have a body of water on the property, set up a place to eat right next to it. Then you can admire the smooth surface of the pond and breathe clean fresh air.

Set aside a very small area for your summer kitchen. Build the walls of the tables out of bricks, put the countertops on them. Place a small barbecue oven in the center and you can cook outdoors.

Even simple shapes can make this room unique. Here's how to make a summer kitchen using the following idea.

To make such a building, you will need:
- timber;
- self-tapping screws;
- corners and other metal fastening systems;
- antiseptic;
- brush;
- thick boards;
- polycarbonate.
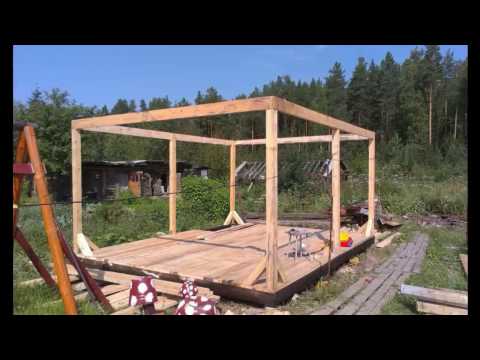
Now you can buy polycarbonate in different colors. Choose it based on your preferences, and so that the roof is in harmony with the nearby buildings. The wooden components of the future structure must be covered with an antiseptic or paint. The base of the structure consists of vertical bars and located slightly obliquely. They need to be well fixed so that the summer kitchen is stable. The roof is pitched here. For its lathing, thick boards are used, which must be put on the edge. Polycarbonate is laid on top and fixed.
And here's how else a summer kitchen in the country can look like. The walls for it are also made of timber, but this material is located vertically, which greatly facilitates the work.
The canopy covers part of the room. Chairs and tables are easy to make from beams and planks. This uncomplicated utensil will be decorated with blue flowers, allowing you to make a corner in the style of Provence.

If you decide to make a solid summer kitchen, then use larch for the floor. This tree is durable, well withstands outdoor placement, atmospheric precipitation. But first, the material must be covered with an appropriate agent to protect the wood from decay.

How to decorate a summer kitchen in the country?
After the walls and stove have been erected, it remains to decorate this room for cooking.
At the dacha, a variety of items can become decorative elements. Weave braids from onions and garlic, hang them on the walls. If you use a summer cottage in early autumn, then orange rowan clusters, red clusters of viburnum, black clusters of black chokeberry can become decorative elements.
Fresh brushes with berries can sag for quite a long time, decorating this room. If you are making blanks, you can put them on the shelves. Jars with jams and pickles will also become decorative elements. But seaming is not recommended to be stored in bright light, keep this in mind.
You can decorate the kitchen by creating useful little things with your own hands.
If you managed to collect mushrooms, dry at least a few pieces. String pieces of boletus or small mushrooms whole on the string, and hang them over the stove in the summer kitchen. In a few days, these gifts of the forest will completely dry up here, then they will decorate the room and exude a unique aroma.
See how wooden dishes, original bottle shapes and figurines can decorate an empty wall. Place it all on a DIY shelf.

Sew some pretty chair covers to add a touch of coziness to the space.

The right fabric will also help this goal. If your summer kitchen is located directly in an open place, fence it off with wide strips of multi-colored fabric, hanging them on a rope and securing with clothespins.
This place for eating can be portable, as the chairs and table quickly fold and, if desired, can be transferred to another place.

If your summer kitchen is almost completely open, when there is bright sun or wind, you can hide from them by sliding the blackout curtains. They will also help you hide from your neighbors if you do not want them to watch your meal.

For this space, you can sew seats to chairs with removable waterproof covers. They will not be afraid of precipitation, and if necessary, you can always remove this fabric and wash.
Decorative pillows will also decorate this seating area and add coziness to it.

The same applies to small sofas. These are made in romantic colors and allow you to sit comfortably and have a good rest.

If you liked the ideas for decorating a summer kitchen and want to build one, then check out the video tutorial.
The first plot will teach you how to quickly build a summer kitchen.
The second video review will help you decorate the kitchen in the country and in the city house. After all, such little things will add coziness to any room where housewives prepare food with love.


