
If a few decades ago, the decoration of ceilings in most cases was limited to whitewashing or wallpapering, then today the base can be sheathed with rather unusual materials, for example, plastic. How to install plastic panels on the ceiling, we will figure it out below. PVC is a practical and versatile high performance material used in many manufacturing industries. It also gained wide popularity in construction. Decorating ceilings with plastic panels is the best option for different types of premises.
Advantages and disadvantages of plastic panel ceilings

Finishing the ceiling surface with polyvinyl chloride has many advantages:
- Masking irregularities … Perfect alignment of the base coat is not required for installation. The panels will hide all defects.
- Convenient installation of communications … Pipes, wires and ventilation ducts fit freely in the space between the ceiling.
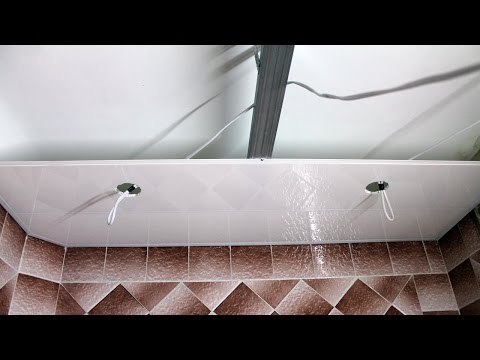
- Different lighting options … You can install original lamps or lighting in the ceiling made of plastic panels with your own hands.
- Easy to install … It is much easier to equip a PVC structure than suspended or stretch ceilings.
- Light weight … The lightness of the material allows it to be attached to a longitudinal frame, which significantly reduces the cost of profiles.
- Additional insulation possible … During the installation process, hydro-, noise- and heat-insulating material can be placed in the interceiling space.
- Reuse … The panels can be dismantled and reinstalled if required.
- Moisture resistance … The material is absolutely not afraid of water, and therefore it does not warp, does not become moldy, does not deform when moisture enters. Because of this, it is he who is chosen for equipping the ceiling from plastic panels in the bathroom, in the kitchen, on the balcony and on the loggia.
- Ease of care … Plastic is resistant to most detergents without abrasives, so it can be easily cleaned from almost any contamination.
- Relative cheapness … PVC panels are relatively low cost and will cost significantly less than plasterboard or tension counterparts.
- Durability … With proper use, plastic will last about 15 years.
As for the disadvantages of this method of finishing ceilings, here they are distinguished:
- Simple view … The ceiling made of plastic panels looks pretty budgetary.
- Limited design types … Using PVC, you can only make a single-level structure without bends.
- Reducing the height of the room … A plastic suspended ceiling will make the room lower by at least the width of the profile.
- Interpanel seams … Even with the correct installation of the seamless plastic lining, the joints of the panels will still be visible.
Having weighed the pros and cons of this finishing method, you can make the final decision whether to install plastic ceilings indoors.
Varieties of plastic panels for the ceiling

Today this material is so common in the construction industry that it is used for cladding various surfaces.
By type of purpose, panels are:
- Wall … They are denser and heavier.
- Ceiling … They differ in relatively low weight and lower strength characteristics.
By the type of connection, the following varieties are distinguished:
- Seamless … The joints of such panels are visible only at close range.
- Embossed … The surface looks as if sheathed with clapboard.
- With chamfer (rustic) … They look like seamless patterns, but have a decorative hole at the ends.
The panels on the market are presented in three typical sizes:
- Lining - 300 * 10/300 * 12.5 cm;
- Seamless with a length of 260-300 cm and a width of 15-50 cm;
- Squares (rectangles) - 30 * 30 - 100 * 100 cm;
- Leafy, 80-203 cm wide, 150-405 cm long.
According to the type of coating, PVC panels are divided into:
- Glossy … The lacquer finish makes the surface mirror-like.
- Matte … No additional processing. A budget option.
- Colored … In cheaper models, the drawing is applied by transfer from thermal film, in expensive ones - by direct printing.
For the installation of a ceiling made of plastic panels, ceiling, seamless, sheet patterns are most often used.
Recommendations for choosing plastic panels for the ceiling

Among the variety of PVC panels on the market, it is very easy to get confused, therefore you need to know the rules for choosing a quality material:
- The panel should be geometrically correct in shape, with a clearly applied pattern and a smooth surface.
- No stiffeners should be visible from the outside. At the same time, keep in mind that the strength of the structure directly depends on their number.
- When choosing panels, take two pieces and fit them together. High-quality products should fit snugly to each other, easily join and not form gaps at the joints.
- Try pushing or bending the material. Even though they are light and thin, ceiling panels should not be too fragile.
- Smell the stuff. A quality product does not emit a pungent odor.
You should not save on materials, because high quality panels will last much longer and will fully pay for themselves over time. Be sure to check product certifications and shop from trusted suppliers to avoid becoming the owner of a substandard product.
To make the right choice among the widest range of textures and colors, consider the following nuances:
- You can visually increase the height of the room by equipping a light ceiling. Conversely, a darker coating will reduce the height.
- The glossy surface visually deepens the ceiling, making it more remote and the room more voluminous.
- Do not overwhelm the interior by using more than three colors in the ceiling decoration.
- Imitation of wood or stone on plastic looks primitive (especially if seams are visible), therefore it is better to refuse texture patterns.
At the same stage, think about the type of luminaires used and how to mask the extreme ends of the panels.
Do-it-yourself ceiling installation from plastic panels
The structure consists of a frame fixed to the base surface and sheathed with PVC. To do the work yourself, you need to prepare the ceiling, make markings, draw up a drawing, calculate the amount of material required, build a frame and fix the panels on it. At each stage, many technological nuances should be taken into account and it is important to approach each process responsibly in order to ultimately remain satisfied with the work.
Preparatory work before installing the ceiling made of plastic panels

No significant preparation or leveling of the base ceiling is required with such a finish, but some work is still worth doing:
- We free the room from bulky furniture, remove curtains, cornices, paintings and a chandelier, insulating the ends of the wires.
- We put plastic wrap on the floor and close the doorway with it.
- We remove the ceiling trim and dismantle the old wiring if necessary.
- We putty large cracks and holes.
- We prime the surface with an anti-fungal composition.
If a suspended installation method is planned (using metal hangers), then the preparation of the base surface can be considered complete. If it is supposed to be installed by the hemming method (fixing the profiles directly to the ceiling), then additionally it is necessary to smooth the surface with plaster putty.
Calculation of material for a ceiling made of plastic panels

In the course of work, we will need directly panels and accessories. Materials should be purchased with a margin so that in case of unforeseen circumstances the installation process does not drag out. To correctly determine the exact number of fasteners, components and panels, we first measure the length of all four walls. Note that opposite walls must also be measured individually as they can be uneven.
Calculations are carried out taking into account the following rules:
- Divide the ceiling area by the area of one panel, add 15-20% to the result and round up. This figure will be an indicator of the required number of PVC panels.
- When calculating the number of ceiling profile and suspensions, keep in mind that it is mounted in increments of 0.5-0.6 meters.
- The length of the required starting profile is equal to the perimeter of the room plus 10 cm.
- The number of dowels will be needed with the calculation of 1 piece / 0.5 meters of the profile, and screws - 1 piece / 0.5 meters of the panel length.
- To calculate the amount of plastic profile, divide the perimeter of the room by three (standard length of products) and round it up.
In addition, you may need an H-profile for joining the ends of the panels, plastic corners for external and internal joints.
In residential premises, the crate can also be made from wood, but for the installation of a ceiling made of plastic panels in the kitchen, balcony or bathroom, it is better to use metal, galvanized ones.
Ceiling markings before installing plastic panels

For the convenience of work, prepare in advance a tape measure, a paint cord and a water level.
We carry out the markup in this order:
- We measure the height of all corners and the center of the room.
- In the lowest corner from the base ceiling, we measure the height of the interceiling space.
- Using a level, we make marks in the same plane in all corners, we screw temporary screws into them.
- Pull the paint cord between the two temporary fasteners and beat off the line for the location of the plastic coating. We repeat the procedure for all walls.
- On the opposite walls at the ceiling, we make marks in increments of 0.5 meters.
- We pull the paint cord between the marked points and beat off the attachment lines of the bearing profiles.
- We mark the attachment points of the suspensions.
If a hemming technique for attaching panels is assumed, then the marking on the wall is not done, and the base ceiling is pre-leveled.
How to make a frame for a ceiling from plastic panels

When installing the frame for suspended ceiling mounting, we use metal hangers. Before starting work, you must make sure that there are no hidden wiring in the places where holes are drilled. To do this, you need to invite an electrician or use special detectors. Failure to do so could damage the power supply and even cause injury.
We carry out the work according to the following instructions:
- We attach a guide profile at the level of the markings on the wall. It must be fixed on all walls, except for the one where the last part will be installed. This is necessary for the convenience of docking and fitting.
- At the marked places, we attach the suspensions to the dowels and bend their ends.
- We insert the ceiling profile into the guide and fix it to the suspensions with self-tapping screws.
- We align each element along the stretched nylon thread.
The false ceiling frame is attached without hangers to a pre-aligned base surface as follows:
- Attach the bearing profile along the marked lines on the ceiling. In the process, it is necessary to monitor the most tight fit of the parts to the wall. However, if the coating was pre-leveled, then no gaps should form.
- We attach the L-shaped profile to the walls around the perimeter of the room at the level of the ceiling profiles fixed to the ceiling.
- We attach the corners at the joints.
At this stage, it is necessary to lay all communications and draw conclusions for the lamps. Be sure to lay the wiring in a heat-resistant corrugated sleeve.
Please note that when the ceiling is hemmed, there is not enough space for mounting spot lighting.
How to sheathe the ceiling with plastic panels

Plastic panels must be fastened across the location of the profiles, the installation is carried out as follows:
- If necessary, we cut off the part of the desired length by 0.5 cm less than the width of the room. To do this, you can use a jigsaw, a hacksaw with fine teeth, a sharp knife.
- Sand the edges with sandpaper and remove the film from the panel.
- Insert one side into the starting profile, bend it slightly and insert the second edge.
- We move the element close to the wall. As a result, the first panel will be fixed in three profiles.
- We attach the remaining side with self-tapping screws with a wide head to the crate in the groove.
- Insert the second part in the same way into opposite guides and move it tightly to the previous panel.
- We sew the entire ceiling using this technique. The extreme element before installation will need to be cut to the appropriate width.
- We install decorative skirting boards on the starting profile around the perimeter of the room. In the place where the last panel is attached, it can be glued onto liquid nails.
- We cut out holes for mounting the fixtures with a drill with a crown.
Such finishing of the ceiling can be done at any stage of the renovation, both before and after finishing the walls and floor, since this work is not "dirty".
Useful tips for installing a ceiling from plastic panels

To make the design aesthetically pleasing, strong and durable, we recommend taking into account the following recommendations in the process:
- The plastic panels are fixed to the longitudinal frame, but if you plan to hang the chandelier, then at the place of its installation you will need to reinforce the crate with jumpers and fix the anchor hook in the base ceiling in advance. Jumpers must be cut from the ceiling profile and attached with crab connectors.
- For a beautiful joining of the skirting boards in the corners, they must be cut off at an angle of 45 degrees. For convenience, you can use a miter box.
- If after installing the last panel there are small gaps, they can be blown out with acrylic-based sealant.
- It is better to attach a foam plinth to uneven walls, since plastic products will form gaps.
- The best quality PVC products are produced by Italian manufacturers. The warranty period for such panels is almost doubled, and the cost is 20-25% higher.
- Plastic is not flammable, but under the influence of high temperatures (80-90 degrees) it can melt, therefore it is better not to install high-power lighting devices in these ceilings. The best option is LED lighting.
- It is categorically impossible to glue panels with liquid nails to the ceiling. Firstly, this is not a secure fit, and secondly, there must be a ventilation gap between the base surface and the plastic coating.
These simple tips will help you avoid mistakes during installation. Read the instructions carefully and make a plan of action before starting work, so as not to forget anything.
How to make a ceiling from plastic panels - watch the video:
Plastic ceilings are the optimal solution for bathrooms, kitchens and other premises, in which the practicality and functionality of finishing is in the first place. Our recommendations will help you understand the question of how to make a ceiling from plastic panels. Following the instructions, you will independently complete all the work, from preparing the base surface to installing decorative skirting boards.


