
You can make postcards for May 9 if you look at the presented master classes and 50 step-by-step photos. There are ideas for children of different ages, for a competition, as a gift or for yourself.
You can make crafts for Victory Day from paper, cardboard, plasticine. See how to make unusual cards and gifts.
Crafts for Victory Day - DIY plasticine gifts
Show the children how to make gifts for May 9th using familiar material. Take:
- plasticine of the right colors;
- thick cardboard;
- soft cloth;
- plastic knife.

Here's how to make a postcard for May 9, which at the same time will become a gift from a child:
- Give him a rectangular sheet of cardboard. It is better to take a colored one right away. Now have the child roll up thin sausages, cut them and lay out the letters.
- Make a congratulatory inscription, then he can move on to making a star. Then you need to make flowers from plasticine.
- To create a St. George ribbon, you need to roll up thin bundles of orange and black plasticine and fasten them together, roll them out a little. And the ends must be left free, just a little twisted. It remains to mold a sausage from green plasticine, glue along the edge of the work.
- To make this edging more beautiful, have the child cut this decorative element into identical fragments with a knife to get such a pattern.
You can create similar postcards for the May 9 contest. With their own hands, children will perform them in various techniques. You can use not only plasticine, but other materials as well.

To do this kind of work, take:
- cardboard;
- plasticine;
- paper;
- pencil;
- dry beans;
- St. George's ribbon;
- glue.
See also instructions:
- Have a child draw the outline of the Eternal Flame. Now you can make a flame from plasticine circles, gluing them here, or from paper using the facing method. Then you need to attach the grains of dry dark beans in the form of a star to the plasticine around the Eternal Flame.
- To make flowers out of paper, you need to cut circles from a stack of red napkins. Then fasten the middle of each blank with a stapler.
- Glue the flowers onto the card. Make the stems for them from green plasticine, roll it over the working surface. It remains to create an inscription from the same material and tie the flowers with a St. George ribbon.
The child can draw salute with colored pencils.
The next voluminous postcard on May 9 is also made of plasticine. To make such flowers, you need to cut pieces from a sticky mass, roll them into balls and flatten them with your palm. Then these pancakes must be evenly cut to form petals and slightly bend their edges. It remains to glue the yellow cores here and make green stems. You will make a flag from a rectangle of red plasticine, which you need to pinch in the corners. Then it will seem that the flag is evolving.

Crafts for Victory Day in the technique of facing
It will also allow you to make children's postcards for May 9th. Watch a small workshop to help you do this.

First you need to draw a dove with a simple pencil, then cut squares with sides of one and a half cm from a napkin. Now the child will wind these blanks on a pencil and then glue them onto the base. It remains to cut out an inscription, a twig and a part of the globe from colored paper. This postcard symbolizes world peace.

Also, the facing technique will help to make another postcard for May 9.
- To do this, glue black and orange strips of colored paper alternately on a sheet of cardboard. They will symbolize the St. George ribbon.
- Now you need to separately cut out a star from red paper or cardboard of this color. Let the child decorate it with burgundy trims, gluing them here. He will cut green stems out of colored paper, glue them to the base.
- To make flowers, you need to cut out identical circles with a pointed tip, fold them in half, and then unfold and glue them.

You will get a voluminous postcard for May 9, like the next one. Here the star and numbers with the year of Victory are made by facing.

It will turn out to be a real festive picture if the child performs it in this technique, and then makes a fireworks with the help of threads. To do this, you need to cut the colored yarn and glue it as rays and vertical stripes. Then you need to wind up small balls and also attach them around these blanks. Using the method of facing, the child will make a background, flowers, an eternal flame. The lettering can be laid out with red satin ribbons to make it shine.

Crafts for Victory Day - DIY tank
They can be brought to school or presented to a friend. Such a tank will become a worthy decoration of the house.

Take:
- toilet paper rolls;
- black paint;
- brush;
- paper tape;
- corrugated cardboard;
- wrapping paper.
First paint the bushings black. When the cover is dry, fold the 3 pieces together and secure them with paper tape.

Then glue a strip of wrapping paper to get the tank body. Then glue on both sides a strip of corrugated cardboard. You will have caterpillars. Cover them with silver paint if desired.

Now make a rectangle out of cardboard, glue it with wrapping paper. This will be the turret of the tank. Glue a red paper star here. Make a hole in the center in front, glue the muzzle rolled from wrapping paper here. Here's a gift for May 9th.

You can make similar military equipment from salt dough. To do this, take:
- a glass of flour;
- 1 tablespoon salt
- 1 tablespoon water
- half a teaspoon of vegetable oil.

Knead these ingredients into a thick dough. Roll it out pretty thick, cut out a rectangle for the tank's hull, a circle for its turret and auxiliary parts. Now you need to let the workpiece dry completely. Then you will color it.

Here is a DIY gift for May 9 that can be made from salt dough. See how to make a paper tank.
Cut strips from green corrugated paper. Twist each one and glue the ends of these blanks. Now connect five small circles each with a strip of cardboard, which will become a crossbar. Glue it between the two tracks to connect them. Attach a small cardboard roll to the back. A larger circle of this material will become a tower. Complete the blank with details to make a tank of this type.

How to make an eternal flame for Victory Day with your own hands?
This idea will also come in handy when you are making crafts for May 9th.

To create such a job, take:
- a box of chocolates;
- double-sided tape or glue;
- colored cardboard;
- paper cupcake molds;
- chenille wire;
- photograph of the sentry.
Cut out five-pointed stars of different sizes from cardboard. The template below will help you with this.

Take a box of chocolates, paste over with red paper. Cut out flames of fire in red, yellow and orange from corrugated paper. It will appear to be on fire. Now glue the stars on the base first, then in the center - this is the flame. Attach the box at the back. Cut strips out of thick paper, bend them at the ends and glue. Place the soldiers under these arches.

To make flowers, paint the cupcake tins red. Insert chenille wire into each.

You can also make paper flowers and also place them near the Eternal Flame. In this case, the flame is also created from paper that holds its shape well.

How to make flowers for the Victory Day celebration?
Having created them, you can decorate a postcard or craft for May 9th. First, cut rectangles from corrugated paper, align them, fold with an accordion and tie with chenille wire. Now trim off the tips to make them sharper.

Then you will need to combine these two tips at one point, fluff the flower. This is how beautiful it will turn out.
The next one is created in almost the same way. But they took a white sheet of paper for him. This sample is also folded with an accordion, but then you need to paint the edges of this blank with a felt-tip pen.

Also attach the flowers to the chenille wire, then fluff them up. You can create these adorable creatures in a different way. Use a cloth to do this. From it you need to cut out various blanks for flowers, for stems and leaves. Then take the circles for flowers, align them, pierce with wire and secure it. Fix the green sepal on the back. Then you will need to wrap the wire with a strip of green fabric and make leaves from the same canvas.

And here's how to make flowers with St. George ribbons. Such on this day you will decorate your outfit or present such boutonnieres.

Prepare:
- foamiran;
- a brooch with a pin;
- glue gun;
- scissors;
- St. George ribbon;
- wire.
Cut a 25 cm long strip from the St. George ribbon. Sharpen the 4 edges with scissors.

Check out a flower template to help you make a carnation. You need to cut out parts of this shape.

Attach these templates to the foamiran by cutting out these blanks from it. You will also need to make petals, stars and other elements.

Now cut the edges of the flowers in a circle. And then, put the leaves on the thick green wire first, then the sepals and petals. Glue the flower to the St. George ribbon, attach a pin on the back side to fasten this boutonniere to the suit.

You can make flowers for Victory Day and stick them on a postcard.
- Cut the semi-oval petals out of white paper, fold each in half and reopen.
- Glue these flower-shaped blanks on the prepared sheet of cardboard. From yellow paper and let the child roll up small circles and attach these stamens inside each flower.
- Now you need to draw a star with a pencil, the inscription May 9. Small lumps of red paper are glued around this sketch. It is better to use a napkin as it drapes well. Attach flowers and you can give such a card.

Beaded flowers look great too. To do this, you will need red and green beads. Wire will also be needed.
Take a piece of sufficient length, type 5 red beads on it. Weave this blank to form a buttonhole.
On the right and left, create another one of the same loop. Now connect them, create the base of the flower. Thus, make several more blanks on the same wire. If this piece is not enough, then attach other pieces of wire here. Thus, make several round blanks and arrange them so that they resemble a flower.

Now you need to attach several wire fragments twisted in half on the back side, on which the beads will be located. Connect these elements to make the bottom of the carnation flower. Then put green beads on the beads, make leaves out of them. Fold the resulting stem, wrap it with green thread.

It remains to tie the St. George ribbon, after which the craft is ready. You can also make it out of paper. A child will create such lush flowers from a napkin. Then he will glue them to the postcard, fix the St. George ribbon on the stem.

See what gifts for May 9 can be made by children of different age groups.
Crafts for kindergarten on May 9
Advise the kids to do the following work, which will not cause much difficulty for the kids. It's no secret that children love to draw. And if you use the following technique, then the process will be even more interesting.

Let the child take a sheet of blue paper or cardboard of this color, drop paint here and blow into a tube on it. Due to this, the liquid drop will spread and take on bizarre shapes. Thus, the child will make the sun or a festive fireworks.

Let this fireworks be against the background of the city. Then you will need to cut out of paper or draw houses with dark silhouettes, since it is late evening.

Using a toilet paper roll, your toddler will also create bright flashes of fireworks. To do this, the workpiece at the bottom needs to be chopped into strips and dipped into the paint poured into a bowl. Now let the child dip the sleeve in here and make such color prints.

There will also be a simple craft for children on May 9 from plasticine. Let the baby first fashion a pedestal of green mass, as if it were grass, attach flowers from plasticine here. Now from this material you need to make an airplane and a pedestal for it.

Show your child how to sculpt a St. George ribbon, a star, tell him about Victory Day on May 9. And the next craft will help to consolidate the acquired knowledge.

Also teach him to sculpt a soldier. It will be fun. Have the child take a piece of cardboard and cover it with blue plasticine using the smear method.
To get the blue color of plasticine, you need to add a little blue to white and mix well.
Now the child will make circles out of white, attach them here to make the mainland against the background of water.

If a competition is announced in a kindergarten in order to make symbols for May 9. show the kids how to make this type of card. All of them will gladly do this job.

Crafts for Victory Day for school
For children of this age, more complex work can be advised. But for this age category, they should also not cause difficulty. The vytynanka technique allows you to get beautiful postcards.
Glue the white sheet onto the blue sheet first. Then draw a sketch. To do this, you can use ready-made templates for vytynanka, for example, like this.

Now, carefully start cutting with a small stationery knife or scalpel, removing unnecessary fragments. For flowers, you need to mark only the petals with such a sharp tool and raise them. Draw the middle in the center. You will get such a beautiful vytykanka.

You can also advise making crafts for Victory Day for schoolchildren of this type.

- They will roll cones out of white paper, glue them to create birch trunks. Now you need to draw black lines on them with a brush. And one cone must be covered with foil to make a memorial. You can use paper of this color.
- Then you will need to glue here the date of the beginning and end of the war, an asterisk. Place branches with green leaves glued on them in the upper parts of the cones.
- Set it all up on a green painted cardboard box lid. You can cut a path from carpet or brown fabric, put soldiers, put flowers.
Show your child how to paint with stained glass paints and outlines. He will surely enjoy this activity. Let him create a real painting depicting the Kremlin, flowers, Red Square and fireworks. You can do other jobs in the same way.

The isothreading technique is also useful to make crafts for Victory Day. Thus, the schoolchildren will create a star, pigeons, the Kremlin tower. You can also make flowers to use for your work. Decorate the medal made using the isothread technique with the St. George ribbon.

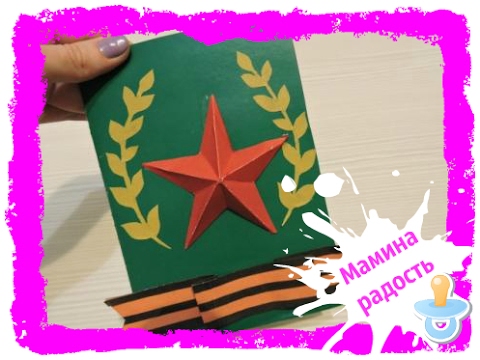
Such crafts for Victory Day can be created by children of different ages and adults. See how to make a postcard for May 9th. You will get a beautiful volumetric star.
The second video demonstrates how to make a craft for Victory Day. After watching this story, you can create a tank with your children.


