
Delight your kids by making dishes and food for their dolls from a variety of materials: paper, plasticine, clay, lids and caps.
How to make utensils for dolls?
Such utensils consist of plates, cups, saucers, kettle and other items.

It's hard to believe that these items are made of waste material. See what makes such dollhouse utensils.

Some objects need to be glued together, then painted in a certain color.
To make it as clear as possible to you how to make such utensils, watch the master classes illustrated with photographs.
How to make a plate with your own hands?
Made of plastic

To craft such kitchen utensils, you will need:
- plastic covers from vegetable oil;
- scissors;
- cardboard;
- stickers.
Cut off the tail of the plastic oil cover, you won't need it. Cut a circle out of the cardboard, which corresponds in diameter to the notch in the lid.
Attach a sticker to it, glue this element in the center of the circle.

If there are no stickers, then just draw a flower on the cardboard.
You've made shallow dolls, see how to make deep ones. To do this, you will need the Kinder Surprise plastic wrap inside this artificial egg.
Cut the deeper part from the shallower one, singe the edges as follows. Put baking paper on the electric hotplate, place the workpiece on it with the cut side down. If you have a gas stove, then the glassine should be placed in a frying pan.

From paper
Here's how to make a paper dolls plate so that it is as deep as a bowl. The quilling technique will help this.

Cut a strip 1–2 cm wide from white or colored paper. Screw it onto a pencil or a rod, remove from this accessory.
Glue the tip, pull slightly in the middle to shape the plate.

Polymer clay
Beautiful plates for dolls are also made from polymer clay. To do them, you need to take:
- polymer clay;
- white acrylic paint;
- lids;
- a toothpick;
- brush;
- glossy varnish.

Mash up the plastic. Roll out a piece, attach a round object to it, cut out the future vessel according to this template. Now attach a round object of a smaller diameter to the center of the workpiece, press it against the plastic.
Attach a toothpick to the edges of the plate, make them openwork. Cover the edge with paint. When it's dry, flatten here with a knife. You can draw a flower in the center of the pot, then leave the plate to harden in the air or bake in the oven (this is described in the instructions for a particular polymer clay).

Made of cardboard

On the wrong side of the cardboard, draw a circle as large as you want it to be the size of the bottom of the plate. Draw a larger circle around this blank. Cut out the resulting ring that sits between the large and small circle.
Make an incision on its side. Align the two edges of this blank, glue them in this position. Place the remaining circle on the cardboard, cut it out with a margin. Glue the prepared ring to this blank, you get a plate with sides.
To make this item more durable, you can make several layers and glue them together.

And here is another interesting option that will allow you to make a whole toy set for feeding dolls. It will require old cards that are out of order, which should not be thrown away.
How to make a toy doll set?

You can see what kind of source material was used. It will be necessary to carefully detach the small elements from the base so as not to damage them, remove the winding with your hands, slightly prying it with the tip of small scissors.
Insert a wooden rod inside such an element, cut off the excess.

Make some of these toy containers with wooden lids, write the names of the spices on them on small paper strips. Attach them with glue or tape.

The child will also be delighted with the sets for free-flowing spices, making them is also quite simple.
Take a metal element, use a nail and a hammer to make several holes in it.

It remains to close the lids and admire what an interesting toy set you have.

You will transform old capacitors beyond recognition. To do this, you first need to remove the covers from their bottom and saw off one piece to half.

Work on some other details in the same way. Here's what you get at this stage.

File the edges of these blanks to make them even. Smaller parts, such as handles, lid opening elements, need to be processed in the same way. Cut these items from a can, for example, from a can of condensed milk or from a stew.

Solder them into place, see what a wonderful playset you get.

You can make it from other materials with your child, for example, from plasticine.

- To do this, you need to knead the plasticine. To make a saucer, roll the mass into a ball, flatten, slightly lift the edges up.
- Show your child how to make a cup. To do this, you also need to first roll the ball, then press in its center with your finger, give the shape of a cup.
- To make a handle for it, roll a thin sausage out of plasticine, bend it slightly and attach it to the side.
- You can also make a coffee pot out of plasticine. To do this, you first need to roll a pear-like shape out of this material. This is the body. To make a handle, roll a plasticine sausage, bend it and attach it to the side. The spout of the coffee pot is also made from a curved sausage, and its lid is from a shape similar to a cake.
If you want to make a coffee pot out of paper, the following diagrams will help.

See how delicate and beautiful it turns out.

A set of dishes can also be made from natural materials. Just now the acorns are ripe, you can stock up on them to tinker throughout the winter.

To make such a set, you will need:
- acorns with caps;
- twigs;
- twigs;
- small hacksaw;
- glue gun.
Carefully remove the lid from the acorn, glue a curved twig to it, which will become a handle, and one small thin twig that needs to be turned into the spout of this teapot.

Saw off a thin circle from the branch, which will become a saucer. Place a cup on it, you need to turn the acorn hat into it. Glue the curved rod as a handle. Make the same cup and saucer, and you can start the puppet tea.
A wide vase can be made from an acorn cap, glued to the bottom of the scales of cones, decorating this item.

Make children's play even more fun by making not only dishes for dolls, but also food for them. Of course, the kids are not averse to using the real one, but this will quickly deteriorate, it is short-lived. You will show them how to make food for their charges so that they can play it for a long time.
How to make food for dolls?

Check out how wonderful this lemon cake looks. Its great advantage is not only in its excellent appearance, but also in the fact that you can play with it for a long time. After all, this dessert is made of polymer clay, which is quite durable.
Do not give such items for play to small children, it is difficult to explain to them that this is not a real cake and cannot be tasted by the teeth. Before making food for this kind of dolls, you need to take:
- polymer clay of the required colors;
- toothpicks;
- stationery knife;
- rolling pin.
Let's start with the decoration. To make lemons, use white, yellow and light yellow clay. Roll out of these three pieces into a circle.
Now take a light yellow clay and cut this piece with a clerical knife into 6 equal pieces. Roll a sausage out of each.

Next, use white clay, which you need to knead in your hands and roll out into a thin layer. Put the first yellow sausage on it, roll this roll.

Thus, arrange all the yellow sausages, give the shape of a drop with a knife. Now roll a rope out of white polymer clay, it will become the centerpiece. Attach the decorated six slices to it.

It is necessary to wrap the resulting beauty, first in white, and then in a yellow layer of polymer clay.

It's time to make the cakes themselves. To do this, roll out a circle of white, brown and yellow polymer clay. Roll out thick cakes from them, place one on top of the other.

To make the doll cake further, you need to tackle the lemon shavings. To do this, you need to chop a hard piece of clay into shavings with a sharp knife, then roll the sides of the cake in it, attaching this decoration with your fingers.

Roll the white plastic onto thin sausages, roll them up with a tourniquet and bend them in the form of roses, decorating the cake with this makeshift cream.

To make the lemon cut well, put it in the freezer for half an hour. Then it will be easy to chop this sausage into thin slices, which you will do.
Place them on the surface of the cake, decorate with shavings of brown rough clay, and admire with your child what a wonderful food for the dolls turned out.

Place this masterpiece in the freezer for 30 minutes, then it will be easy to cut into wedges.

To see how fluffy the dough is, carefully make a few holes on one side of the piece and then on the other. Following the polymer clay instructions, leave this culinary masterpiece to air-dry or bake in the oven.
And here's how to make food for dolls from another pliable material.
Salted dough

To make such baked goods, you will need:
- salty dough;
- bottle molds and lids;
- pastel;
- stained glass paints;
- stationery knife;
- rolling pin;
- varnish.
Roll out the salted dough with a rolling pin. Make several flagella from the same plastic material. The largest one will become the sides of the pie. Decorate the edges of this product with it. Smaller flagella create a beautiful crate.

Cut out cookies from the rolled salted dough with tins; the remnants of this material will make wonderful closed pies.

- Here's how to make food for dolls to look like bagels. Roll out the salted dough cake into a thin circle, cut it in half first, each half into three more pieces.
- In each of these triangles, you need to wrap a small sausage from the dough, then form a bagel. To do this, this triangle must be rolled, starting from the edge, towards the corner.
- Using yellow or light brown pastels, add color to the bagels by coloring them. Dip each one in coarse salt as if it were sugar.

You can cut a few pies into pieces, then bake all this wealth in the oven to dry the dough.

To make the open cakes more realistic, paint the gaps between the flagella with dark red stained glass paints. Mix white acrylic and acrylic varnish, paint the cookies on top with this "icing".

You can decorate the cookies with colorful beads, then you need to put the pastries in a box and decorate the table for dolls with it. Salted dough fruit can also be found here. Create them from the remnants of this material.
Blind apples and bananas with the children, paint them with gouache of the desired color, then varnish.

A bar of chocolate will also come in handy. To do it, take:
- brown and white polymer clay;
- stationery knife;
- toothpicks.
Roll the plastic into a tall rectangle, cut into squares. Glue strips of white clay on top of them. You can make coffee beans from the remains of the brown mass and stick them on top of the chocolate pieces.

To make chocolates for dolls, you need to mold small balls of brown plastic and apply a pattern to them with a toothpick. All that remains is to put the candies in the box and you can put them on the kitchen table.

Doll food can be made from a wide variety of materials, such as fabric. The main thing is to know how to sew fruits and vegetables with your own hands.
If you liked the theme, we suggest seeing how to make food for dolls, which will be like from McDonald's.

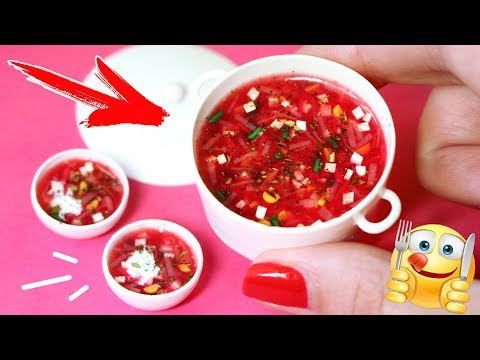
Perhaps the child will want to "feed" his charges with healthy food? Then see how to make borscht for them.
The third master class will teach you how to make dishes for dolls: forks, spoons, a ladle and other items.


